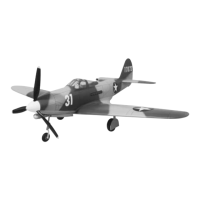
❏❏12. Refer to the sketch above and drill 3/32"
[2.40mm] holes in the inner TE for the hinges,
keeping your drill aligned with the guidelines
on the bottom of the wing (a 3/32" [2.40mm] drill
bit in a high speed rotary tool works the best). The
center of the holes should be 5/32" [4mm] above
the bottom sheeting as shown in the sketch.
Hint:
Start
the holes with a 3/32" [2.4mm] brass
tube sharpened at the end. This will increase your
accuracy by keeping your drill from wandering
off center.
❏❏13. Slightly enlarge the front of the holes so
the hinge points can be inset as shown on the
plan. Use a
cutting burr
in a rotary tool for this if
you have one. Test fit the hinge points to make
sure they fit.
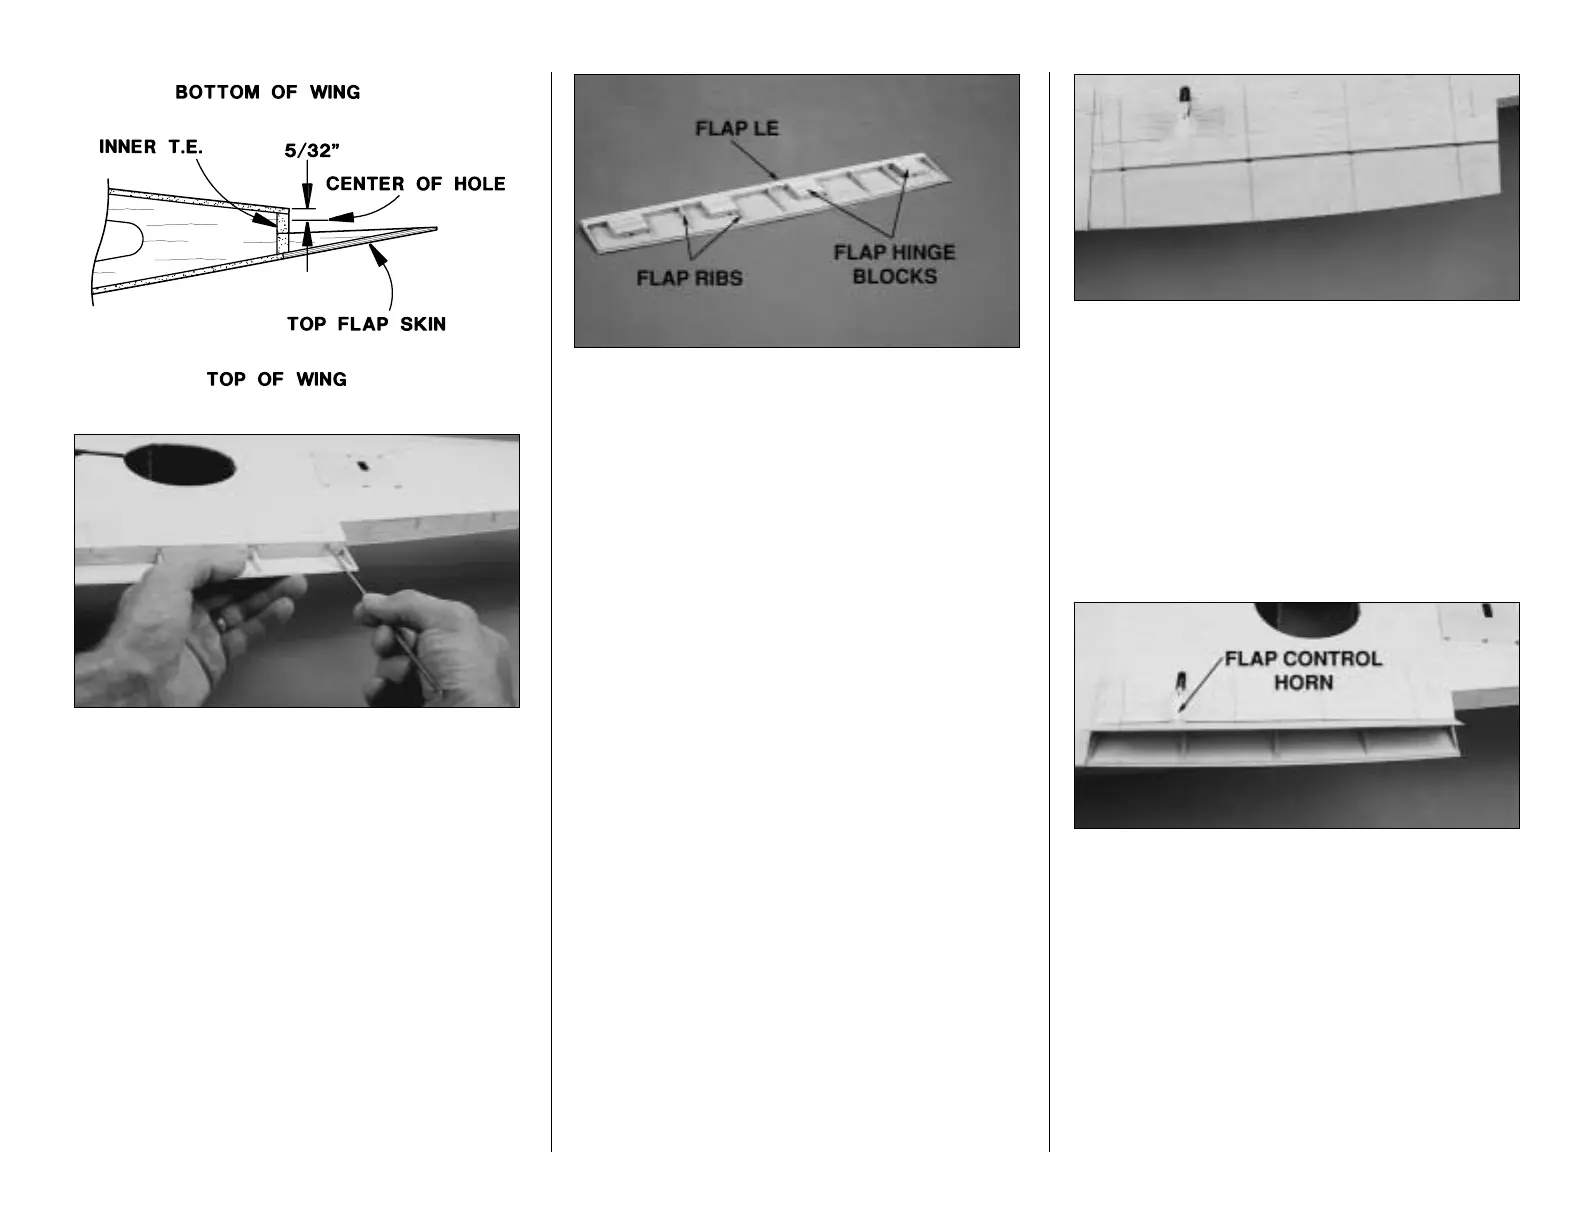
Refer to this photo for steps 14 through 18.
❏❏14. Cut the flap LE from a 3/16" x 1/4" x 24"
[4.8 x 6.4 x 610mm] balsa stick. Glue the flap LE to
the top of the bottom flap skin.
❏❏15. Remove the hinges from the wing and
trim the flap LE until the flap fits the wing.
❏❏16. Cut the flap ribs from a 3/32" x 3/8" x 24"
[2.4 x 9.5 x 610mm] balsa stick. Glue the flap ribs to
the flap where shown on the plan and sand them to
match the shape shown on the cross section.
❏❏17. Cut the flap hinge blocks from the 3/16"
x 3/4" x 12" [4.8 x 19.1 x 305mm] balsa stick and
glue them to the flap where shown on the plan.
❏❏18. Use the guidelines on the flap skin to drill
3/32" [2.40mm] holes for the hinges. The same as
the holes in the wing trailing edge, the center of
the holes for the hinges in the flaps should be
5/32" [4mm] above the bottom edge of the flap
skin. Enlarge the front of the holes so the hinges
will fit as shown on the plan.
❏❏19. Sand the hinge blocks so they match the
flap ribs and so the flap fits the wing.
❏❏20. Round the leading edge of the flap as
shown on the plan and cut a small notch at each
hinge to allow the flap to fully travel without
interfering with the hinges.
❏❏21. Test fit the flap to the wing with the
hinges. Raise the flap. Enlarge the notches in the
flap for the hinges or make other adjustments
if necessary.
❏❏22. Cut the flap control horn block from
the 3/16" x 3/4" [4.8 x 19.1mm] balsa stick and
glue it inside the flap where shown on the plan.
Use the flap horn as a
template
to drill two 1/16"
[1.60mm] holes through the flap for the #2 x 3/8"
[9.5mm] screws.
❏❏23. Reinforce the screw holes with a few
drops of thin CA. After the CA dries, temporarily
mount the flap control horn to the flap with
the screws.
❏❏24. Cut the screws if they interfere with the
top flap skin or ribs when the flap is raised.
❏❏25. Move the flap through its range of
motion. Make adjustments where necessary.
❏ 26. Return to step 1 and build the other flap the
same way.
- 29 -

 Loading...