Vacancy Mode: Manual On
only, automatic Off after set
time delay.
Mode
Position
INSTALLATION INSTRUCTIONS
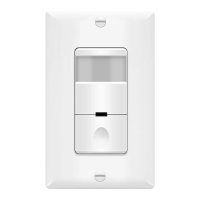
TD0S5/ TD0S5-NL
OCCUPANCY/VACANCY
(2-IN-1)
SENSOR SWITCH
Voltage ..............................................................................
..120VAC,60Hz
Incandescent ........................................................................................500W
Fluorescent...........................................................................................500VA
Motor ...............................................................................................1/8HP
Time Delay .......................................................................1
5Sec to 30Mins
Light Level. .........................................................................30 Lux--Daylight
Operation Temperature ............................................................32 F
-131 F
0
The passive infrared sensors work
by detecting t he difference between
hea t emitted from the human body in motion and the background space.
The sensor switch can turn a load on and hold it as long as the sensor
detects occupancy. After no motion is detected for the set time delay, the
load turned off automatically.The sensor switch has one relay (equal to
single pole switch), also includes Ambient Light Level Sensor.
Coverage Area
The coverage range of the sensor switch is specified and illustrated in
Fi gure 1. Large objects and some transparent barriers like glass
windows will obstruct the sensor's view and prevent detection,
causing the li ght to turn off even if someone is still in the detection area
.
Description
OFF
Left
Circuit is permanently
opened. ( switched off)
Center
Occupancy Mode:
Automatic On, automatic
Off after set time delay.
VAC
Right
Push-Button
on Reaction
None
Manually toggles
On
I
Off load.
Manually t
oggles
On/Off load.
Time Delay knob
Default position: 15 Seconds (Test mode)
Adjustable: from 15 Seconds to 30 Minutes (clockwise)
Sensor Sensitivity Range Knob
Default position: Center at 65%
Adjustable: 30% (Position 1) to 100% (Position 4)
Note: Turn toward right for greater room space.
Ambient LightLLevel Knob
Default position: Daylight (100% at position 4)
Adjustable: Daylight to 30Lux (Counter clockwise)
Note: to avoid wasting energy by preventing light turn-on during
daylight.
1.
Connect lead wires as wiring diagram (see Figure 2): Black lead
to the Line (Hot), Red lead to the Load wire, White lead to the
Neutral wire, Green lead to the Ground.
Note: The white wire MUST be connected to the neutral wire in
the junction box. Please do not connect the white wire to any
other wire besides the neutral.
2.
Gently position wires in wall box, attach sensor switch to the box.
3.
Mount device "TOP" up.
4.
Restore power at circuit breaker or fuse. Wait
one
minute for
the sensor to complete its initial run.
5.
Remove the small cover plate. (Illustrated in Figure 3)
6.
Locate the adjustment knobs on the control panel to test and
change setting.(Illustrated in Figure 3)
7.
Replace the small cover plate after testing and setting.
8.
Attach the wallplate.
DESCRIPTIONION
IINSTALLATIONION
SAFETY WARNING::
Read and understand these instructions
before installation. This device is intended for installation in
accordance with the National Electrical Code and local
regulations. It is recommended that a qualified electrician
perform this installation. Make sure to turn off the circuit
breaker or fuse(s) and test that the power is off before wiring
the device.
Note: Please check the junction box for a neutral wire. This switch
requires a neutral wire in the junction box for it to work properly.
Wir ing Diagram:
ADJUSTMENT
BBand Switch Prescription
OCC
SPECIFICATIONS
Switch Type...................................................................................Single Pole