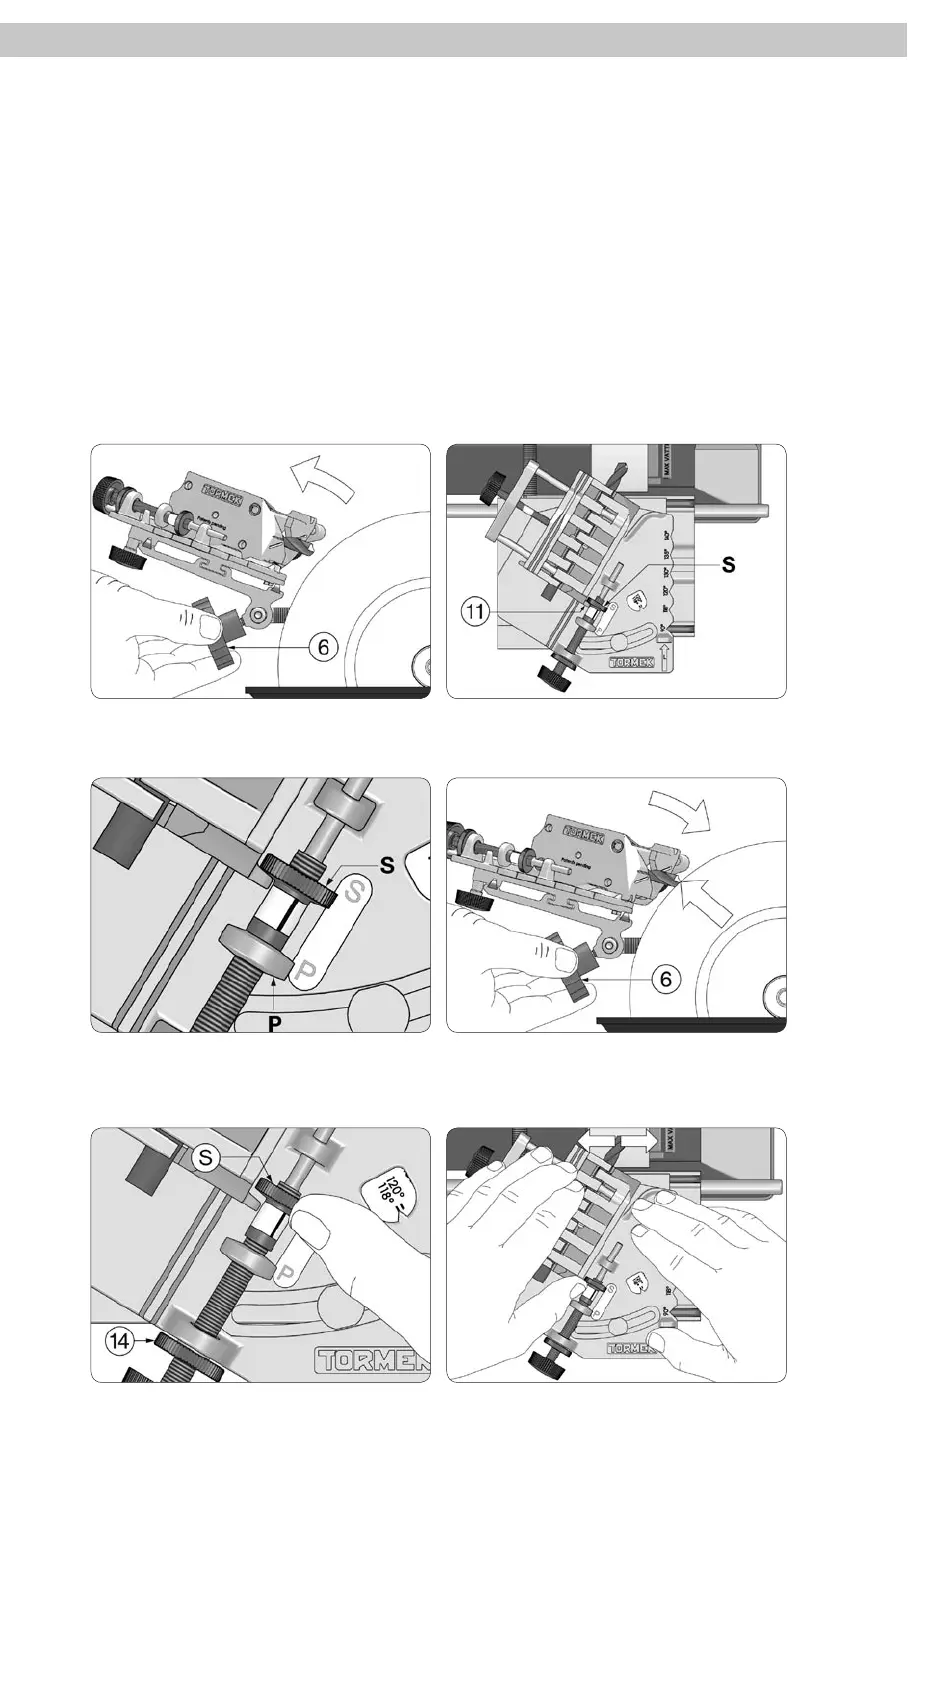
Screw the stop nut S forwards.
Start with 1½ turn for a 6 mm (¼") drill.
The setting screw should still be
locked with the locking nut (14).
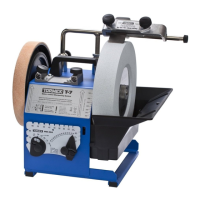
Start the machine. Press the drill holder
towards the grindstone and start grinding
the first secondary facet. Move the guide
back and forth across the stone.
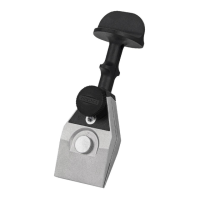
Tilt the base until the heel of the drill
touches the grindstone and lock it with
the wheel (6).
Loosen the wheel (6) and tilt the base
to an approx. horizontal position.
Lift and move the drill holder forwards so
that the lug (11) rests on the stop nut S.
Grind the Secondary Facets
and Create a 4-Facet Point
The stop nut S must be screwed
to touch the stop P.
The two primary facets meet and form a horizontal and at chisel edge without a
tip. This chisel edge is not the best since the drill will walk when you start drilling.
The chisel edge will also take a great deal of the axial force without actually cut-
ting and therefore creates much heat.
By grinding two secondary facets, the drill gets a 4-facet shape and a tip, which is
benecial for the function. The thrust force required is reduced as well as the heat
development which is most detrimental to the life of the drill bit. Furthermore a
4-facet point drills a straighter hole and will not walk.