39
Latitude Elbow Prosthesis
Latitude Elbow Prosthesis Surgical Technique UCLT101
Step 1
Remove the mantle of cement surrounding the ulnar
plastic component using a burr, an osteotome or any
other device.
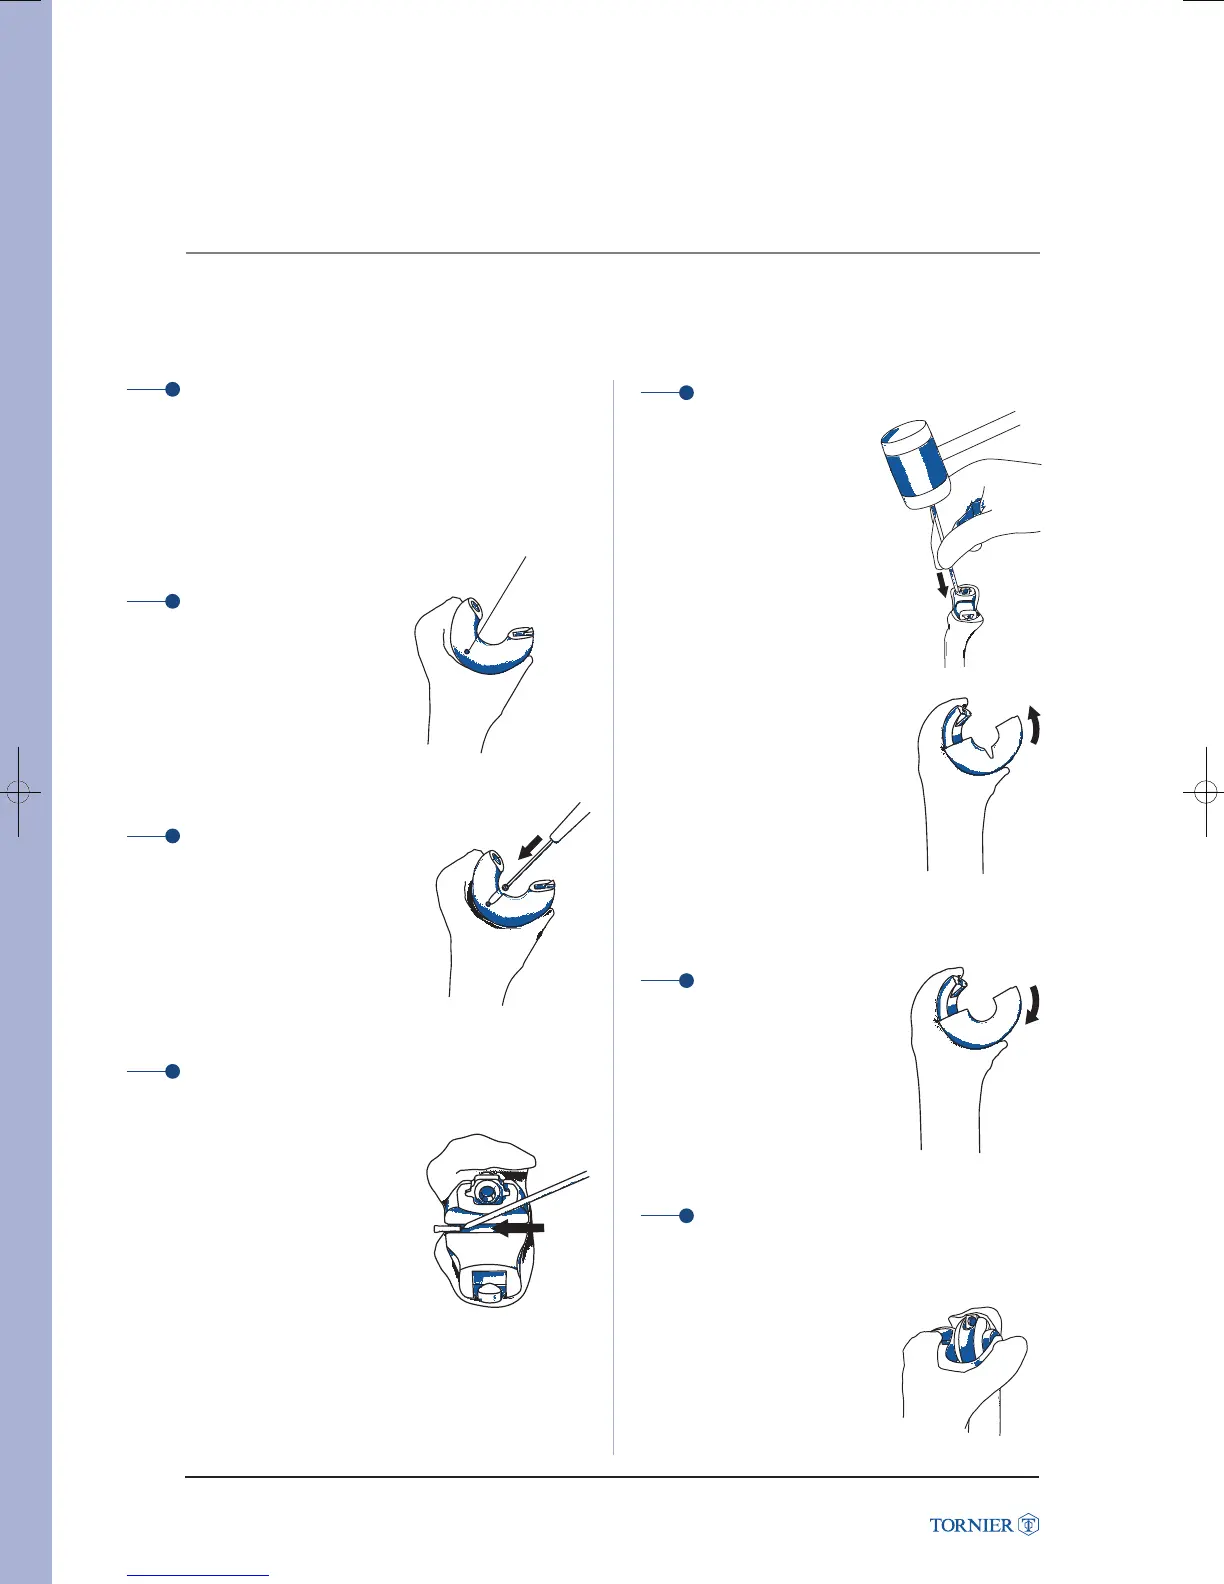
Step 2
Locate the position
of the assembly pin
from the medial side
(picture 1).
Step 3
Using a burr, an osteome
or any other device remove
the plastic to get full access
to the pin (picture 2).
Step 4
From the lateral side, using
a tapered device, such as
the tab bending tool,
and a hammer, gently
remove the pin from
the plastic/metal interface
(picture 3).
Step 5
Once the pin has been
removed, the ulnar plastic
bushing can be slide off
the ulnar stem.
It can be helpful to use a
tapered tool and a hammer
to remove the plastic part as
shown on pictures 4 and 5.
Step 6
Position the new plastic bushing
on the ulnar stem and rotate it on
the slide channel until it is flush,
fully engaged (picture 6).
Step 7
The ulnar cap must be assembled to the ulnar
stem after revision of the plastic bushing.
Indeed, the ulnar cap is the only
way to secure the plastic
bushing on the ulnar stem
(picture 7).
15. REVISION
REVISION
Assembly pin
(picture 6)
(picture 3)
(picture 1)
(picture 2)
(picture 4)
(picture 5)
(picture 7)
TO LATITUDE INT UCLT101.qxd:Mise en page 1 7/07/10 15:01 Page 38


 To Next Page
 Loading...