19
CONTROLS
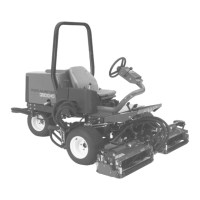
Traction Pedals (Fig. 35) Depress traction forward
pedal to move forward. Depress traction reverse pedal
to move backward or to assist in stopping when
moving forward. Also, allow pedal to move or move it to
neutral position to stop machine.
Mow/Transport Slide (Fig. 35) - Using your heel,
move slide to the left to transport and to the right to
mow. The cutting units will only operate in the mow
position.
Note: Mow speed is set at the factory to 6 mph. It can
be increased or decreased by adjusting the speed
stop screw (Fig. 36)
1. Forward traction pedal
2. Reverse traction pedal
3. Mow/Transport slide
4. Tilt steering lever
5. Indicator slot
6. Angle indicator
Figure 35
1
2
4
3
5
6
1. Speed Stop Screw
Figure 36
1
Tilt Steering Lever (Fig. 35) - Pull lever back to
loosen to tilt the steering wheel to desired position.
Then push lever forward to tighten.
Angle Indicator (Fig. 35) - Indicates sidehill angle of
the machine in degrees.
Starter Switch (Fig. 37) The starter switch, used to
start, stop and preheat the engine, has three positions:
OFF, ON/PREHEAT and START. Rotate key to
ON/PREHEAT position until glow plug indicator light
goes out (approximately 7 seconds), then rotate key to
START position to engage starter motor. Release key
when engine starts. The key will move automatically to
the ON/RUN position. To shut engine off, rotate key to
OFF position. Remove key from switch to prevent
accidental starting.
Throttle (Fig. 37) Moving throttle forward increases
engine speed, rearward decreases engine speed.
Cutting Unit Shift Lever (Fig. 37) - To lower cutting
units to the ground, move lift lever forward. Cutting
units will not drop unless engine is running and will not
operate in raised position. To raise cutting units, pull lift
lever rearward to the RAISE position.
Model 03201 only- Move lever to the right or left to
move cutting units in same direction. This should only
be done when cutting units are raised or if they're on
the ground and the machine is moving.
DANGER
The machine is most stable on a side hill when
the cutting units are shifted uphill. Shifting cut
ting units downhill decreases machine stabil
ity. This could cause a rollover, which may re
sult in personal injury or death.
Note: Lever does not have to be held in forward
position while cutting units are lowered.
Indicator Slot (Fig. 35) - The slot in the operator's
platform indicates when the cutting units are in the
center position.
Cutting Unit Drive Switch (Fig. 37) The switch has
two positions: ENGAGE and DlSENGAGE. Rocker
switch operates a solenoid valve, on valve bank, to
drive cutting units.
Figure 37
1. Throttle
2. Hour meter
3. Temperature light
4. Oil pressure light
5. Glow plug indicator light
6. Alternator light
7
8
1
3
4
5
6
2
9
10
7. Cutting unit drive switch
8. Cutting unit shift lever
9. Ignition switch
10. Parking brake
11. Lift lever lock
11
Hour Meter (Fig. 37) Indicates the total hours of
machine operation. The Hour Meter starts to function
whenever the key switch is ON.
 Loading...