The air cleaner element must be cleaned every 25
hours of engine operation. However, the element
must be cleaned every few hours if operating condiĆ
tions are extremely dusty or sandy.
Remove the wire from the spark plug.
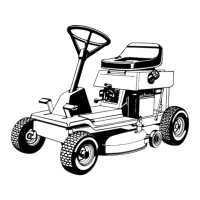
Remove the knob and air cleaner cover (Fig. 11).
Every 25 hours the foam pre-cleaner should be
cleaned (Fig. 11). Remove foam pre-cleaner by
sliding it off the paper cartridge (Fig. 11).
A. Wash the foam pre-cleaner in liquid soap
and warm water. Rinse thoroughly in clear
water.
B. Wrap the foam pre-cleaner in cloth and
squeeze it dry.
C. Saturate the foam in engine oil. Squeeze it to
remove excess oil.
The paper air cleaner cartridge should be
replaced every 100 hours. Remove one nut from the
top of the paper cartridge (Fig. 11).
)'30%
1. Knob 4. Paper cartridge
2. Air cleaner cover 5. Nut
3. Foam pre-cleaner
Clean the air cleaner body carefully to prevent
dirt from entering carburetor. Remove and discard
the paper cartridge.
Insert a new paper cartridge into the air cleaner
body. Reassemble the air cleaner.
%20.+%3, 1.+4%-21 13#( !1
*%0.1%-% !0% -.2 2. "% 31%$ 2. #+%!- 2(% /!/%0
#!020)$'% (%6 ,!6 #!31% $%2%0).0!2).- .& 2(%
#!020)$'%
+5!61 ./%0!2% 2(% %-')-% 5)2( 2(%
!)0 #+%!-%0 %+%,%-2 )- /+!#% .0 %-')-% $!,!'%
5)++ 0%13+2
Check oil level every time you fill gas tank. Change
oil after the first 2 hours of operation; thereafter, unĆ
der normal conditions, change oil after every 25
hours of engine operation. However, change oil more
frequently when engine is operated in dusty or
sandy conditions. If possible, run engine just before
changing oil because warm oil flows better and carĆ
ries more contaminants than cold oil.
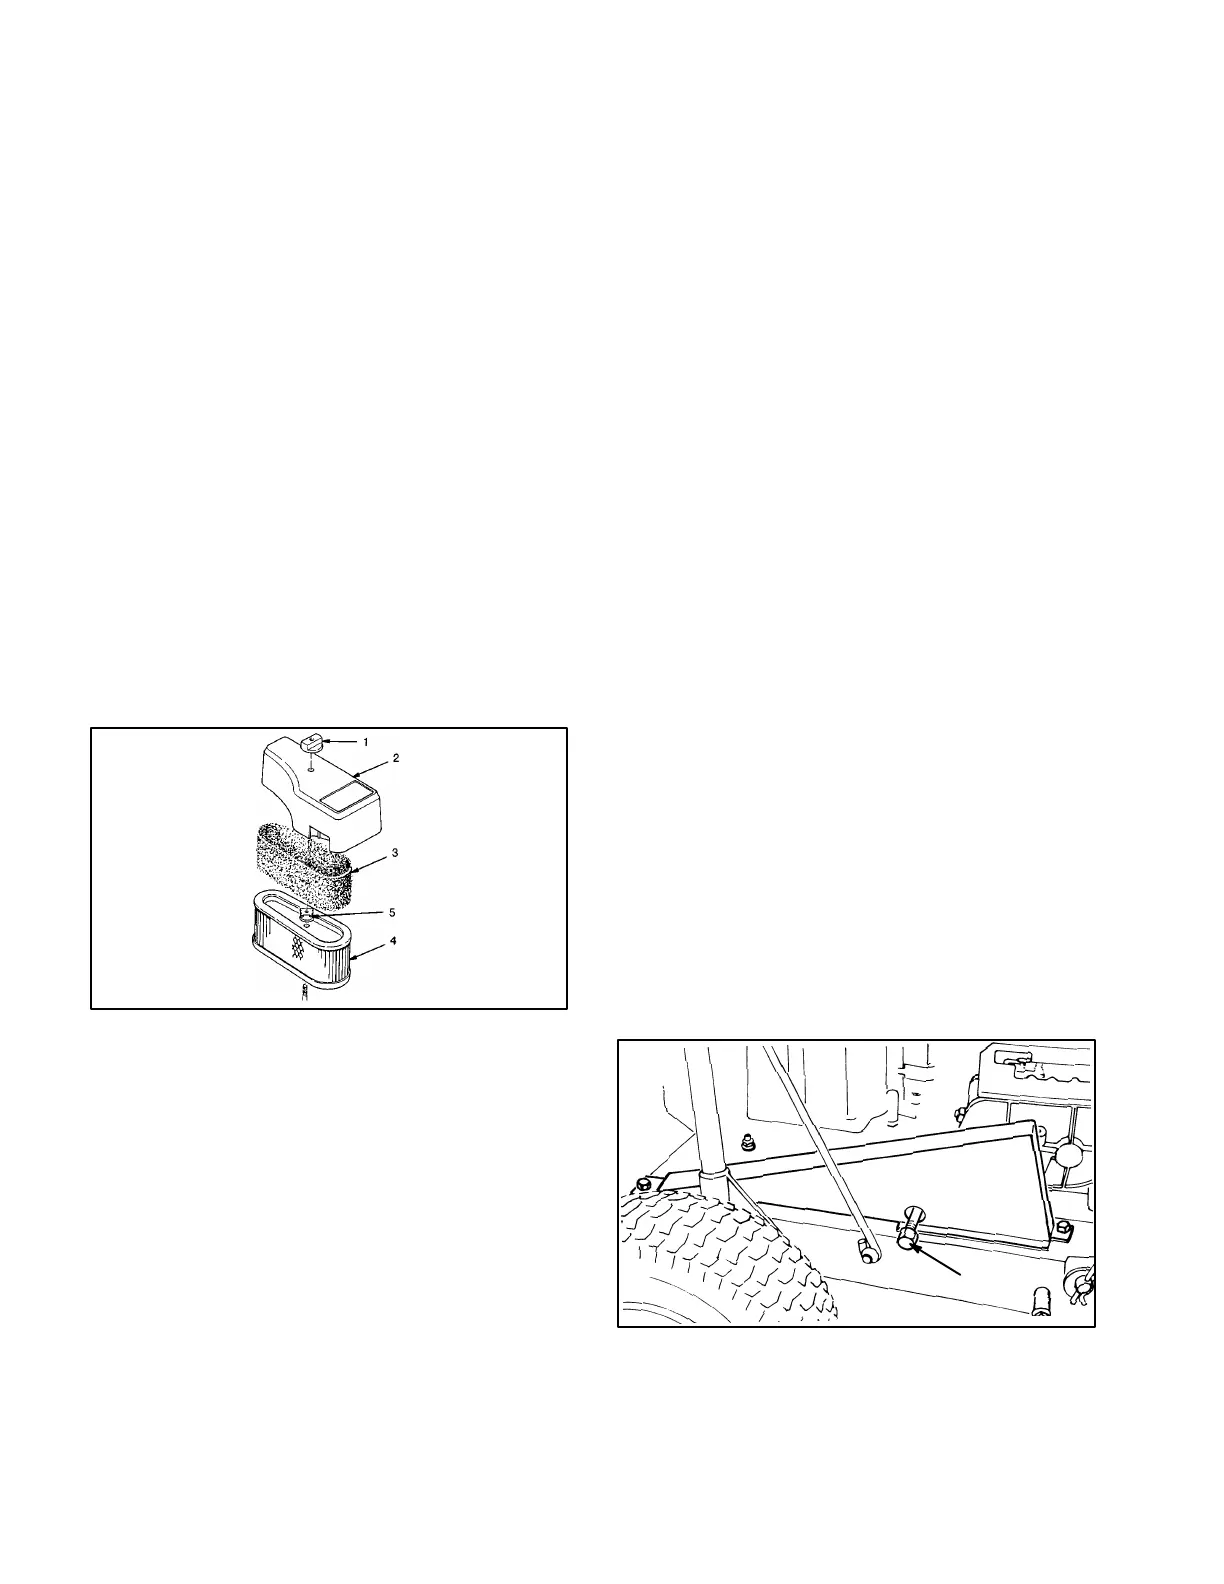
Position rider on a level surface so oil drains
completely and a true reading results when crankĆ
case is refilled.
Stop engine and pull wire off spark plug (Fig. 9).
Move blade control into DISENGAGE detent and
set height-of-cut in lowest position.
Clean area around drain plug. Next, put a shalĆ
low drain pan under rider to catch the oil.
Remove drain plug (Fig. 12).
When oil is drained completely, reinstall drain
plug and wipe up any oil that may have spilled.
With rider parked on a level surface, fill crankĆ
case with oil: refer to Fill Crankcase With Oil,
page 12.
)'30%
1. Drain plug
392
1
 Loading...