22
MAINTENANCE
SERVICING CUTTER BLADE
Check cutter blade every time rider is tipped
on end. If bolt holding blade is loose, tighten it
to 45-60 ft-lb. If blade or sail (Fig. 16) at end
of blade is worn, eroded, or cracked, replace
the blade. Replace the blade if it is bent or
out-of-balance. Always use genuine TORO
replacement blade to ensure safety and best
performance. NEVER USE WILL-FIT REĆ
PLACEMENT BLADE.
WARNING
1. Make sure engine is shut off and remove wire
from spark plug.
IMPORTANT: To remove blade from spindle shaft,
the rider must be tipped on its rear end. Before
the rider is tipped, drain all gasoline from fuel
tank and oil from crankcase. Also remove battery
so acid does not spill onto the rider. (ALL BAGĆ
GING ATTACHMENTS MUST BE REMOVED BEĆ
FORE TIPPING RIDER.)
2. Drain gasoline from fuel tank: refer to Draining
Gasoline From Fuel Tank, page 21.
3. Drain oil from crankcase: refer to Changing
Crankcase Oil, steps 1Ć6, page 20.
4. Remove battery from chassis: refer to Activating
and Charging Battery, page 12.
5. Shift transmission into 1st gear and engage
parking brake. Tip rider onto its rear end.
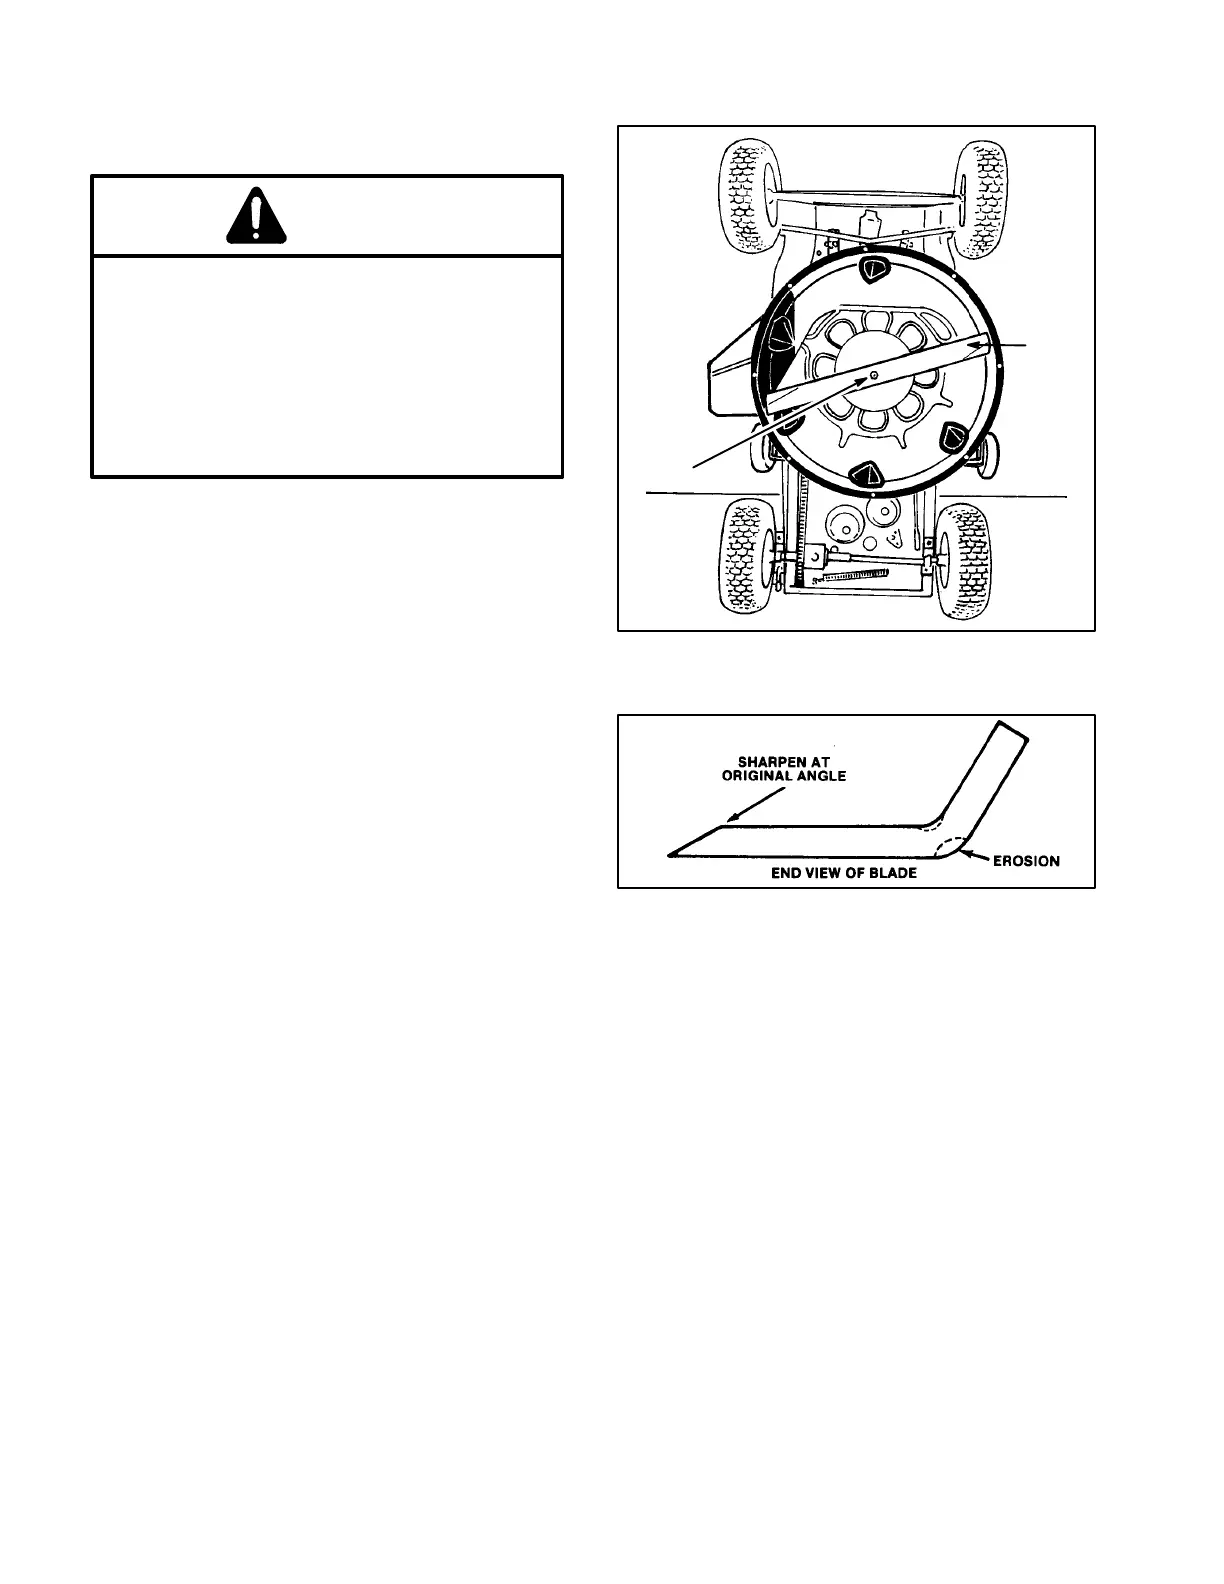
6. Grasp end of blade using a rag or thickly
padded glove; then remove blade bolt, washer and
blade (Fig. 15).
Note: Since blade bolt is tightened to 45Ć60 ftĆlb
(61Ć81 N·m) at the factory, it may be difficult to reĆ
move the bolt. If the bolt cannot be removed, contact
an Authorized TORO Service Dealer or a service
station" for assistance.
7. Using a file, sharpen cutting edge at both ends
of the blade (Fig. 16).
IMPORTANT: Sharpen top side of the blade and
maintain original cutting angle to ensure a sharp
cutting edge. The blade will remain balanced if
same amount of material is removed from both
cutting edges.
1
2
Figure 15
394a
Figure 16
8. Check balance of blade by putting it on a blade
balancer. (An inexpensive balancer can be purĆ
chased at a hardware store.) A balanced blade will
stay in a horizontal position on the balancer. By conĆ
trast, a blade that is not balanced will settle to the
heavy side. If blade is not balanced, file more materiĆ
al off cutting edge of the blade. Continue to file and
check the blade until it is balanced.
9. In sequence, reinstall blade, washer and blade
bolt (Fig. 15). Tighten blade bolt to 45Ć60 ftĆlb (61Ć81
N·m).
IMPORTANT: Make sure cutting edge of blade is
away from mower housing.
10. Tip rider back to its normal operating position.
11. Fill crankcase with oil: refer to Fill Crankcase
With Oil, page 12.
12. Fill fuel tank with gasoline: refer to Fill Fuel Tank
With Gasoline, page 13.
13. Install the battery: refer to Activating and ChargĆ
ing Battery, page 12.
 Loading...