WARNING
Openholesinthemowerexposeyouand
otherstothrowndebriswhichcancause
severeinjury.
•Neveroperatethemowerwithouthardware
mountedinallholesinthemowerhousing.
•Installthehardwareinthemountingholes
whenyouremovethemulchingbafe.
7.Installtherightmowerblade;refertoInstallingthe
Blades(page45).
8.Liftupthegrassdeector.Install2bolts(5/16x3/4
inch)tothetwoholesalongthedeckcutout.
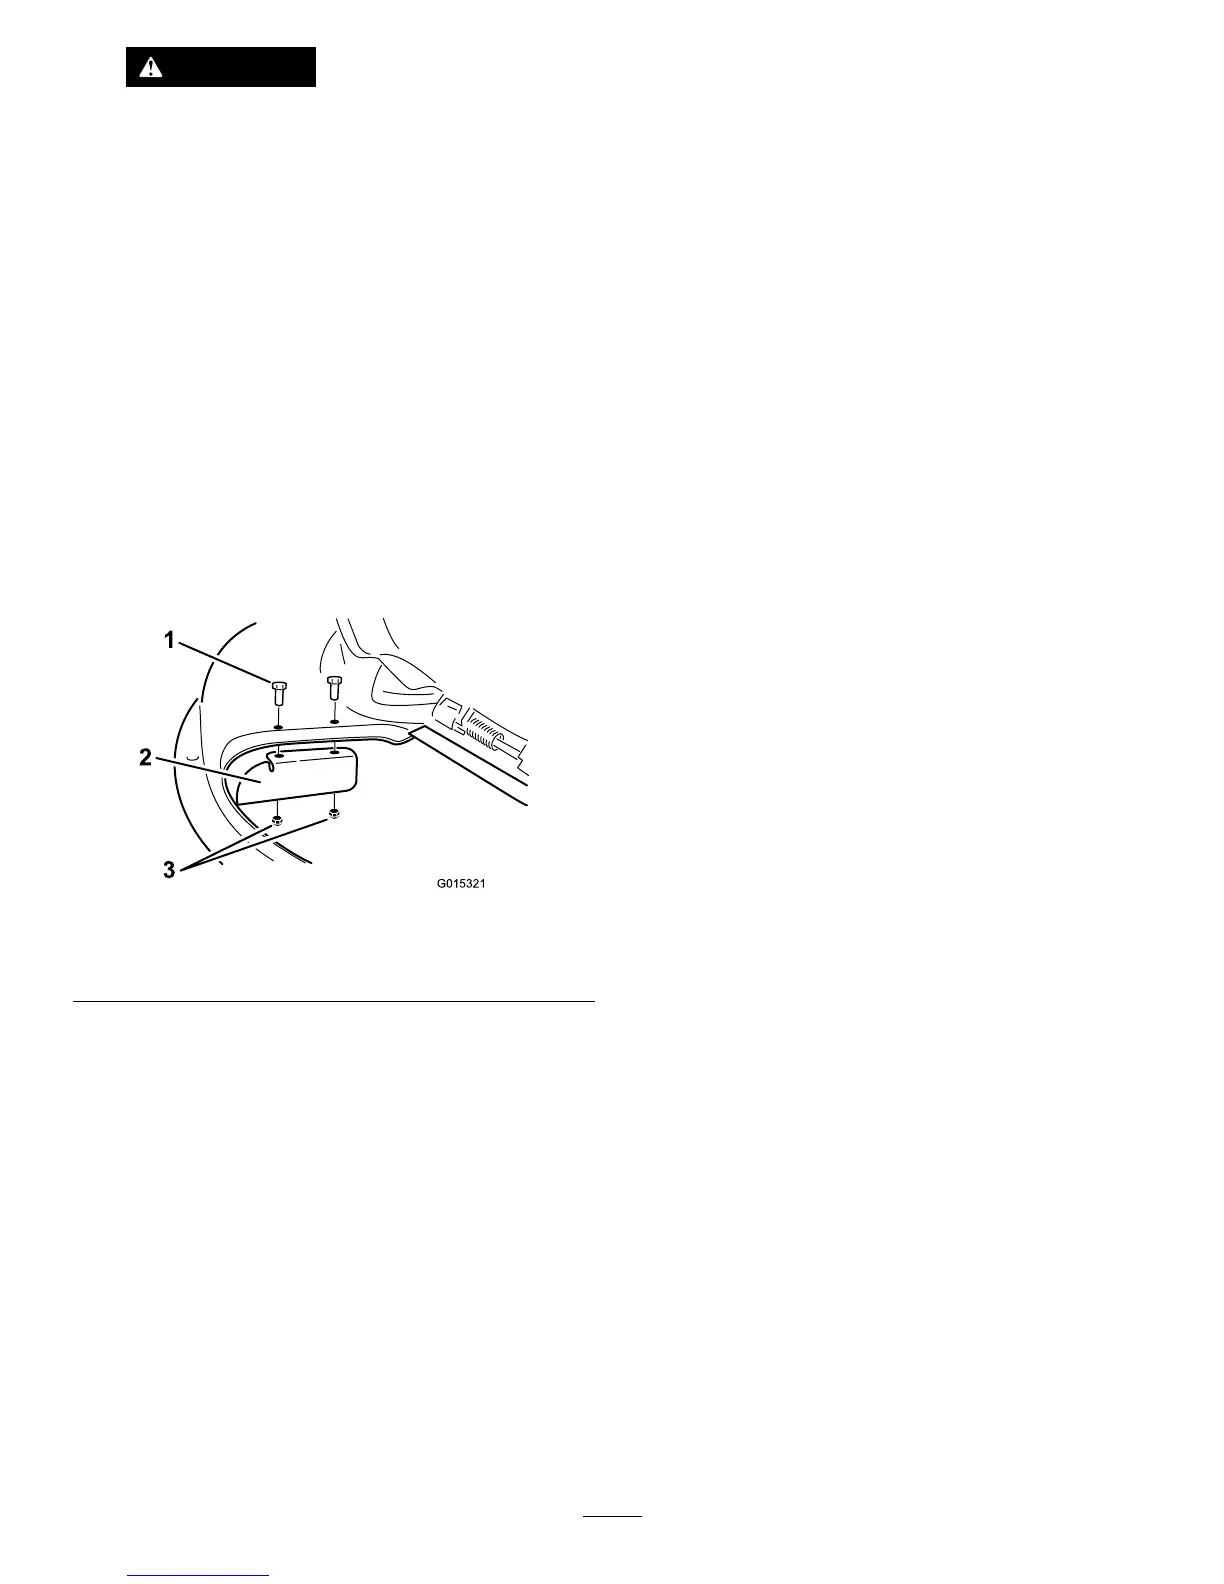
9.Installthecutoffbafetothemowerdeck(Figure25).
Note:Usethe2locknuts(5/16inch)tosecurethe
bafetothemowerdeck.
Note:Thecutoffbafewasshippedwiththemachine
asaloosepart.
Figure25
1.Bolt(5/16x3/4inch)3.Locknut(5/16inch)
2.Cutoffbafe
10.Torquethefastenersto7to9N-m(14to18ft-lb).
11.Lowerthegrassdeectoroverthedischargeopening.
Important:Ensurethatthemowerhasahinged
grassdeectorthatdispersesclippingstotheside
anddowntowardtheturf,whileinsidedischarge
mode.
InstallingtheRightBafeforMulching
1.Parkthemachineonalevelsurfaceanddisengagethe
blade-controlswitch.
2.Ensuretheparkingbrakeisengaged,stoptheengine,
removethekey,andwaitforallmovingpartstostop
beforeleavingtheoperatingposition.
3.Removethecutoffbafefromthemowerdeck(Figure
25).
4.Removetherightmowerblade;refertoRemovingthe
Blades(page44).
5.Slidetherightbafeunderthemowerdeck,andsecure
itusing2knobsandthecurvedwashers(cuppedside
facingthemower)asshowninFigure23andFigure24.
Important:Ensurethatthetabonthefarright
sideoftherightbafeisoutsideofthemowerand
isushwiththemowerwall.
6.Installtherightmowerblade;refertoInstallingthe
Blades(page45).
28