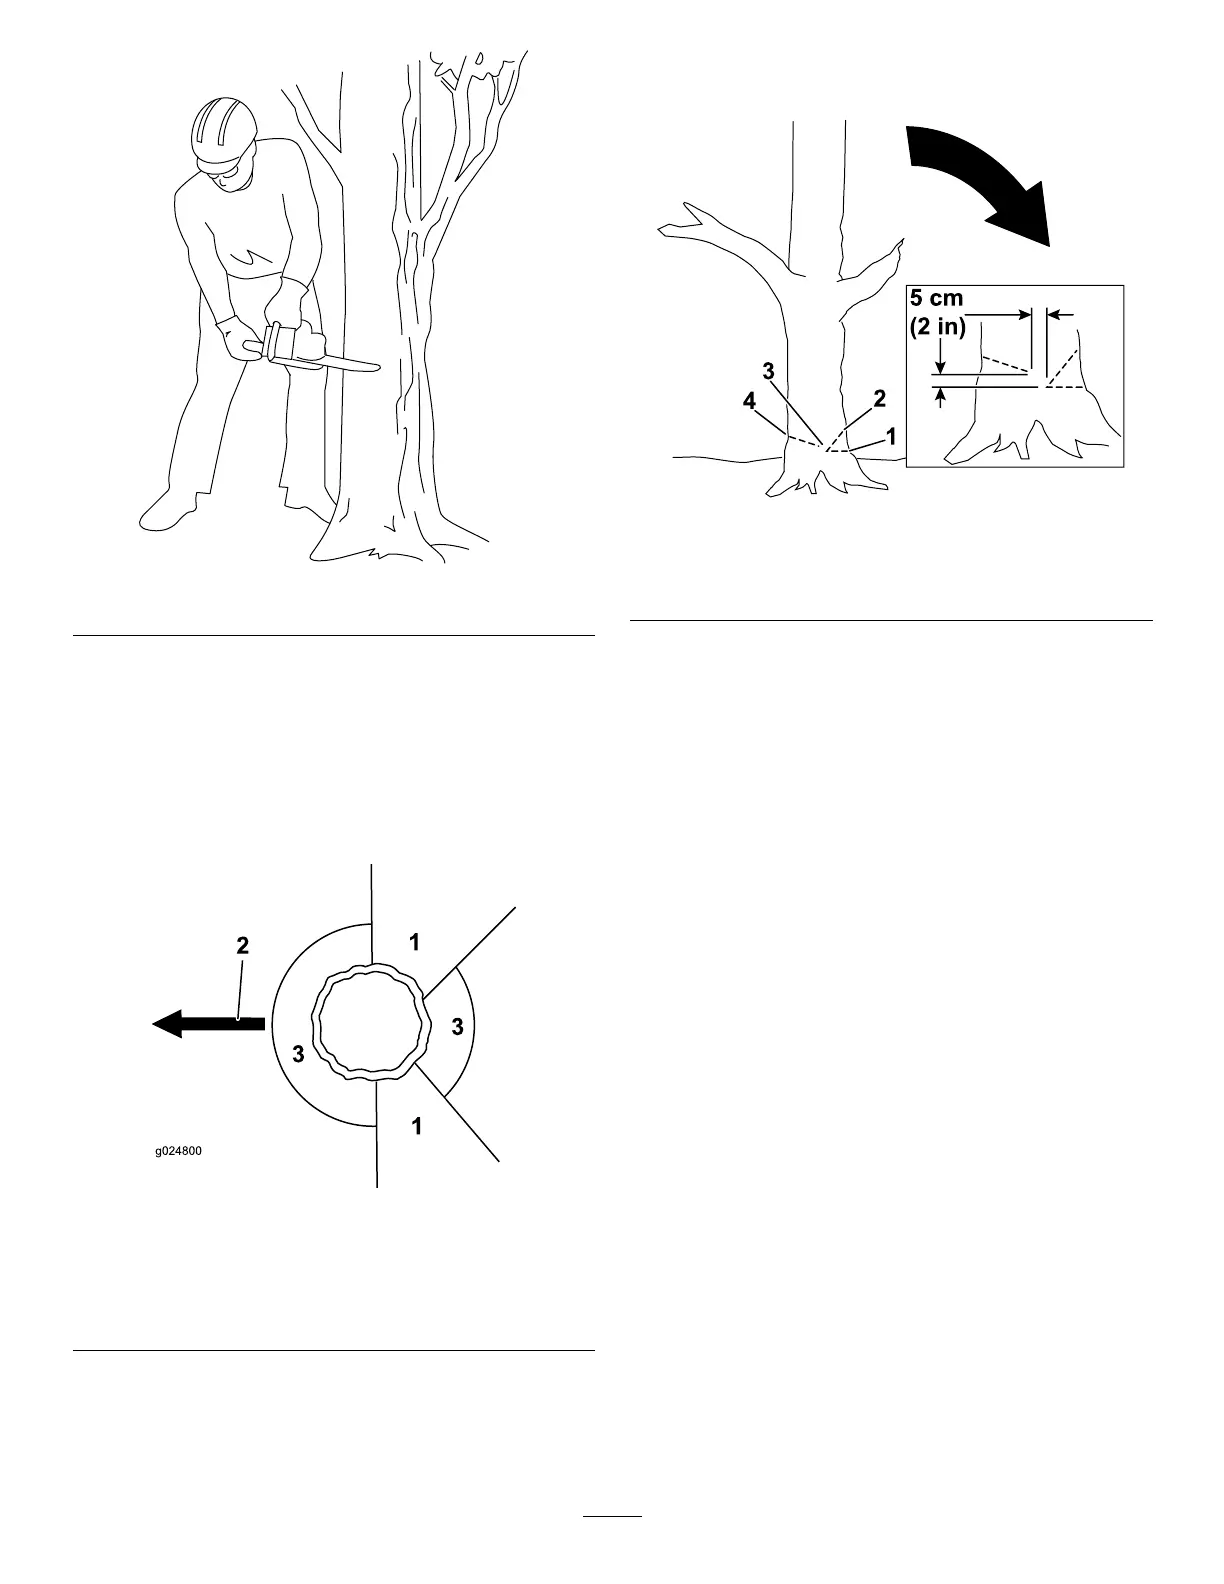
g195831
Figure 16
1. Determine the direction that the tree will fall.
T ake the following variables into consideration:
• Wind direction
• Heavier limbs on 1 side of the tree
• Natural tilt of the tree (if any)
2. Determine a clear , safe retreat path away from
the danger area; refer to Figure 17 .
g024800
Figure 17
1. Retreat path (at a 45°
angle opposite from the
planned direction of fall)
3. Danger area
2. Planned direction of fall
3. Grip the chain saw as shown in ( Figure 13 ).
4. Make the rst cut a third of the way through the
tree diameter on the side where you want the
tree to fall ( Figure 18 ).
Note: Making this cut prevents the chain saw
from being pinched while making the next cut.
g228707
Figure 18
1. First cut 3. Hinge
2. Second cut
4. Back cut
5. Make a second cut to form a notch, starting the
cut at least 5 cm (2 inches) above and away
from the rst cut ( Figure 18 ).
Important: Ensure that the rst cut and the
second cut meet at the same point, forming
a clean notch.
6. Make the back cut from the opposite side of the
notch and about 5 cm (2 inches) higher than the
bottom of the notch as shown in Figure 18 .
Important: Stop the third cut 2.5 to 5.0 cm
(1 to 2 inches) from the notch to form a hinge
between the cuts ( Figure 18 ), which keeps
the tree from falling in the wrong direction
or twisting as it falls.
Note: As the back cut nears the hinge ( Figure
18 ), the tree should begin to fall.
7. When the tree begins to fall, remove the chain
saw , shut it of f, put it down, and retreat along the
path you determined in step 2 .
Important: If the tree begins to fall in an
undesired direction, immediately stop the
cut, shut off the chain saw , put the chain saw
down, and use a non-metallic wedge to open
the back cut and push the tree in the desired
direction.
15


 To Next Page