Assembly
6
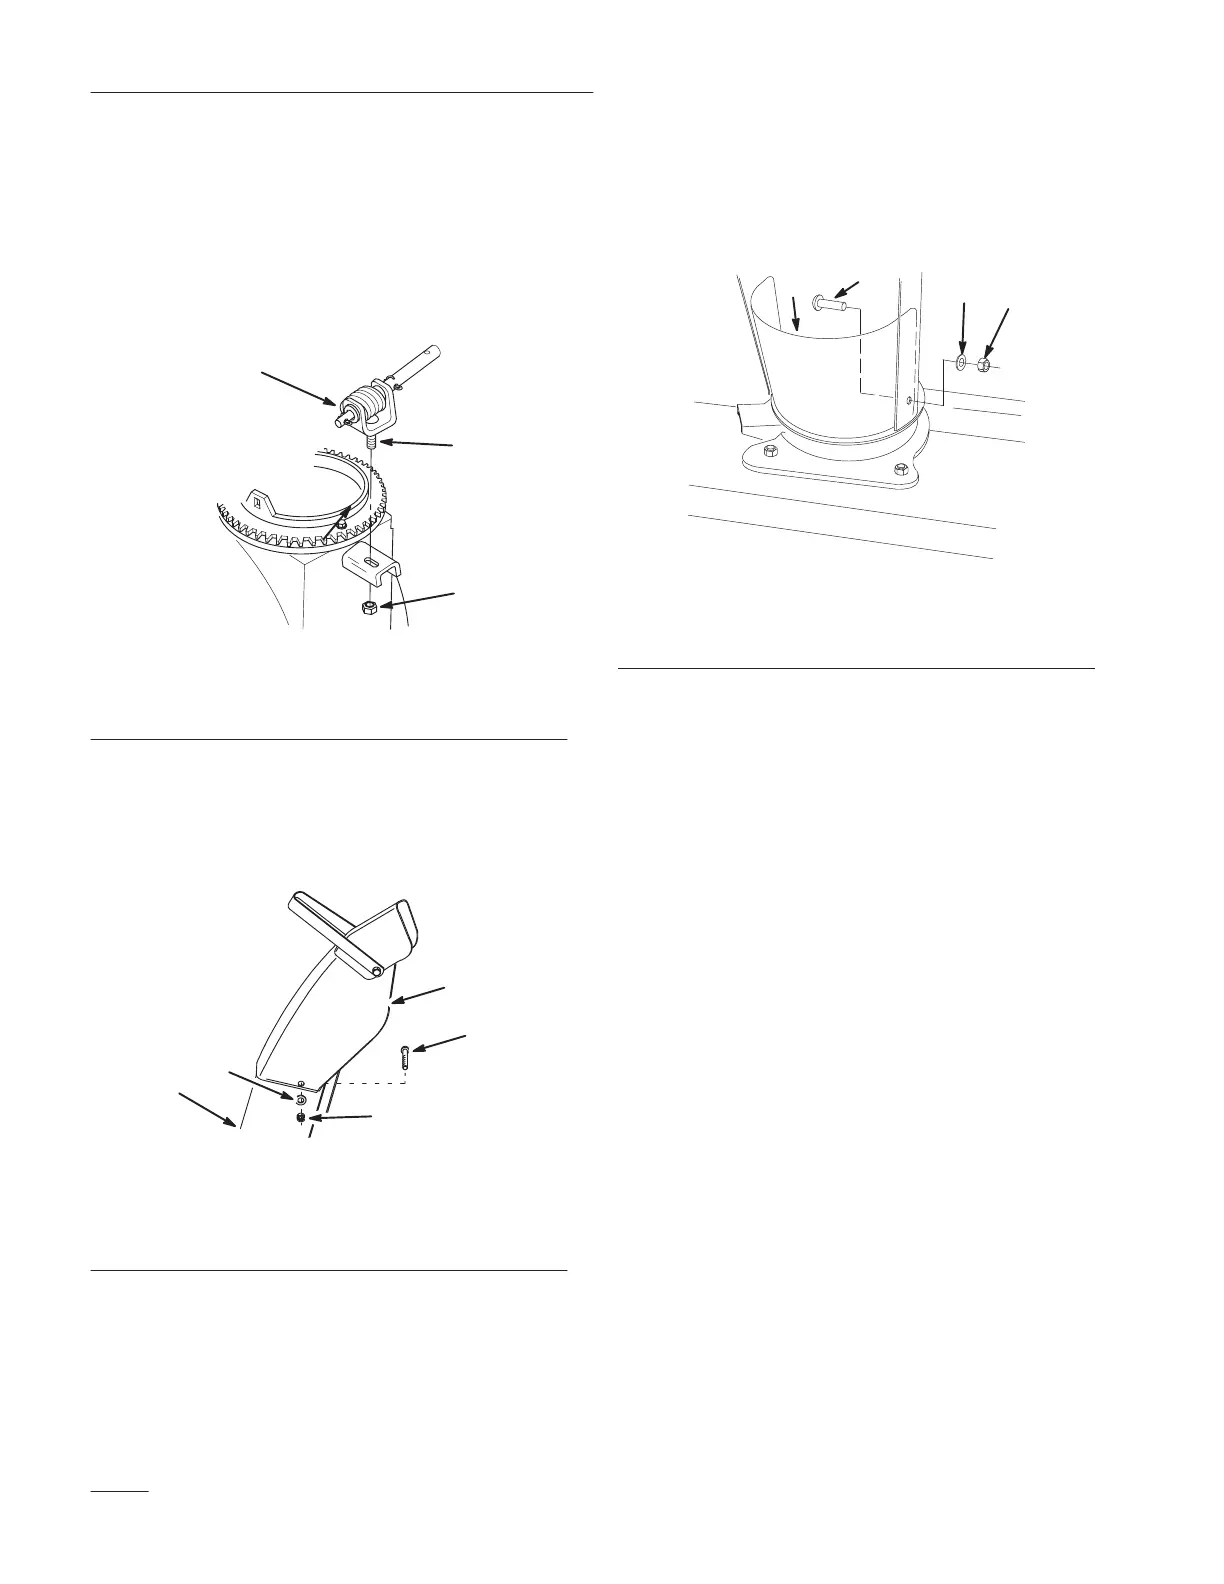
7. Install discharge chute rotator assembly into slot
in housing with 5/16 x 1” carriage bolt (head to
top) and 5/16” locknut (Fig. 4).
8. Adjust rotator assembly so that worm gear is at
right angle with chute, the teeth mesh fully and
the chute turns freely, tighten locknut securely.
1
2
3
m–2584
1
Figure 4
1. Rotator assembly
2. Carriage bolt 5/16 x 1”
3. Locknut 5/16”
9. Assemble upper discharge chute section outside
and on top of lower section with (2) 5/16 x 5/8”
carriage bolts (heads on inside), (2) 5/16”
washers and (2) 5/16” locknuts (Fig. 5).
1290
1
3
2
5
4
Figure 5
1. Upper section
2. Lower section
3. Carriage bolt 5/16 x 5/8”
4. Washer 5/16”
5. Locknut 5/16”
10. Install discharge chute assembly and cover onto
housing with (3) 5/16 x 3/4” carriage bolts
(heads to inside), (3) 5/16” washers and (3)
5/16” locknuts (Fig. 6).
12
3
2241
4
Figure 6
1. Discharge chute cover
2. Carriage bolt 5/16 x 3/4”
3. Washer 5/16”
4. Locknut 5/16”
 Loading...