Do you have a question about the Toshiba 40L2546 and is the answer not in the manual?
This document outlines the service and maintenance procedures for the 40_50L2546/56 series LCD Televisions, emphasizing safety, proper handling, and adjustment processes. It serves as a comprehensive guide for qualified service personnel to ensure the longevity and optimal performance of the device.
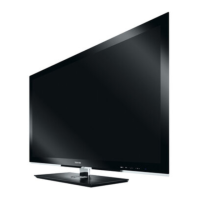
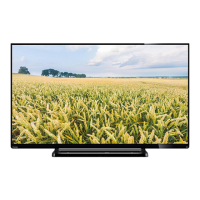
The 40_50L2546/56 series LCD Televisions are large-screen, high-definition displays designed for a rich audio-visual experience. They incorporate an improved digital signal processor to enhance image quality and support a wide array of audio-visual equipment through diverse connecting terminals, including HDMI. These televisions are capable of displaying images from PCs on their large, high-definition LCD screens, offering versatility in usage. The device features an easy-to-use On-Screen Display (OSD) system, which can be operated conveniently with a remote control, and is designed for low power consumption, contributing to energy efficiency.
The television offers a variety of input and output options to cater to different user needs. For video input, it supports SCART for full RGB output, Component video with composite video input and L/R audio input, and multiple HDMI inputs for digital devices. RF input is available for ATV (NTSC/PAL/SECAM), DTV (DVB-T/C/T2), and DVB-S/S2 satellite signals. For PC connectivity, it includes an Analog RGB input terminal (D-sub 15-pin) and an Audio input terminal (Component L/R audio input). Audio output options include a 3.5mm headphone socket and an Optical SPDIF output for connecting to audio amplifiers.
The remote control provides comprehensive control over the television's functions. Users can switch between TV ON and Standby modes, select external input sources, and activate the Still Picture function. It supports teletext display, TEXT subtitle pages (if available), and Stereo/Bilingual transmissions. Number buttons allow for direct channel selection, while dedicated buttons for Audio Description and switching between ATV and DTV modes enhance accessibility. Volume and channel can be adjusted using specific buttons. The remote also allows access to on-screen information, the index page in Text mode, and the QUICK menu. Users can mute the sound, exit the menu system, and display the Electronic Program Guide (EPG). Menu navigation is intuitive, with directional arrows and an OK button to confirm selections. Color buttons offer additional control for Text and PVR functions, including revealing concealed text, holding a page, enlarging text display size, and selecting a page while viewing a normal picture.
Side inputs provide additional connectivity and control. A Common Interface slot is available for conditional Access Modules (CAM). USB ports allow access to JPEG, MP3, or Movie files, and can be used for updating TV firmware. HDMI 2 serves as another High-Definition Multimedia Interface input. A headphone jack and a power button are also located on the side. The power button turns the TV On and Off, and can be held down to reset the TV if it becomes unresponsive. Volume and channel selection can also be managed via side buttons, which can cycle through Channel, Input, and Volume modes. An ANT/CABLE input supports analog (NTSC/PAL/SECAM) and digital TV systems (DVB-T/C/T2). A PC IN port connects to a personal computer, and a Digital AUDIO OUT (SPDIF) port connects to an audio amplifier.
The manual provides detailed instructions for maintaining the device, with a strong emphasis on safety and proper handling.
Safety Precautions: Before any repair work, it is crucial to read and understand the safety precautions. These include warnings about potential injury or death from electric shock and potential breakage or irreparable damage to the device. Service personnel must be qualified and should only perform tasks described in the operating instructions. Special attention is drawn to the handling of the Panel Module and front Filter, which are made of glass and require caution to prevent injury. Replacement work should only commence after the Panel Module and AC/DC Power supply have cooled down sufficiently. Care must be taken to avoid damaging the display surface, and the Panel Module should not be touched with bare hands to prevent blemishes and damage. The use of clean, soft gloves is recommended during replacement work for both display protection and personal safety.
Cleaning the Device: For the LCD panel, it is essential to unplug the power cord before cleaning. A lint-free and dry cloth should be used to prevent damage. Chemical cloths, cleaners, hard cloths, or abrasive rubbing should be avoided as they can cause discoloration, damage, or scratches. For greasy dirt or fingerprints, a lint-free cloth moistened with a diluted neutral detergent solution, followed by a soft, dry cloth, is recommended. Spray cleaners should not be used as they can cause malfunction. For the monitor's cabinet, benzene, thinner, other chemical products, volatile solutions like insecticide, and prolonged contact with plastic or rubber materials should be avoided to prevent cracks, deformation, and paint peeling. Chemical cloths, cleaners, or waxes can also cause damage. A lint-free cloth is suitable for cleaning the cabinet and control panel. For heavy dirt, a soft cloth moistened with a diluted neutral detergent solution, followed by a soft, dry cloth, is advised. Acid/alkaline, alcoholic, abrasive cleaners, powder soap, OA cleaner, car wax, and glass cleaner are strictly prohibited.
Servicing with Lead-Free Solder: The product uses lead-free solder to protect the environment. Service personnel must wear safety glasses to prevent fumes or molten solder from entering the eyes, as lead-free solder can splatter at high temperatures. Printed circuit boards using lead-free solder are marked with an "F." Lead-free solder has a melting point 40-50 degrees higher than leaded solder. When servicing, solder with an alloy composition of Sn-3.0Ag-0.5Cu or Sn-0.7Cu is recommended. If leaded solder is used, all existing lead-free solder must be removed from joints, and if added to existing lead-free joints, it must be thoroughly mixed after melting. A soldering iron with temperature control (320-450°C) and high heat capacity is recommended to ensure proper soldering performance for different components and chassis parts.
Firmware Upgrade: The manual details the process for F/W USB upgrade, which can be done via the UI or an external input keypad. For UI upgrades, if the TV does not have the model name mechanism in its FW, a "MasterUpgrade.bin" file should be used first. If the TV already has the model name mechanism, it will reject upgrades with a non-matching model name. For external input keypad upgrades, the model name mechanism can be bypassed by renaming the .bin file to "MstarUpgrade.bin." The process involves inserting the USB storage device (FAT32 format only), connecting the PCBA with the IR/LED board and power supply, pressing the "Input" key, and powering on the TV. The LED will flash, indicating the upgrade is in progress. After completion, the TV will restart. The new FW version can be checked in the "System Information" page of the Setup menu.
Troubleshooting: A flow chart is provided to assist in troubleshooting common issues, such as the IR/LED board not lighting up, no sound with video, or no video with audio. For an unlit IR/LED board, checks include CN14 pin voltages (3.3V-ST and 2.5V) and the IR/LED board assembly itself, with steps for inspecting cable wires or changing the main board or IR/LED board. If there is video but no sound, the M/B wire connection to CN7 plug and the speaker connection assembly should be checked. If these are okay, the M/B CN9 pin 6 voltage (12.5V) is checked, leading to potential replacement of the power board or main board. If there is audio but no video, the backlight (CN9 Pin 13) and LVDS wire connections (M/B CN8) are checked, followed by M/B U13/FB17 voltage (12-12.5V), which may lead to replacing the power board, main board, or LCD module.
Factory Mode Adjustments: The manual outlines how to enter factory mode using a specific remote control key sequence (◄, EXIT, ENTER). Within factory mode, system information, including model name, F/W version, and release time, can be viewed. Color temperature adjustment (Cool, Medium, Warm) is detailed, involving setting a signal generator to RGB 1024768, 60HZ, and adjusting R and B drive values to meet specified x and y color coordinates within a tolerance of ±0.003. Source calibration ADC adjustment is also described for Component SD 576i, Component HD 1080i/50hz, and PC 1024768/60hz inputs, involving connecting specific test signals and initiating auto-adjustment via remote codes. Other factory mode functions include Preset Channel setup, NVRAM Clear (not recommended for factory use), Timer Clear (resets LCD panel burn-in hours), and Reset to Default (resets all OSD menu settings).
| Screen Size | 40 inches |
|---|---|
| Resolution | 1920 x 1080 pixels |
| Display Technology | LED |
| HDMI Ports | 3 |
| USB Ports | 1 |
| Smart TV | No |
| Response Time | 8 ms |
| Component Video (YPbPr/YCbCr) in | 1 |
| Headphone Outputs | 1 |
| Common Interface (CI) | CI+ |
| VESA Mounting | Yes |
| VESA Mounting Interfaces | 200 x 200 mm |
| Product Color | Black |
| Refresh Rate | 50 Hz |
| Tuner Type | Analog & Digital |
| Digital Signal Format System | DVB-C, DVB-T, DVB-T2 |