Do you have a question about the Toshiba 42XV540U and is the answer not in the manual?
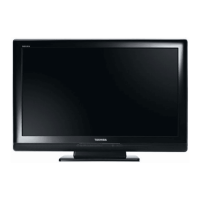
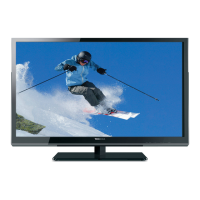
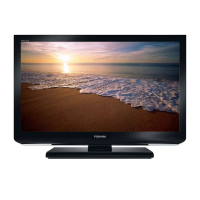
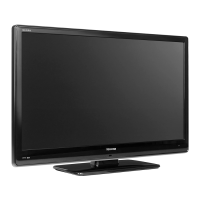
Overview of the various features of the new Toshiba LCD TV.
Guide to the initial setup process for the TV and its features.
Details on the TV's physical controls and input/output ports on the front and sides.
Identification and explanation of the TV's rear input/output terminals.
Description of various cables used for connecting audio and video devices.
General notes on understanding connection diagrams in the manual.
Instructions for connecting VCRs, antennas, cable TV, and camcorders.
Guide for connecting DVD players, VCRs, and satellite receivers using component video.
How to use the IR OUT terminal for remote operation of enclosed devices.
Instructions for connecting devices via HDMI or DVI for digital audio and video.
Setting up connections for controlling compatible audio/video devices via REGZA-LINK.
How to connect an external Dolby Digital decoder or audio system.
Connecting an external analog audio amplifier for sound adjustment.
Guide for connecting a PC to the TV via PC IN or HDMI terminals.
Information on how the remote control operates the TV and other devices.
Instructions for installing batteries in the remote control.
Explanation of the functions of various buttons on the TV remote control.
A chart detailing the function of each remote control key for different device modes.
How to program the remote to control non-Toshiba or other brand devices.
Step-by-step guide for setting up device codes for the remote.
Method to find the correct device code by cycling through available codes.
How to lock remote control volume keys to a specific device mode.
Lists of device codes for various brands of TVs, cable boxes, and satellite receivers.
Overview of the primary menu structure and its sections.
Structure of the Setup and Installation menus.
Accessing and navigating the THINC menu features.
How to use remote control buttons to navigate on-screen menus.
How to enable or disable the TV's product demonstration mode.
Changing the on-screen display language for menus and messages.
Setting the TV to receive signals from antenna or cable input.
Guide to automatically scanning and storing available TV channels.
How to add, delete, or remove channels from the TV's memory.
Enabling automatic input switching using MODE SELECT buttons.
Assigning custom labels or logos to channels for easier identification.
Configuring audio output settings for HDMI inputs.
Displaying signal strength for digital TV channels.
Adjusting the TV's time zone and daylight saving settings.
Checking system information, software version, and factory defaults.
Choosing between Power-Saving and Fast mode for TV startup.
Setting the TV's demo mode to On or Off for demonstration purposes.
How to switch between different connected video sources.
Customizing labels for video input sources for easier identification.
Methods for tuning channels, including using the Channel Browser.
Navigating channels and inputs using the Channel Browser interface.
Configuring settings for the Channel Browser, such as History List and Favorites.
Managing channels and inputs within the Channel Browser's History List.
Defining how analog and digital channels are tuned in Antenna mode.
Quickly switching between the last two tuned channels.
Memorizing a channel to return to quickly via the CH RTN button.
Adjusting the TV screen aspect ratio for optimal viewing.
Adjusting the picture position for specific TheaterWide modes.
Automatically selecting picture size based on the input signal.
Pausing the current video image on screen.
Choosing preset picture settings like Sports, Standard, Movie, or PC.
Fine-tuning picture quality settings like Contrast, Brightness, Color, etc.
Locking picture settings to prevent accidental changes.
Enabling or disabling closed caption display for programs.
Customizing the appearance of digital closed captions.
Temporarily overriding default analog caption modes.
How the CC button interacts with caption and audio selection.
General audio adjustments including muting and volume control.
Switching between different audio tracks on digital channels.
Setting the TV to output stereo sound or second audio program (SAP).
Fine-tuning bass, treble, and balance for audio output.
Limiting maximum volume levels to prevent sudden changes.
Choosing the audio output format for the digital audio out terminal.
Compressing ATSC dynamic range for consistent audio levels.
Accessing parental controls and security features.
How to enter the PIN code to access locked features.
How to change the existing PIN code for the Locks menu.
Setting parental controls to block programs based on ratings.
Ability to download and use alternative rating systems for content blocking.
Preventing access to specific TV channels.
How to temporarily bypass program lock mode.
Locking specific video input sources or channels to prevent unauthorized access.
Setting a time limit for video game play that engages input lock.
Locking the TV's physical control panel to prevent accidental changes.
Adjusting image settings for PC input for optimal display.
Configuring audio output for PC input.
Scheduling the TV to turn off automatically after a set time.
Controlling compatible devices via HDMI connection using the TV remote.
Operating connected REGZA-LINK playback devices.
Adjusting volume and mute for an audio receiver connected to the TV.
Enabling TV auto input switch, auto power, and device standby via REGZA-LINK.
Accessing advanced picture adjustments beyond basic modes.
Automatically adjusting contrast based on picture content.
Adjusting levels of black in the picture for better detail.
Adjusting the picture's color tone using preset options.
Optimizing motion for DVD playback by setting Cinema Mode.
Reducing motion blur by doubling the frame rate to 120Hz.
Reducing video shaking for smoother motion in Cinema Mode.
Reducing visible interference and noise in the TV picture.
Reducing interference caused by MPEG video compression.
Fine-tuning standard colors, including Hue, Saturation, and Brightness.
Adjusting specific base colors within the ColorMaster feature.
Expanding the acceptable color range for wider color signals.
Reducing input lag for better gaming performance.
Accessing settings for surround sound effects.
Enhancing audio with Stereo Extension, Voice Enhancement, and Dynamic Bass Boost.
Common issues and solutions before contacting service.
Troubleshooting a black screen border potentially caused by closed captions.
How to reset the TV when controls are unresponsive.
General advice for problems not covered, including factory reset.
Steps to take if the TV fails to power on.
Solutions for general picture quality issues.
Addressing picture interference using CableClear or DNR feature.
Troubleshooting issues with the video input selection screen.
Ensuring input lock is off to view external devices or specific channels.
Solutions for missing or incorrect color display.
Improving picture quality for composite and S-video connections.
Addressing lip-sync issues and potential causes.
Explaining the meaning of the TV's front panel LED status lights.
Troubleshooting issues related to audio output, muting, and SAP.
Solutions for issues with the remote control's functionality.
Troubleshooting problems related to channel scanning and memory.
Solutions for issues with closed caption display.
Resolving issues related to V-Chip parental controls and PIN codes.
Troubleshooting problems with REGZA-LINK device connectivity.
Addressing issues with HDMI cables and Deep Color functionality.
Technical specifications of the LCD television model.