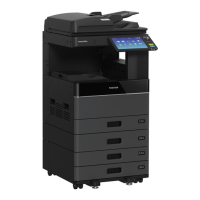
Do you have a question about the Toshiba e-studio 120 and is the answer not in the manual?
Type | Digital Copier |
---|---|
Functions | Copy, Print, Scan |
Resolution | 600 x 600 dpi |
Paper Capacity | 250 sheets |
Print Speed | 12 ppm |
Print Resolution | 600 x 600 dpi |
Interface | USB 2.0 |
Scan Resolution | 600 x 600 dpi |
Copy Speed | 12 ppm |
Paper Size | A4, A5, B5, Legal, Letter |
Zoom | 25% to 200% |
Multiple Copy | Up to 99 copies |
Outlines exclusions and limitations of TOSHIBA TEC CORPORATION's liability.
States that implied warranties are excluded to the fullest extent permitted by law.
States device compliance with FCC rules and potential interference.
Details declaration of conformity for the installed I/F Board.
States the copier is a Class 1 laser product; laser light is confined.
Discusses ozone production and specifies maximum sound pressure level.
Provides safety instructions for Canada and Europe.
Labels indicating the product is a Class 1 laser product in multiple languages.
Advises against removing covers and to refer servicing to qualified personnel.
Explains the applicability of CE directives to the equipment.
Explains the meaning of 'I' and 'O' on the power switch.
Explains symbols on the fusing area label (danger, hot surface).
Lists warnings about hot fusing area, light source, rapid power cycling, etc.
Lists unsuitable locations like damp, dusty, or direct sunlight.
Advice on not dropping the unit, handling toner cartridges, and the photoconductive drum.
Lists laser specifications (wavelength, pulse times, output power).
Repeats Class 1 laser safety and interlock switch warnings.
Explains how to use the operator's manual effectively.
Explains icons like Warning, Caution, and Note used in the manual.
Identifies external parts like covers, trays, and panels.
Identifies internal parts like the drum and charger.
Identifies controls like power switch and interface ports.
Explains status indicators like ONLINE, SCANNER, and Power Save.
Details keys for copy quantity, zoom, and tray selection.
Explains keys for exposure adjustment and mode selection.
Details Clear and Start keys for operation control.
Details recommended paper types, sizes, and weights for trays.
Specifies paper types, sizes, and weights for the main paper tray.
Specifies paper types, sizes, and weights for the bypass tray.
Advises using only genuine TOSHIBA parts and supplies.
Guidelines for storing supplies (clean, dry, stable temperature).
Steps for extending the tray and adjusting guides.
Steps for inserting paper correctly under corner hooks.
Step for returning the paper tray to the unit.
Tips on cancelling blinking, paper condition, and avoiding jams.
Specifies paper types, sizes, and weights for the bypass tray.
Steps to place an original face down on the original table.
Steps to open and extend the bypass tray.
Steps to set guides and insert paper face down.
Steps to select bypass tray and start copying.
Step-by-step process for making copies.
Steps to set copies, exposure, zoom, and tray.
Step to press the start key to begin copying.
Steps to power on the unit correctly.
Warning about using the unit in a different country and socket usage.
Explains scan head lamp behavior during operation.
Shows default settings after power-on or auto-clear.
Discusses preheat and auto power shut-off modes.
Tips on original size, image loss at edges, and handling folded originals.
How to remove the original cover for bulky items.
How to set the number of copies using the quantity keys.
How to adjust copy density manually or for photos.
Steps to select MANUAL or PHOTO exposure modes.
Steps to adjust the automatic exposure level using light/dark keys.
Details preset reduction and enlargement ratios available.
How to adjust zoom ratio using specific keys.
Pressing the tray select key cycles through paper feed locations.
Reduces toner consumption by approximately 10%.
Discusses preheat and auto power shut-off modes.
Returns settings to initial and enables continuous ADF copying.
Step-by-step guide to activate toner save mode.
Introduces user programs for customizing functions.
Steps to select, store program parameters, and return to normal mode.
How to view the total number of copies made.
General advice on using genuine supplies.
Guide for replacing the toner cartridge.
Steps for removing the toner cartridge using the release lever.
Steps for inserting the new toner cartridge.
Steps to close front and side covers securely.
Note on start indicator and resuming copying after replacement.
Warnings about turning off power and avoiding specific cleaning agents.
How to wipe the unit's cabinet, glass, and cover.
Steps to clean the transfer charger using a cleaner.
Table listing common problems, their causes, and solutions.
Guides for issues like no operation, blank copies, and smudges.
Table detailing indicator meanings, causes, and remedies.
Explains indicators for developer, toner, misfeed, maintenance, and errors.
Explains when the unit stops due to a misfeed.
Step 1: Open the side cover to access misfeed areas.
Steps for removing paper from the paper feed area.
Steps for removing paper from the fusing area.
Steps for removing paper from the transport area.
Explains the developer replacement indicator and service requirement.
Explains the maintenance indicator and service requirement.
Lists available software components on the CD-ROM.
Software enabling printer and scanner functions.
Lists computer and OS requirements for installation.
Table showing installable drivers based on OS and connection.
Table mapping OS/Interface to installation reference pages.
Steps 1-3: Insert CD-ROM, navigate, and run setup.
Step 4: Choose software packages to install.
Steps 5-6: Review packages and copy driver files.
Steps to install Button Manager.
Steps to install Desktop Document Manager.
Step 10: Connect USB cable.
Step 11: Install scanner driver.
Step 12: Install printer driver.
Steps 1-3: Insert CD-ROM, navigate, and run setup.
Step 4: Choose software packages to install.
Step 6: Copying driver files.
Step 7: Install Button Manager.
Step 8: Install Desktop Document Manager.
Step 9: Finalize installation.
Steps 1-3: Insert CD-ROM, navigate, and run setup.
Step 4: Choose software packages to install.
Step 7: Copy files and setup parallel interface.
Step 5: Configure printer settings.
Step 8: Install Desktop Document Manager.
Step 11: Connect parallel cable.
Explains Start and Power Save indicator statuses.
Explains ONLINE and Scanner indicator statuses.
Steps to access printer driver setup from the start menu.
Step-by-step guide to printing documents.
Step 4: Set copies, media type, quality.
How copy jobs are handled during print jobs.
Setting up printer driver options like Input Tray.
Steps to configure Button Manager for scanning events.
Specific setup for Windows XP.
Setting Event Manager properties to send scans to Button Manager.
Steps to set scanner events to Button Manager.
Configuring scan settings in Button Manager.
Diagram showing Button Manager workflow for scanning.
How Windows OS handles scanner events.
Step 1: Press the SCANNER key to enter scan mode.
Step 3: Press copy quantity key to select scanning application.
Steps to scan using computer software like Desktop Document Manager.
Steps for using TOSHIBA TWAIN driver.
Step 3: Select the USB scanner source.
Step 4: Acquire image via File menu or button.
Step 5: Set scan configuration and start scan.
Step 3: Establish basic scanning settings.
Step 4: Specify scanned image name, format, and folder.
Steps 5-6: Perform scanning and save image.
Lists sections available in the online manual.
Explains how to navigate and use the online manual.
Steps to install Acrobat Reader from CD-ROM.
Steps to change printer port settings to resolve conflicts.
Details parallel and USB interface cable types.
Steps to connect the USB cable.
Steps to connect the parallel interface cable.
Details type, copy system, paper tray capacity, and speed.
Details copy ratio, exposure, and resolution specifications.
Details power supply voltage and consumption.
Details dimensions, operating temperature, and humidity.
Details sound levels and emission concentrations.
Details software, emulation, and interface port specifications.
Lists available options for system configuration.
Details the auto document feeder (MR-2014).
ADF specifications: weight, size, capacity, power.
Steps for using the ADF.
Enables continuous copying from the ADF.
Locations and removal of ADF misfeeds.
Steps for removing difficult ADF misfeeds.
Details the 250-sheet paper feed unit.
Steps to remove misfed paper from the lower side cover.
Paper size, weight, capacity for the lower unit.
Grants license and lists limitations on software usage.
Conditions for termination and export law assurances.
Provisions for US Government end users.
Disclaims warranties for software disks and the software itself.
Limits TOSHIBA TEC's liability and specifies governing law.