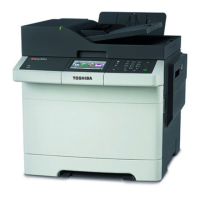
Do you have a question about the Toshiba e-STUDIO305 and is the answer not in the manual?
Safety measures during maintenance, covering power off, static electricity, high temperatures, and sharp edges.
Highlights critical safety components like fuses and IC-RAMs requiring proper handling to prevent accidents.
Details procedures for adjusting various items using codes within Adjustment Mode (05).
Explains how to set or change system parameters using codes within Setting Mode (08).
Guides the adjustment of the auto-toner sensor after developer material replacement, using Adjustment Mode (05-200).
Covers adjustments for image dimensions, including printer and scanner related adjustments like paper alignment and image position.
Details image quality adjustments for copying, such as automatic gamma, density, background, and sharpness settings.
Guides on adjusting high-voltage transformer outputs like developer bias, main charger, and transfer bias using digital testers.
Explains how to correct sheet sideways deviation in paper feeding for bypass and drawer systems.
Details the procedure for adjusting the doctor-to-sleeve gap in the developer unit using a specialized jig.
Covers RADF position, height, skew, and leading edge position adjustments for proper document handling.
Details the PM support mode for viewing part usage (output pages, drive counts) and performing counter clearing.
Guides through the EPU replacement mode, including preparation, operation flow, and precautions for detecting recycled units.
Lists error codes displayed on the control panel, their classifications, contents, and troubleshooting pages.
Provides detailed troubleshooting steps for specific error codes, guiding through checks and component replacements.
Covers troubleshooting common image quality issues such as density, background fogging, moire, blur, poor fusing, and banding.
Details precautions for replacing PC boards and HDD, emphasizing one-board replacement and specific procedures for each board.
Highlights critical precautions for PC board replacement, including the order of replacement for multiple boards.
Explains how to diagnose HDD failures by checking operation history and values like Re-allocated Sector Count.
Outlines essential precautions for HDD replacement, including data backup and formatting procedures.
Details precautions for SYS board replacement, including DIMM/SRAM installation and ROM version updates.
Provides step-by-step procedures for replacing the LGC board, including EEPROM backup and engine ROM updates.
Outlines the procedure for replacing the SLG board, including scanner ROM updates and data transfer.
Details precautions for SRAM board replacement, especially regarding data encryption and initialization procedures.
Explains the procedure for replacing the EEPROM, including backup of SRAM data and firmware version confirmation.
Guides on checking firmware versions after board or HDD replacement to ensure correct combination.
Details how to update firmware using USB media, including necessary programs, file names, and important precautions.
Provides troubleshooting steps for firmware update failures, including checking USB media and connections.
| Max Paper Size | A3 |
|---|---|
| Network Connectivity | Ethernet |
| Hard Disk | Optional |
| Max Copy Resolution | 600 x 600 dpi |
| Scan Resolution | 600 x 600 dpi |
| Functions | Copier, Printer, Scanner |
| Print Technology | Laser |
| Print Speed | 30 ppm |
| Duplex Printing | Yes |
| Memory | 256 MB |
| Fax Speed | 33.6 kbps |
| USB Connectivity | Yes |


