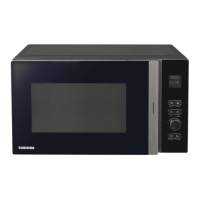
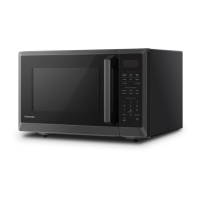
This document is an instruction manual for the TOSHIBA Microwave Oven, model MV-AM20T(BK). It provides essential information for safe operation, installation, usage, and maintenance of the appliance.
Function Description
The TOSHIBA MV-AM20T(BK) is a microwave oven designed for heating food and beverages. It offers various cooking modes including microwave, grill, and combination cooking. The appliance features a control panel for setting cooking times, power levels, and accessing auto menus. It also includes a clock function, kitchen timer, and a child lock for safety. The turntable ensures even cooking by rotating the food during operation.
Important Technical Specifications
- Model: MV-AM20T(BK)
- Rated Voltage: 240V~50Hz
- Rated Input Power (Microwave): 1250-1320W
- Rated Output Power (Microwave): 800W
- Rated Input Power (Grill): 1000W
- Oven Capacity: 20L
- Turntable Diameter: Ø255mm
- External Dimensions: 462x381x282mm
- Net Weight: Approx. 12.59kg
- Installation Height: Minimum 85cm
- Clearance: Minimum 30cm above the oven, 20cm between the oven and adjacent walls.
- Power Cord: Grounding-type 3-wire cord.
Usage Features
General Operation:
The oven is operated via a control panel. When first powered, the screen displays "0:00" and a buzzer rings once.
Clock Setting:
To set the clock:
- Press "CLOCK/KITCHEN TIMER" twice; hour figures will flash.
- Turn the dial to adjust hour figures (0-23).
- Press "START/+30SEC."; minute figures will flash.
- Turn the dial to adjust minute figures (0-59).
- Press "START/+30SEC." to confirm. The ":" will flash, and the time will display.
If the clock is not set, it will not function when powered. The oven returns to its previous state if "STOP/CANCEL" is pressed or no operation occurs for 1 minute during setting.
Microwave Cooking:
- Press "MICROWAVE" once; screen displays "800w" and "00:00".
- Press "MICROWAVE" repeatedly or turn the dial to select desired power (800w, 600w, 400w, 200w, 100w).
- Press "START/+30SEC." to confirm.
- Turn the dial to set cooking time (0:05 to 95:00).
- Press "START/+30SEC." to start cooking.
The step quantities for time adjustment vary: 0-1 min (5 seconds), 1-5 min (10 seconds), 5-10 min (30 seconds), 10-30 min (1 minute), 30-95 min (5 minutes).
Grill or Combi. Cooking:
- Press "GRILL/COMBI" once; screen displays "G".
- Press "GRILL/COMBI" repeatedly or turn the dial to choose power (G, C-1, C-2).
- Press "START/+30SEC." to confirm.
- Turn the dial to set cooking time (0:05 to 95:00).
- Press "START/+30SEC." to start cooking.
- G (Grill): 0% Microwave Power, 100% Grill Power
- C-1 (Combi 1): 55% Microwave Power, 45% Grill Power
- C-2 (Combi 2): 36% Microwave Power, 64% Grill Power
Quick Start:
- In multi-stage cooking, each press of "START/+30SEC." adds 30 seconds. Defrosting time cannot be increased this way.
- In microwave, grill, combination, or time defrost, each press of "START/+30SEC." adds 30 seconds.
- In waiting state, turn the dial left to set cooking time with 100% microwave power ("800w" and "00:00" flash). Turn the dial left or right to set time, or press "START/+30SEC." to add 30 seconds and start cooking automatically. Press "START/+30SEC." again to start cooking after choosing time.
Defrost By Weight:
- Press "DEFROST" once; "100" flashes.
- Turn the dial to select weight (100 to 1500 g).
- Press "START/+30SEC." to start defrosting.
Defrost By Time:
- Press "DEFROST" twice; "240w" and "00:00" flash.
- Turn the dial to select defrost time (MAX 95 minutes).
- Press "START/+30SEC." to start defrosting. Defrost power cannot be changed.
Kitchen Timer:
- Press "CLOCK/KITCHEN TIMER" once; screen displays "00:00".
- Turn the dial to enter time (MAX 95 minutes).
- Press "START/+30SEC." to confirm.
- Buzzer rings 5 times and "End" displays when time is reached.
The kitchen timer cannot be inquired while working. Pressing "STOP/CANCEL" cancels the timer.
Auto Menu (A-1 to A-12):
- Turn the dial right to choose a menu ("A-1" to "A-12").
- Press "START/+30SEC." to confirm.
- Turn the dial to choose default weight based on the menu chart.
- Press "START/+30SEC." to start cooking.
Auto Menu Chart:
- A-1 Reheat cup: 1 cup (Display 1), 2 cups (Display 2), 3 cups (Display 3)
- A-2 Lasagna: 250 g (Display 250 g), 500 g (Display 500 g)
- A-3 Scrambled eggs: 1 (50g) (Display 1), 2 (100g) (Display 2), 3 (150g) (Display 3)
- A-4 Baked potatoes: 1 (Display 1), 2 (Display 2), 3 (Display 3)
- A-5 Crostini: 80 g (Display 80)
- A-6 Pasta: 50 g (with 450g water) (Display 50 g), 100 g (with 800g water) (Display 100 g), 150 g (with 1200g water) (Display 150 g)
- A-7 Grilled Pizza: 200 g (Display 200 g), 400 g (Display 400 g)
- A-8 Baked Bacon: 1 slice (Display 1), 2 slices (Display 2), 3 slices (Display 3), 4 slices (Display 4), 5 slices (Display 5), 6 slices (Display 6)
- A-9 Grilled Vegetables: 500 g (Display 500 g)
- A-10 Reheat vegetable soup: 1 cup (Display 1), 2 cups (Display 2), 3 cups (Display 3)
- A-11 Grilled salmon: 300 g (Display 300 g)
- A-12 Popcorn: 100 g (Display 100 g)
Multi-stage Cooking:
Allows setting up to 2 cooking sections. If one section is defrosting, it must be the first. Kitchen timer and auto menu cannot be used. Quick start can be a section.
Example (defrost 5 min, then 80% microwave 7 min):
- Press "DEFROST" twice; "240w" and "00:00" flash.
- Turn dial to select "5:00".
- Press "MICROWAVE" once; screen displays "800w".
- Press "MICROWAVE" again or turn dial to choose 80% microwave power.
- Press "START/+30SEC." to confirm; screen displays "600w".
- Turn dial to adjust cooking time to "7:00".
- Press "START/+30SEC." to start. Buzzer sounds once for each section. Buzzer sounds five times when cooking finishes.
Inquiring Function:
In cooking state, press "CLOCK/KITCHEN TIMER" to display the time for 3 seconds.
Lock-out Function for Children:
- Lock: In waiting state, press "STOP/CANCEL" for 3 seconds. A long beep sounds, the lock indicator lights, and current time displays.
- Unlock: In locked state, press "STOP/CANCEL" for 3 seconds. A long beep sounds, and the lock is released.
Turntable Reset Function:
After cooking, if the turntable is not in its initial position, it will reset. The lamp, fan, and turntable will operate, and ":נ" will display. After reset, "End" displays. This function only works for one completed cooking cycle. If paused or door opened, it will not enter reset. Opening the door or pressing "STOP/CANCEL" during reset returns the oven to waiting state. Position precision: cooking time in 5 minutes and turntable degrees within +/- 30 degrees.
Utensils:
- Microwave-safe only: Browning dish (bottom 3/16 inch (5mm) above turntable), dinnerware (no cracks/chips), heat-resistant oven glassware (no metallic trim, no cracks/chips), oven cooking bags (slits for steam, no metal tie), paper plates/cups (short-term use, don't leave unattended), paper towels (cover food, absorb fat, short-term use with supervision), parchment paper (cover/wrap for steaming), plastic (microwave-safe, "Microwave Safe" label, slit/pierce/vent boiling bags), plastic wrap (cover food, don't touch food), thermometers (meat/candy), wax paper (cover food).
- Avoided in microwave oven: Aluminum tray (arcing), food carton with metal handle (arcing), metal/metal-trimmed utensils (shields food, arcing), metal twist ties (arcing, fire), paper bags (fire), plastic foam (melts, contaminates liquid), wood (dries out, splits/cracks).
Maintenance Features
Cleaning:
- Unplug the appliance before cleaning.
- Clean the oven cavity with a slightly damp cloth after use.
- Clean accessories (turntable, ring assembly) in soapy water.
- Clean door frame, seal, and neighboring parts carefully with a damp cloth.
- Do not use harsh abrasive cleaners or sharp metal scrapers on oven door glass to prevent scratching and shattering.
- Cleaning Tip: For easier cleaning of cavity walls, place half a lemon in a bowl with 300ml (1/2 pint) water, heat on 100% microwave power for 10 minutes, then wipe with a soft, dry cloth.
- The oven should be cleaned regularly and food deposits removed. Failure to maintain cleanliness can degrade the surface, affect lifespan, and lead to hazardous situations.
- The appliance shall not be cleaned with a steam cleaner.
General Safety and Installation:
- Do not operate with the door open or if safety interlocks are broken/tampered with.
- Do not place objects between the oven front face and door, or allow residue on sealing surfaces.
- If door or door seals are damaged, do not operate until repaired by a competent person.
- The appliance must be grounded to reduce electric shock risk. Plug into a properly installed and grounded outlet.
- Consult a qualified electrician if grounding instructions are unclear. Use a 3-wire extension cord if necessary.
- A short power-supply cord is provided to reduce risks of entanglement or tripping. If a long cord is used, its electrical rating must be at least as great as the appliance's, it must be a grounding-type 3-wire cord, and arranged to avoid draping over surfaces where it can be pulled or tripped over.
- Do not install behind a decorative door to avoid overheating (not applicable for appliances with decorative doors).
- Only use the temperature probe recommended for this oven (if applicable).
- Do not place in a cabinet unless tested in a cabinet.
- Operate with the decorative door open (if applicable).
- Intended for household and similar applications (staff kitchen areas, hotels, motels, residential environments, farm houses, bed and breakfast environments).
- Intended for heating food/beverages. Drying food/clothing, heating warming pads/slippers/sponges/damp cloth can lead to injury, ignition, or fire.
- Metallic containers are not allowed during microwave cooking.
- The rear surface should be placed against a wall.
- Not intended for operation by external timer or separate remote-control system.
- Accessible surfaces may be hot during operation.
- When operating in combination mode, children should only use under adult supervision due to high temperatures.
Troubleshooting:
- Microwave oven interfering TV reception: Normal, similar to other small electrical appliances.
- Dim oven light: Normal in low power microwave cooking.
- Steam accumulating on door, hot air out of vents: Normal, steam from food escapes through vents, some may condense on cool surfaces.
- Oven started accidentally with no food in: Forbidden and dangerous.
- Oven cannot be started:
- (1) Power cord not plugged in tightly: Unplug, then plug again after 10 seconds.
- (2) Fuse blowing or circuit breaker works: Replace fuse or reset circuit breaker (by professional personnel).
- (3) Trouble with outlet: Test outlet with other electrical appliances.
- (4) Door not closed well: Close door well.
- Oven does not heat: (4) Door not closed well: Close door well.
Warranty:
One-year limited warranty from the date of purchase, valid for the original retail purchaser. Does not cover damages from accident, misuse, abuse, lack of reasonable care, non-provided attachments, loss of parts, or use outside specified voltage. Warranty is void if used for other than private household purposes or outside the UK.
For service, pack unit in original carton and materials. Contact customerservice@uk.toshiba-lifestyle.com or Midea Home Appliances UK Ltd. (5 New Street Square, London EC4A 3TW).
Midea Home Appliances UK Ltd. disclaims responsibility for consequential or incidental losses.
Record Model Number and Serial Number (found on back cabinet) for future reference.
WEEE Directive:
This product should be collected and treated separately at WEEE collecting points, not disposed of with household waste.