Do you have a question about the Toshiba TECRA S1 and is the answer not in the manual?
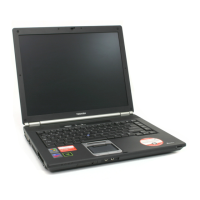
This document is a "Memory Module Replacement Guide" for TOSHIBA personal computers, published in September 2004. It provides detailed instructions for replacing memory modules in various Toshiba laptop models, including the TECRA S1, TECRA 9100, TECRA M1, TECRA M2, Satellite 2400, Satellite 2405, Satellite 1110/1115, Satellite Pro M10, Satellite Pro M15, Satellite M30/M35, Portégé R100, and Portégé M200/M205. The guide is structured into four main chapters: Introduction, Before you start the replacement, Replacing the memory module, and After you have done the replacement.
The primary function of this guide is to enable users to safely and correctly replace memory modules in their Toshiba laptops. It serves as a practical manual for a specific maintenance task, ensuring that users can upgrade or repair their computer's memory without professional assistance, provided they follow the instructions carefully.
Usage features are extensively covered, starting with essential preparatory steps. Before beginning any replacement, users are instructed to turn off the computer, ensuring it is not in sleep, suspend, or hibernate mode, and that the power indicator is off. All external connections, including the AC adapter, cables, and other devices, must be removed. Crucially, the battery pack must be removed, with a reference to the computer's User's Guide for specific instructions on battery removal. These steps are critical safety measures to prevent damage to the computer or the memory module and to avoid data loss. The guide explicitly warns against attempting to install or remove a memory module without completing these initial steps. It also emphasizes that memory modules should only be installed in the computer for which they are intended, noting that incorrect installation or installation in the wrong computer will result in a series of short beeps, indicating an error.
The replacement process itself is broken down into specific steps for different computer models, acknowledging that the procedure varies. The guide highlights that most computers have two memory slots and advises users to remove any affected memory modules before installing replacements. Illustrations are provided to clarify the process, though it's noted that these may sometimes show only one module being replaced, even if both are affected.
Maintenance features are detailed throughout the "Replacing the memory module" chapter. The first step involves removing the memory module cover. This typically requires removing or loosening screws, for which a size 0 Phillips screwdriver is recommended to prevent damage to screw heads. Users are cautioned against touching the connectors on the memory module or the computer, as contamination can lead to memory failures. Similarly, care must be taken to prevent screws or other foreign objects from falling into the computer.
For models like the TECRA S1, TECRA 9100, Satellite 2400/2405, Satellite 1110/1115, Satellite Pro M10/M15, Satellite M30/M35, Portégé R100, and Portégé M200/M205, the process generally involves removing one or two screws to access the memory module cover. For the TECRA M1 and TECRA M2, the procedure is more involved, requiring the removal of the keyboard brace and potentially the keyboard itself to access the memory modules. For the TECRA M1, the display panel needs to be opened and tilted, and the keyboard brace carefully removed. Then, three screws securing the keyboard are removed, and the keyboard is lifted and laid face down on the palmrest. A critical warning is given not to drop screws inside the computer and to avoid applying tension to the ribbon cable connecting the keyboard to the computer. Insulation sheets covering the memory modules must be lifted and temporarily secured with masking tape. For the TECRA M2, the battery is removed, a screw from the battery compartment is taken out, the display panel is opened, and a thin object is used to lift out the keyboard brace. Two screws securing the keyboard are then removed, and the keyboard is lifted and placed on the palmrest, again with warnings about the ribbon cable and not touching the keys. A metal bracket also needs to be removed.
The actual removal of the memory module involves pressing latches outwards, which causes one end of the module to pop up due to a spring mechanism. Users are instructed to hold the module by its edges and pull it out. A significant caution is included regarding heat: if the computer has been in use for a long time, the memory modules and surrounding circuits will be hot, so users must allow them to cool to room temperature before replacement.
Installation of the new memory module is the reverse process. The module must be firmly pushed into the connector, ensuring the notch aligns, and then pressed down until the latches click into place. For models where the keyboard or metal bracket was removed, these components are reinstalled, and all screws are replaced. The guide stresses the importance of replacing all screws and ensuring no foreign objects are left inside the computer. For the TECRA M1, the insulation sheet must be returned to its original position to cover the memory module(s). Finally, the battery pack is reinstalled.
After the physical replacement, the guide outlines steps to verify the installation. Upon turning on the computer, the total memory size is automatically calculated. Users are instructed to check the system properties to confirm that the RAM size is correct. Instructions are provided for different Windows operating systems: for Windows XP Home Edition or Professional, users navigate through the Control Panel to "Performance and Maintenance" and then "Display basic information about your computer" to check the RAM size in the "General" tab. For Windows 2000, Windows 98 Second Edition, or Windows NT 4.0, users access "System" in the Control Panel to verify the RAM size in the "General" tab. This ensures that the memory module has been successfully recognized and is functioning correctly.
The document also includes "Conventions" for understanding the manual, such as how abbreviations are defined and the meaning of different message types (Cautions and Notes). Cautions, marked with an exclamation mark, warn about potential data loss or equipment damage, while Notes, marked with an "i," provide helpful hints or advice. These conventions enhance the usability and safety aspects of the guide, making it easier for users to follow critical instructions.
| RAM | 256 MB - 2 GB |
|---|---|
| Operating System | Windows XP Professional |
| Memory Type | DDR SDRAM |
| Maximum Memory | 2 GB |
| Processor | Intel Pentium M |
| Storage | 40 GB - 80 GB HDD |
| Display | 14.1 inch XGA (1024x768) or SXGA+ (1400x1050) |
| Chipset | Intel 855PM |
| Optical Drive | DVD-ROM |
| Ports | USB 2.0, VGA, RJ-45, RJ-11, Headphone, Microphone |