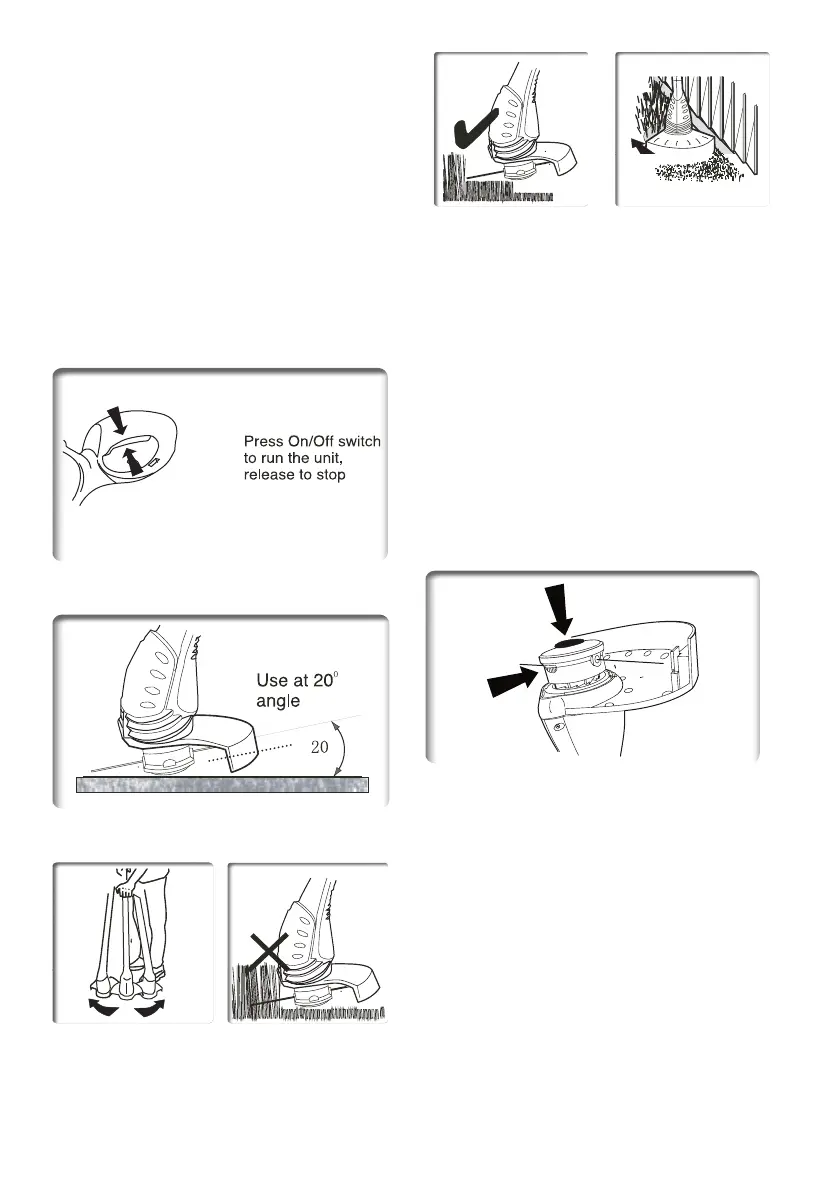
9
allow the trimmer to cut the line.
Use the trimmer at an angle of
approximately 20 degrees to the
working area (see Fig1
4).
Swing the trimmer from side to side
(see Fig15).
3. Do not overload your trimmer, take
small “bites” this will keep machine
operating at high speed and will greatly
improve cut
ting efficiency, (see Fig16
and Fig17).
4. Use the edge of the guard as a guide
when using near fences walls etc, and
mo
ve in a backwards direction (see
Fig18).
TO REPLACE THE CUTTING
LINE
Always unplug the trimmer before
carrying out any maintenance
1. To replace the nylon line, first remove
the spool cover from the spool holder
by pushing down centre of the spool
and at the same time pressing the two
spool cover opening but
tons firmly, now
remove the empty spool and replace
with a new pre-wound spool (see Fig19).
Fig 19
2. Insert the line through the “brass”
holes on the spool holder, pull line out.
Push spool inwards against the spring
clip and then push spool cover firmly
downwards until it locks into position
and at the same time pull lines and be
sure that they are released from spool
rail notches. If not, the bumping- feed
will not operate.
Follow the instruction on cut
ting the
line in “Preparing the trimmer for use”
section 4 before use (see Fig20).
Fig 13
Fig 14
Fig 15 Fig 16