Visit WWW.TOTALPOND.COM for information and tips.
EN
EN
6
Please call Customer Care before returning item to store: 1-888-412-6001
7
1B
2
6
OPERATION INSTRUCTIONS
A
A
B
A
1A
A
J
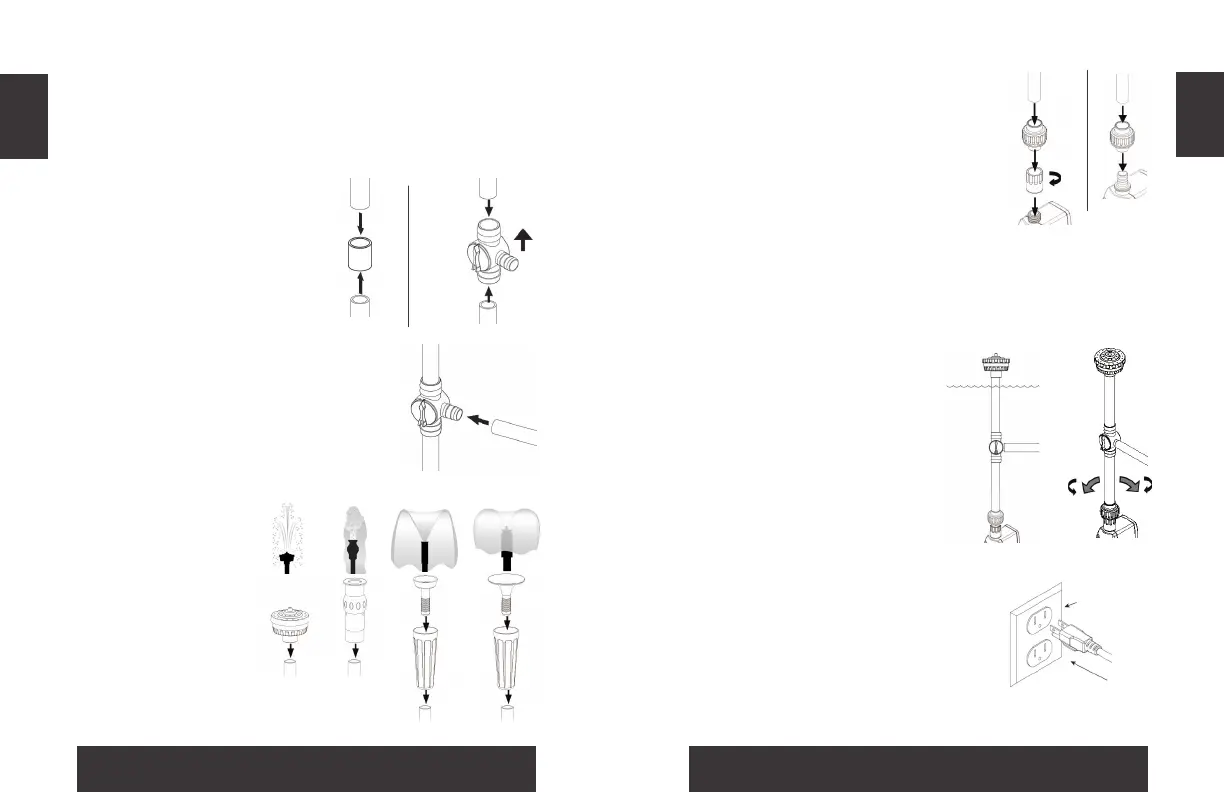
Step 1A. Connect the two
extension tubes with the
coupler. Proceed to Step 3.
Step 1B. Connect the
extension tubes to the
diverter valve. Make sure the
arrow is pointing up and the
diverter valve is connected
as shown.
Step 2. Connect 1/2 in. tubing onto
the diverter valve. Connect the other
end of tubing to a water feature.
NOTE: Tubing and water feature are
not included.
This kit includes a coupler and a diverter valve. To ow
water to the fountain nozzle only, go to Step 1A. To ow
water to the fountain nozzle and a second water feature,
go to Step 1B.
Step 3. Choose a
fountain nozzle
for the desired
water effect, and
assemble your
choice as shown.
I
A
I
A
AA
F G
H
E
3
A
C
D
4
Step 4. Connect the extension tube
to the outlet of the pump using the
supplied adapters.
Use the 3/4 in. adapter and swivel
adapter to connect the extension tube
to TotalPond Fountain Pump (#52216)
and any TotalPond Pond Pumps.
Use the swivel adapter to connect the
extension tube to TotalPond Fountain
Pump (#52228) .
NOTE: Pumps are not included. Refer to the pump manual for
more information.
Step 5. Place the pump into
water.
Step 6. Utilize the pivoting
base to achieve a more
vertical fountain display if
needed, and tighten the
locking nut for a secure t.
Step 7. Connect the pump
into a properly grounded
electrical outlet.
NOTE: If the diverter valve
was used, you can adjust the
ow control as needed.
5
GFCI
outlet
7
A
C