Visit WWW.TOTALPOND.COM for information and tips.
EN
EN
4
Please call Customer Care before returning item to store: 1-888-412-6001
5
Part Description Qty
A
25 ft. x 3 in.
seaming tape roll
1
Questions, problems, missing parts? Contact
Customer Care Monday - Friday
1-888-412-6001 customercare@totalpond.com
Thank you for choosing TotalPond
®
PACKAGE CONTENTS
PREPARATION
Before beginning assembly or operation of product, make
sure all parts are present. Compare parts with package
contents list and diagram. If any part is missing or damaged,
do not attempt to assemble, install or operate the product.
Contact Customer Care for replacement parts.
• Estimated assembly time: 10 minutes.
NOTE: After applying the seaming tape, wait several
hours before exposing the newly extended liner to
water.
• Tools Required: gloves, scissors, cloth, tape measure,
marker/chalk
INSTRUCTIONS
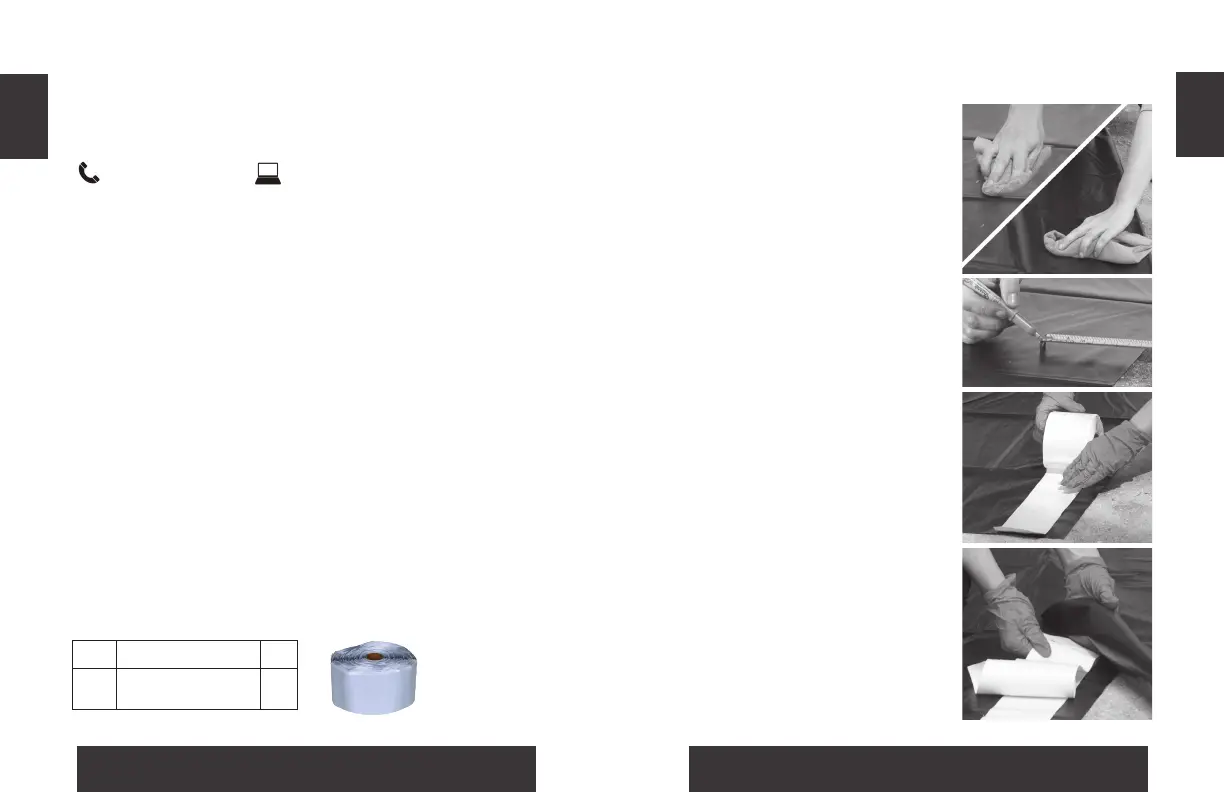
1
NOTE: Seaming Tape is extremely sticky. It is
recommended that protective gloves be worn when
handling this product to prevent skin irritation.
Step 1. Clean all areas of the
liner that will overlap with a mild
cleaning agent, like soapy water.
For extremely dirty or sticky
liners, you can use acetone. Also
smooth out any wrinkles in the
liners.
Step 2. Using a marker or chalk,
mark at least 4 inches from the
edge of the bottom liner. Make
several marks down the length of
the liner for easy positioning.
Step 3. Align the seaming tape
on bottom liner where you have
made the marks. Unroll the tape
along the entire length and stick
the seaming tape to the bottom
liner.
Before removing the backing,
apply pressure along the entire
length of the seam tape.
NOTE: You can use a roller or
similar tool to help you.
Step 4. Align the top liner over
the seaming tape. Slide the
backing out from under the top
liner, applying pressure to the
top liner as you go.
Once the two liners are connected
apply pressure along the entire
length of seam to seal.
2
3
4
 Loading...