8
❏
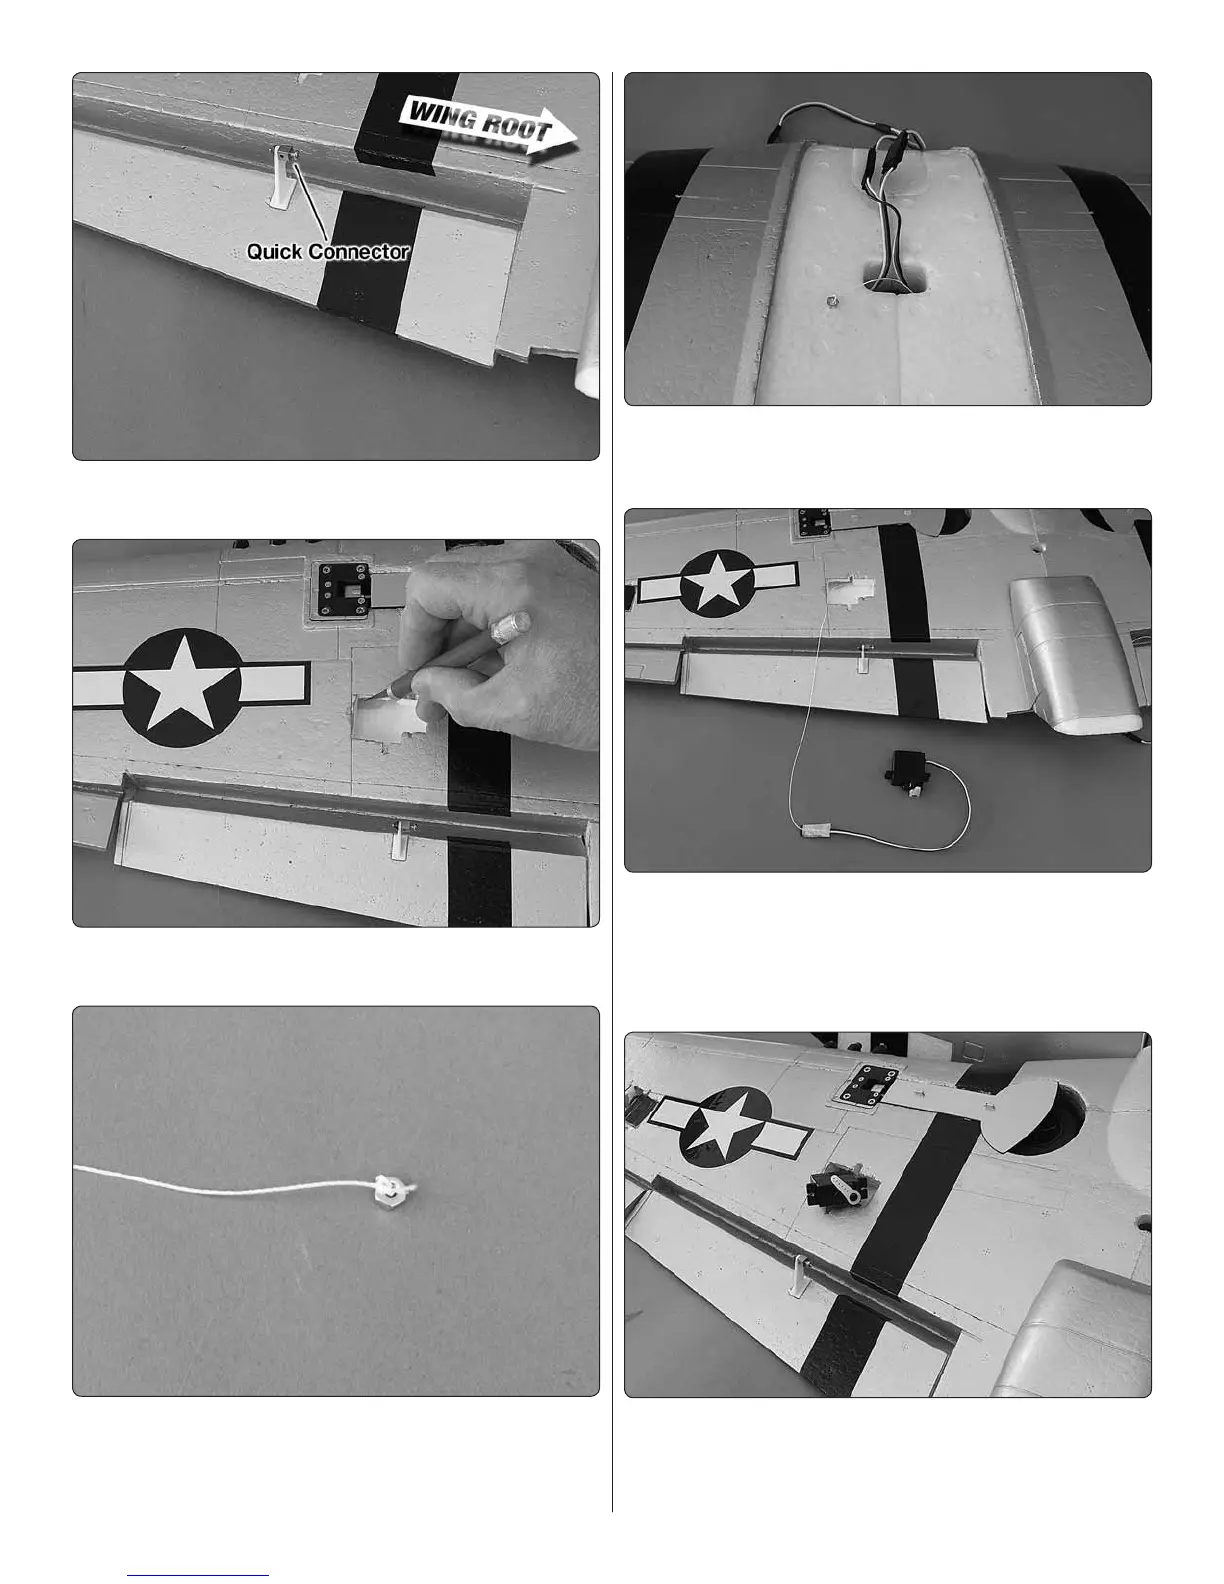
3. Use CA to glue the control horn in the slot with the quick
connector towards the wing root.
❏
4. Use a sharp hobby knife to cut the ap servo opening.
The foam over the opening is approximately ¼” (6mm) thick.
❏
5. To assist in pulling the ap servo leads through the
wing, tie a small nut (not included) to a string.
❏
6. Insert the nut in the opening in the ap servo recess.
Gently shake the wing to guide the nut and string to the
opening in the top center of the wing.
❏
7. Attach the ap servo lead to the string and carefully
pull it through the wing and out of the opening. Tip: Tie the
string to the retract cable and use a piece of masking tape
to position the string at the end of the connector.
❏
8. Connect a Y-harness to the ap servo lead.
❏
9. Plug the ap servo into the ap channel on the receiver.
Switch on the transmitter and then receiver. Check that the
servo arm is as shown with the ap control on the transmitter
set to aps up.

 Loading...