6
Step 4. Congure Camera
Follow app instructions to configure your camera and add it to your
home network.
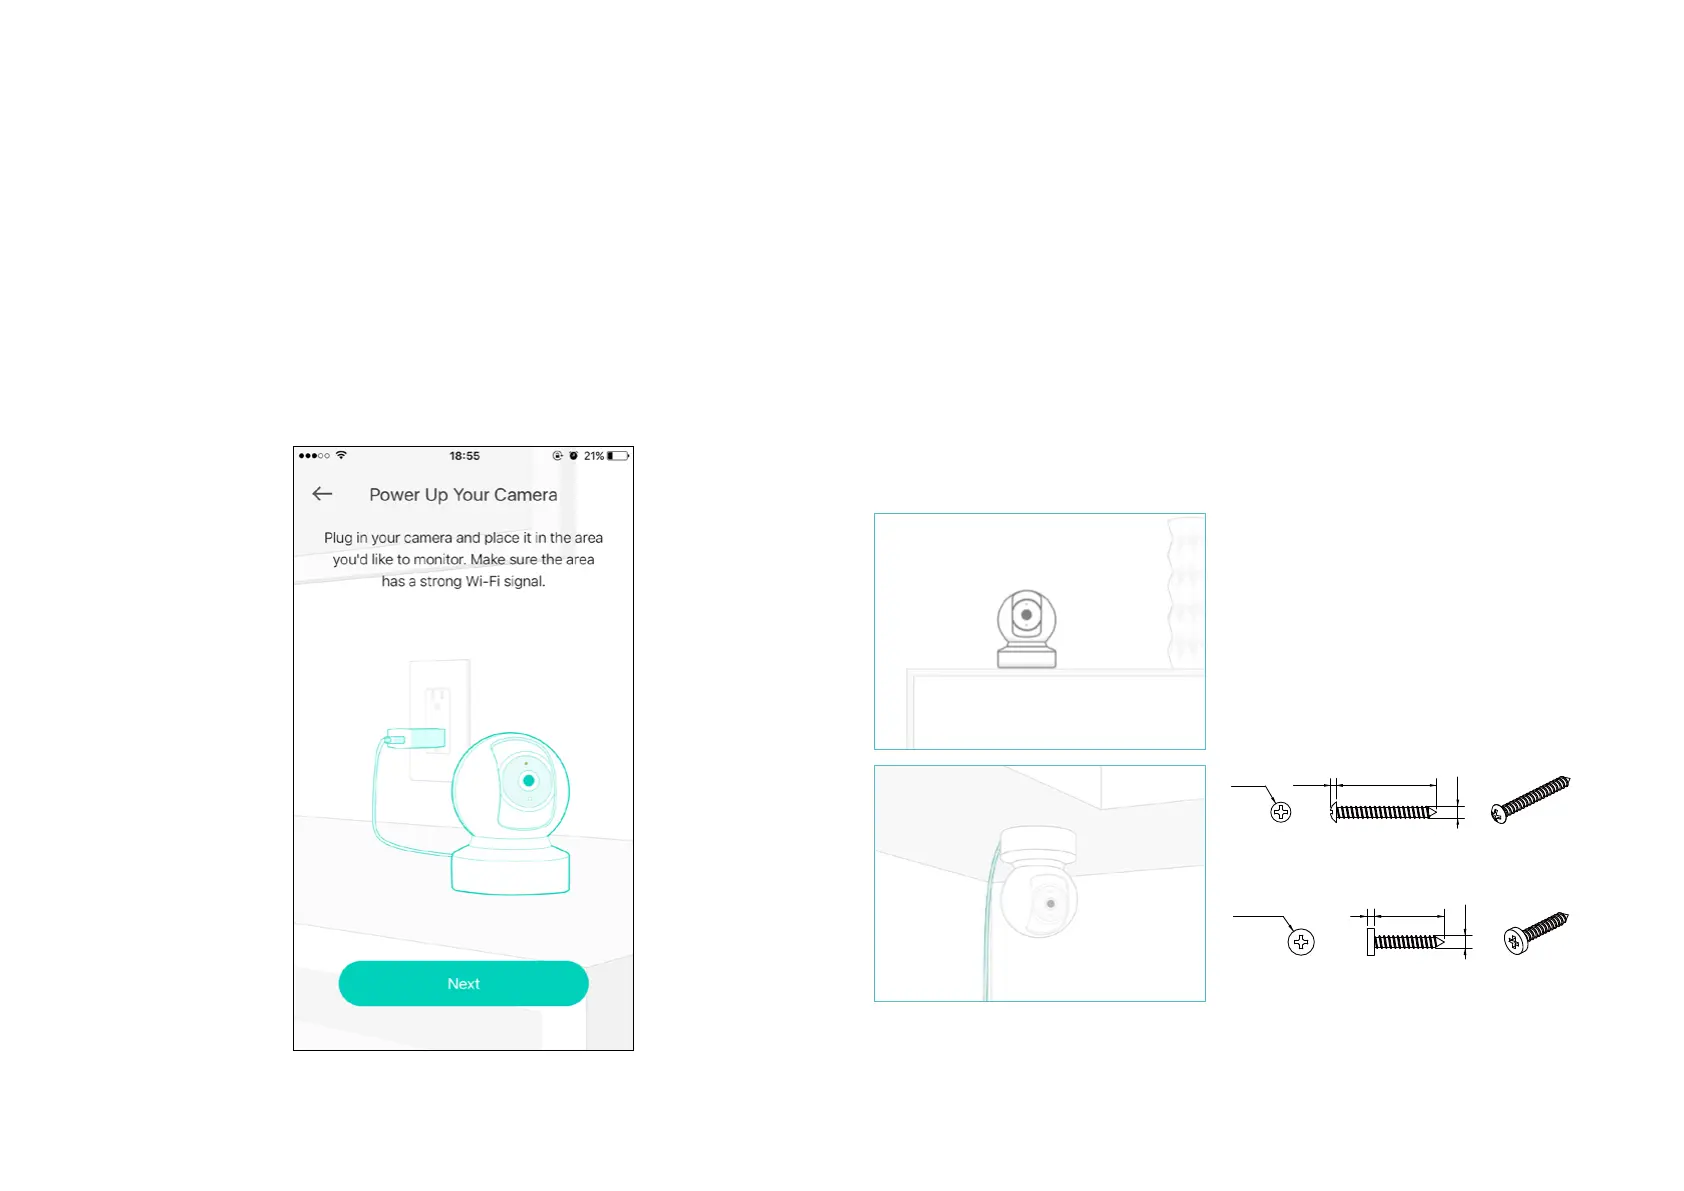
Step 5. Place Camera
Place your camera on a at surface, or install it on a wall or ceiling with
the provided indicator label and mounting screws.
• For soft surface: Directly screw the screws in.
• For cement wall: Drill two
φ
6mm holes with the help of indicator label, insert the plastic
expansion tubes into holes and screw the mounting screws into the expansion tubes.
n 7.5
2 20
3.5
UNIT: mm
n 6
301.8
3.5
Note: Your camera might use one of
the following two types of screws
.
 Loading...