NC210 HD Wi-Fi Cloud Camera
30
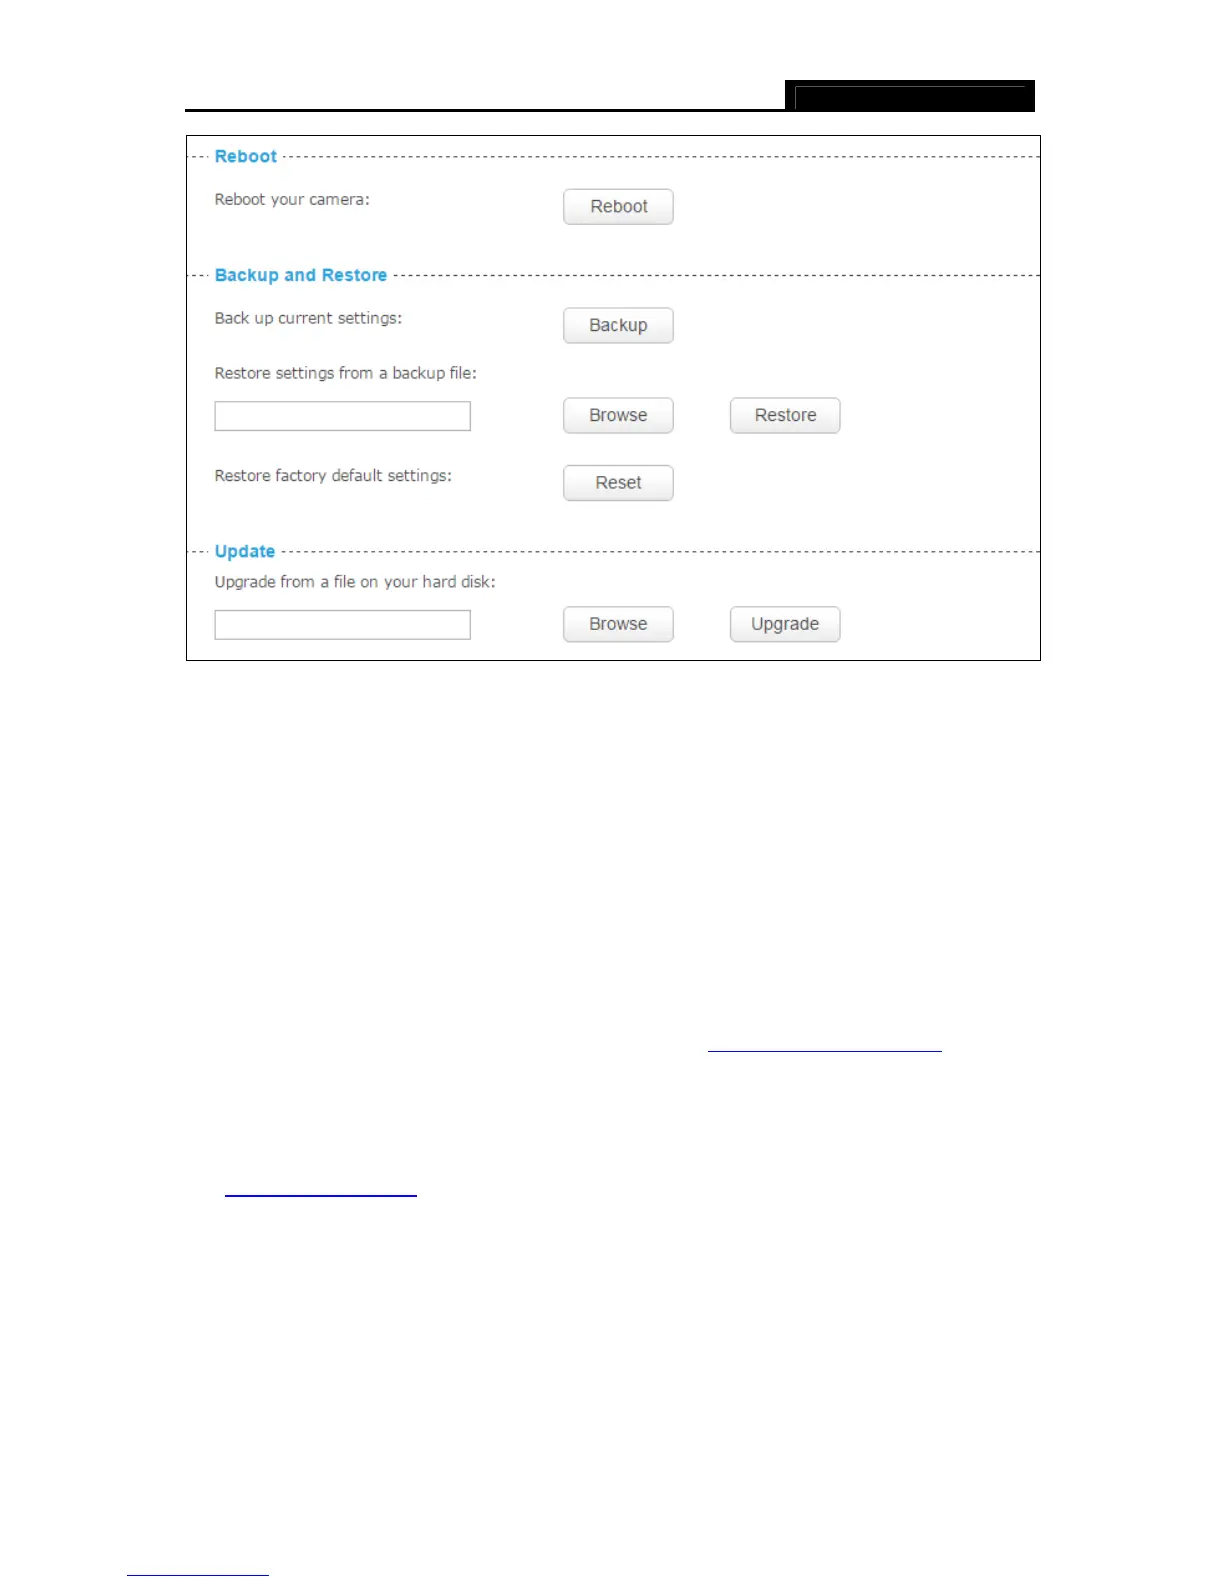
Reboot: Click Reboot and then click Reboot on the pop-up screen to confirm. Rebooting will
not change the camera’s setting. After rebooting, you need to log in to this page again.
Backup: Click Backup and follow the instructions on the browser to save the setting data file
to your specified location.
Browse: Click Browse to locate the saved backup file.
Restore: Click Restore, and then the camera will start rebooting. The settings will be restored
to the previous configuration.
Reset: Click Reset to restore the camera to its factory defaults. Don't turn off the camera
while resetting. After resetting, you need to add the camera to your TP-LINK Cloud account
again, find out the IP address of your camera (refer to 4.1 Log in to Your Camera
), and then
use the default username and password (admin/admin) to log in to this web management
page.
Update: Before update, download the latest firmware from the product page at
http://www.tp-link.com
, and then use decompression software to extract the file. Click Browse
to locate the latest downloaded software file, and then click Upgrade to update the camera’s
software to the latest version. Wait for the upgrading process to complete, and the camera will
reboot automatically.
Note:
1. The firmware upgrade procedure must not be interrupted or the camera may be damaged.
2. The firmware upgrade procedure is always risky and do not try to upgrade new firmware if it’s
not necessary.