EasyManua.ls Logo

TP TP610 User Manual

TP TP610
24 pages
To Next Page IconTo Next Page
Page #1 background imageLoading...
Page #1 background image
TP610
Gourmet Mud Kitchen
Instructions for assembly, maintenance and safe use.
Robovision Ltd t/a TP Toys
Unit 11, Enterprise Way, Flitwick, Bedfordshire, MK45 5BX England
www.tptoys.com
THIS PRODUCT CONTAINS SMALL PARTS AND IS NOT
SUITABLE FOR CHILDREN UNDER 36 MONTHS.
SMALL PARTS ARE A CHOKING HAZARD.
THIS PRODUCT IS INTENDED FOR USE BY CHILDREN
AGED 3+ YEARS.
ONLY FOR DOMESTIC USE. FOR OUTDOOR USE ONLY.
TOY MUST BE ASSEMBLED BY AN ADULT BEFORE USE.
CHILDREN MUST NOT USE THIS PRODUCT UNTIL
PROPERLY INSTALLED.
ADULT SUPERVISION REQUIRED.
REMOVE ALL PACKAGING BEFORE GIVING TO YOUR
CHILDREN.
RETAIN PACKAGING FOR FUTURE REFERENCE.
POTS AND PANS FOR USE IN ROLE PLAY ONLY.
WATER MAY BECOME CONTAMINATED - EMPTY WATER
AFTER EACH USE.
DO NOT SIT ON, OR OVERLOAD THE WORKTOP.
WARNINGS!
Included
We constantly strive to improve our assembly instructions. To see the most current version of this
instruction for assembly, maintenance and safe use. Please visit the product page at tptoys.com
1 Person
Assembly Build
Recommended
x1
Build Time
2 Hrs
Question and Answer IconNeed help?

Do you have a question about the TP TP610 and is the answer not in the manual?

TP TP610 Specifications

General IconGeneral
BrandTP
ModelTP610
CategoryToy
LanguageEnglish

Summary

Assembly, Maintenance, and Safe Use Instructions

General Safety Warnings

Crucial safety information covering small parts, age restrictions, and product usage.

Product Use and Maintenance Guidelines

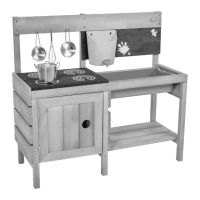
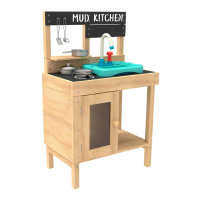
Detailed instructions on safe usage, maintenance, and care for the mud kitchen.

Step 1: Constructing the Base Frame

Assemble the primary vertical and horizontal supports for the kitchen base.

Step 2: Attaching Side Panels

Connect the side panels to the base frame using specified screws.

Step 3: Installing Support Beams

Attach horizontal support beams to the main structure for stability.

Step 4: Adding Lower Shelves

Secure the lower shelves to the frame using wood screws.

Step 5: Attaching Locking Mechanism

Install the locking mechanism for a moving part or accessory.

Step 6: Installing Side Panels (Part 1)

Attach horizontal wooden panels to the sides of the frame.

Step 7: Installing Side Panels (Part 2)

Continue attaching horizontal wooden panels to the frame.

Step 8: Attaching Hob Panels

Mount the hob panels onto the upper structure.

Step 9: Assembling the Back Panel

Assemble the back panel with hob elements onto the main structure.

Step 10: Attaching Back Panel Details

Add specific decorative or functional elements to the back panel.

Step 11: Installing the Mud Tray

Slide or attach the mud tray into its designated position.

Step 12: Adding Accessories and Hooks

Install hooks and accessories for the kitchen items.

Step 13: Assembling the Water Dispenser

Assemble the water dispenser unit with container and tap.

Step 14: Final Assembly and Checks

Complete final assembly steps and perform a thorough check.

Product Support and Registration

Customer Service and Guarantee Information

Details on product registration, guarantee terms, and customer support contacts.

Related product manuals