12
The point at which a measurement is made should always be similar with the calibration point,
especially in the case of corners and edges of small parts.
Important Note: The enclosed substrates are intended for checking accuracy only and not for
calibration purposes. User must recalibrate the instrument according to practical applications.
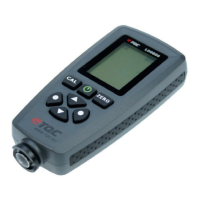
5.3 Calibration
Please read chapter 5.2 rstly, re-calibrate the instrument according to the measured product
sample. The instrument provides basic calibration, zero calibration and multi-point calibration.
t #BTJDDBMJCSBUJPO"MTPUIFGBDUPSZEFGBVMUDBMJCSBUJPODBOPOMZCFVTFEGPSNFBTVSFNFOUTPO
even surfaces and if the object has the same material, curvature, and size as the factory
provided substrates. For more details, please consult with your supplier.
t ;FSPDBMJCSBUJPO3FDPNNFOEFEJGNFBTVSJOHFSSPSTPDDVSVQUPVN
t .VMUJQPJOUDBMJCSBUJPO5IFBMMPXFENFBTVSJOHEFWJBUJPOXJMMCFNBY_VN0OF
point calibration, Is only recommended if the readings are expected to be close to the cali
bration value. Several points calibration is recommended when measuring on rough surfaces
or for precise measurements on smooth surfaces if the expected thickness lies between that of
the calibration point.
5.3.1. Zero Calibration
a. Place the probe on the uncoated sample and raise it after one beep. The LCD will show ”X” the
measured value.
b. Press and hold “ZERO Key” until hearing 3 beeps. The LCD will show “0” and “ZERO” symbol.
c. Repeat step b and c several times to obtain mean value.
d. When nished. Press “Zero Key” to exit calibration mode.
5.3.2. Multi-point Calibration
a. In measuring mode, press “CAL key” once to enter into calibration mode.
b. Zero calibration according to chapter 5.3.1. afterwards place the calibration foil on an
uncoated sample.
c. Place the probe and raise it after one beep. A reading will be displayed. Press “Up Key” or
“Down Key” to increase or decrease the reading or hold the key for changing continuously
VOUJMUIFSFRVJSFEGPJMUIJDLOFTTWBMVFJTTIPXO5IF-$%XJMMTIPXDVSSFOUDBMJCSBUJPOQPJOU
“Ptn X ”. The “X” will be ashing.
d. Place the probe on the test sample for several times, raise the probe each time you replace it,
then press “CAL Key”, after “3 beeps”, it will display a mean value for the current calibration
point.
e. Press “Left Key” to conrm and end current calibration point, the “X” will be steady. Or press
“Right Key” to cancel and end current calibration point.
f. For more calibration points, use another calibration foil and repeat steps c, d and e.
g. When nished. Press “CAL Key” to exit calibration mode.
EN
 Loading...