4
18-AH77D1-1A-EN
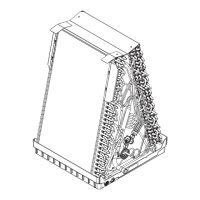
Figure 4
Legacy apex
“N” coils
Figure 5
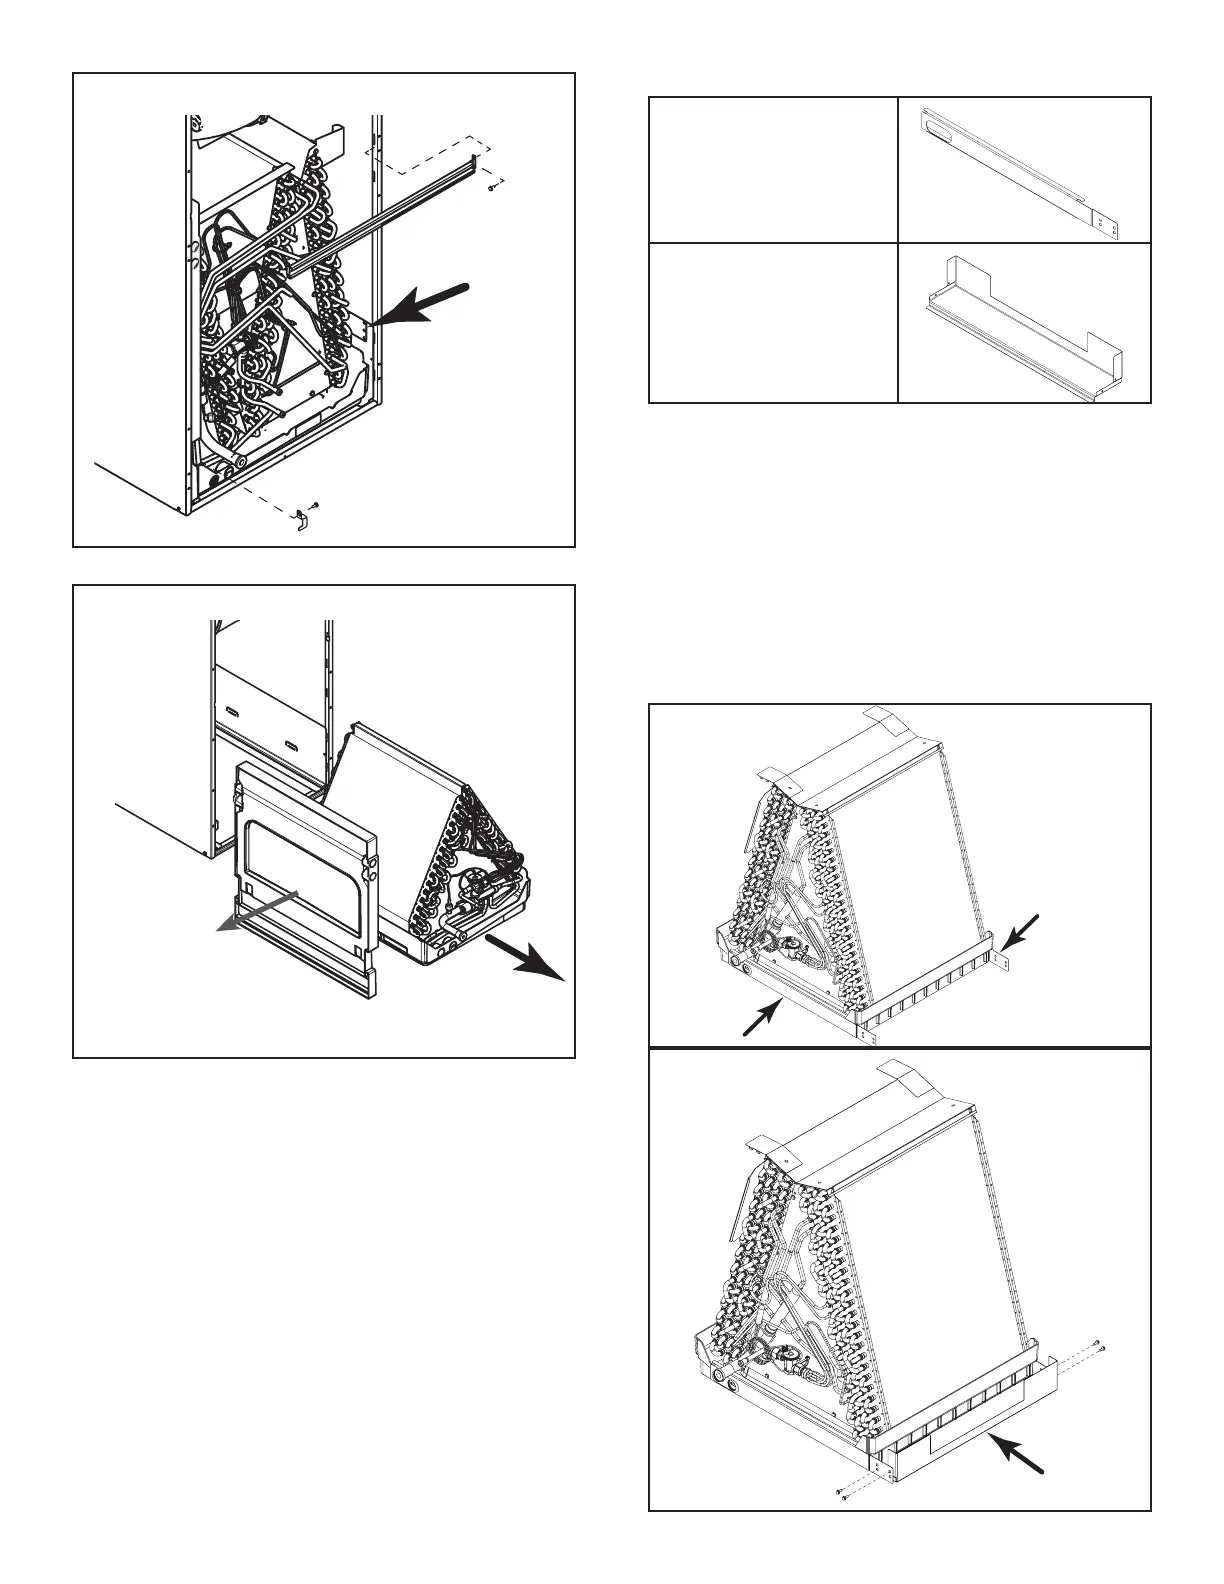
Figure 7
Figure 6
4.1.3 Orifice Metering Device Removal (if Equipped)
1. Remove the Schrader valve from the equalizer port
using a Schrader removal tool.
2. Loosen and remove copper liquid line tube fitting from
distributor assembly.
3. Remove orifice metering device from inside distributor.
4. Protect Schrader valve and orifice metering device
from debris. Retain both to reinstall later.
4.2 Install Retrofit Kit for 26.5” Wide
Cabinets
This retrofit kit will be installed when it is shipped with the
replacement coil only. This kit is only applicable for 26.5”
wide cabinets.
Kit Contents:
Small Bracket
Qty. 2
Large Bracket
Qty. 1
NOTE: Install the brackets always on the right side of the
coil assembly.
1. Remove kit contents from packaging.
2. Install two (2) small brackets, each on the front and
rear side bottom of the coil assembly. See Figure 6.
3. Install the large bracket between the two (2) small
brackets, align the mounting holes and secure using
the screws supplied with the kit. See Figure 7.
See Figure 8 for the assembled view of the coil assem-
blies.
 Loading...