KC2706-R04 190528
Covers Part #8880
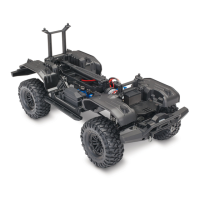
TRX-4 Traxx™ All-Terrain Track Set Installation Instructions
Kit Contents:
• TRX-4 Traxx (2 front, 2 rear)
• 2.5x12mm cap-head screws (8)
• 17mm wheel wrench
TRAXXAS.com
Traxxas, 6250 Traxxas Way, McKinney, TX 75070,
Phone: 972-549-3000, Fax: 972-549-3011, e-mail: support@Traxxas.com
Recommended for optimal performance (sold separately):
Part No. Description
2250
Servo, digital high-torque 330 coreless, metal gear (ball
bearing), waterproof
2255
Servo, digital high-torque 400 brushless, metal gear (ball
bearing), waterproof
8247X Servo horn, steering, metal/ 3x14 BCS (1)
2262 BEC, complete (includes receiver box cover and seals)
Front Left Rear LeftRear RightFront Right
2.5x10mm
CS
2.5x12mm
CS
Keep the drive teeth free
of debris while running
Forward
rollover height
Reverse
rollover height
M4x0.7mm
NL
Driving Tips
• Keep the drive teeth on the interior of each rubber track clear of debris to prevent the track from shifting out
of position or derailing during operation.
• Occasionally, the drive wheel may skip on the drive teeth of the track. This is normal and will not cause
damage to your truck. Check for any obstructions and/or reposition the truck before continuing.
• Observe the rollover height when driving over tall obstacles. Do not attempt to climb obstacles that are taller
than the rollover height of the Traxx (Fig. A). Be careful when reversing. The trailing wheel has a much lower
rollover height than the leading wheels; some obstacles will be too tall for the trailing wheel.
• Increased traction from the rubber tracks may cause your truck body to lean to one side while driving
through deep snow or thick mud. This is called torque twist. Installing stiffer suspension springs can reduce
torque twist in the chassis and provide additional stability.
Maintenance
• Always clean debris from the Traxx drive units after running, including snow buildup, mud, etc. Spray all metal
components, screws, bearings, and bushings with WD-40® or similar water displacing light oil. It is best to
remove the rubber tracks to gain access to all areas and to allow for complete cleaning of the assemblies.
• Clean the drive units using a garden hose with a spray nozzle. If a garden hose is not accessible, running the
Traxx in clear water, such as a stream or shallow pond, will remove much of the accumulated mud. Blow all
remaining water from the track assemblies with compressed air.
• DO NOT allow mud to dry on the drive units, as this will cause the assemblies to seize up and require full
disassembly and thorough cleaning.
• Refill the anti-rotation shocks (oil dampers) with 40wt silicone shock oil as necessary.
Note: The vehicle body, front/rear bumpers,
or the rock sliders may require minor trimming
for proper clearance after installation of the
Traxx drive units. A travel limiter has been pre-
installed in the rear shocks on the drive units
to minimize the amount of trimming needed
on the body. For more track articulation on
uneven terrain, remove the travel limiter;
additional body trimming may be required.
Install the TRX-4 Long Arm Lift Kit (part #8140,
8140R, or 8140X, sold separately) for additional
height and clearance with the body.
Note: Traxx drive units
are included for each
corner of the truck and
are marked for correct
installation: front left,
front right, rear left, rear
right. The drive units
must be installed in the
correct locations for
proper operation.
Remove the
M4x0.7mm
wheel nuts from
the stub axles
and remove all
four wheels and
tires. Retain and
reuse the wheel nuts.
Remove the 2.5x10mm cap-head screws from the
portal gearboxes.
Install the anti-rotation brackets on the portal gearboxes.
Position the brackets on the gearboxes until the tabs on the
bracket snap into place.
1
2 3
4 5
6
A
Install the drive units on the stub axles and reinstall
the wheel nuts; tighten securely. Reinstall the stub
axle nuts.
Secure the brackets with the included 2.5x12mm cap-head
screws (2).
2.5x10mm
CS
2.5x12mm
CS
Drive wheel
Visitez Traxxas.com/manuals pour télécharger
les instructions dans votre langue.
Visite la página Traxxas.com/manuals para
descargar el instrucciones en su idioma.
Auf Traxxas.com/manuals, können Sie
anleitung in Ihrer Sprache downloaden.
CAUTION: USE LOW GEAR
On models equipped with two-speed
transmissions, drive with the transmission in low
gear to prevent overheating and permanent motor
damage. On models equipped with single-speed
transmissions, the stock gearing (17-T pinion and
39-T spur gear) is suitable for general use in most
terrain with NiMH or 2s LiPo batteries; for mud or
snow use, or when using a 3s LiPo battery, you must
replace the stock gearing with an 11-T pinion and
45-T spur gear prior to driving.
Remove the stub axle nuts from
the Traxx drive units using the
included 17mm wheel wrench.