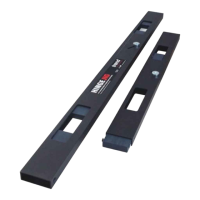
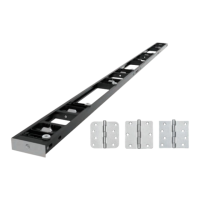
EasyManua.ls Logo

TREND KWJ750P User Manual

TREND KWJ750P
27 pages
To Next Page IconTo Next Page
Page #1 background imageLoading...
Page #1 background image
tool technology
KWJ750P
EN
Original Instructions
DE
Übersetzung Der Originalanleitung
FR
Traduction Des Instructions Originales
NL
Vertaling Van De Originele Instructies
P.5
P.14
P.24
P.33
P.42
Översättning Av De Ursprungliga Instruktionerna
SE

Questions and Answers:

TREND KWJ750P Specifications

General IconGeneral
BrandTREND
ModelKWJ750P
CategoryTools
LanguageEnglish

Summary

Original Instructions

Worktop Definitions

Definition of Surfaces on a Worktop

Defines the different surfaces of a worktop for routing operations.

Worktop Face Up

Specifies the worktop orientation with the top surface facing upwards for routing.

Worktop Face Down

Specifies the worktop orientation with the bottom surface facing upwards for routing.

Worktop Width

Defines the width of the worktop to be used with the jig.

Postformed Edge

Describes the rounded or shaped edge of the worktop.

Technical Data

Jig Thickness

Specifies the thickness of the jig itself.

Cutter Size

Indicates the diameter of the router cutter recommended.

Maximum Workpiece Thickness

States the maximum thickness of material the jig can accommodate.

Worktop Width Range

Defines the range of worktop widths the jig is designed for.

Guide Bush Size

Specifies the required diameter of the guide bush.

Weight

Provides the total weight of the jig.

Intended Use

Safety

General Safety Points

Provides crucial safety precautions for using the router jig and associated power tools.

Warnings

Clamp Usage and Router Path

Ensure clamps do not obstruct router path and are securely tightened.

Breakout Prevention

Router direction must be into the postform edge to prevent breakout.

Worktop and Jig Security

Ensure worktop is held securely and jig is clamped properly.

Plunge Router Operation

Release plunge on router at the end of each cut.

Working Position and Footing

Ensure comfortable working position and proper footing.

Hole Size and Radius

Check hole size suitability and note engraved radius values.

Cam Swivel and Waste Support

Swivel cams away from cutter path and support waste pieces.

Items Enclosed

Description of Parts

Items Required

Assembly and Adjustment

Recommended Cut Depths

Guides on setting router depth for accurate cuts and clearance.

Location Pin Identification

Explains how to use location pins to align template apertures.

Window Set Up

Procedure for setting up the jig's window for joint measurement.

Operation

Cam Swivel Warning

Ensure cams are swiveled out of the cut line before routing.

90° Right Hand Joint

Detailed steps for creating 90° right hand joints using the jig.

90° Left Hand Joint

Detailed steps for creating 90° left hand joints using the jig.

Square End Routing

Instructions for using the central slot to square cut worktops.

Peninsular Joint

Guidance on routing peninsular joints, including cut order.

Routing the Curved Peninsular

Steps for routing curved sections of a peninsular joint.

Routing 3/4" BSP Hole

Routing 35mm Circular Hinge Recess

45° Angle End Cut

Corner Radius

Mini and Narrow Zip Bolts

Strengthening the Joint

Accessories

Recommended Cutters

Lists recommended Trend router cutters for use with the jig.

Sub-base Set

Details the universal sub-base and guide bush for accurate routing.

Slim Line and Short Bolt Recesses

Sealing the Joint

30mm Guide Bush

Offset Pro Out of Square Device

Panel Connector Bolts

Biscuit Jointer for the Router

Flat Biscuit

Details Trend flat biscuit sizes for joint reinforcement.

Environmental Protection

Guarantee

Spare Parts List

Troubleshooting

Joint Fit Incorrect at Radius

Addresses issues with incorrect cutter/guide bush diameter or pin placement.

Irregular Gaps When Clamped

Troubleshoots gaps caused by guide bush drift or particle board chips.

Chipped Laminate

Causes and remedies for chipped laminate during routing.

Jig Slipping on Material

Solutions for jig movement during operation, including clamp security.

Cut Joints Not Square

Diagnoses and fixes for non-square joints due to router tilt or jig flex.

Assembled Joint Not Flush or Bowed

Addresses issues with worktop thickness or flatness affecting joint flushness.

Maintenance

Use of Genuine Parts

Emphasizes using only Trend original spare parts and accessories.

Cleaning

Instructions for regular cleaning of the jig with a soft cloth.

Lubrication

States that the jig requires no additional lubrication.

Storage

Recommendations for storing the jig after use.

Related product manuals