ASSEMBLY INSTRUCTIONS
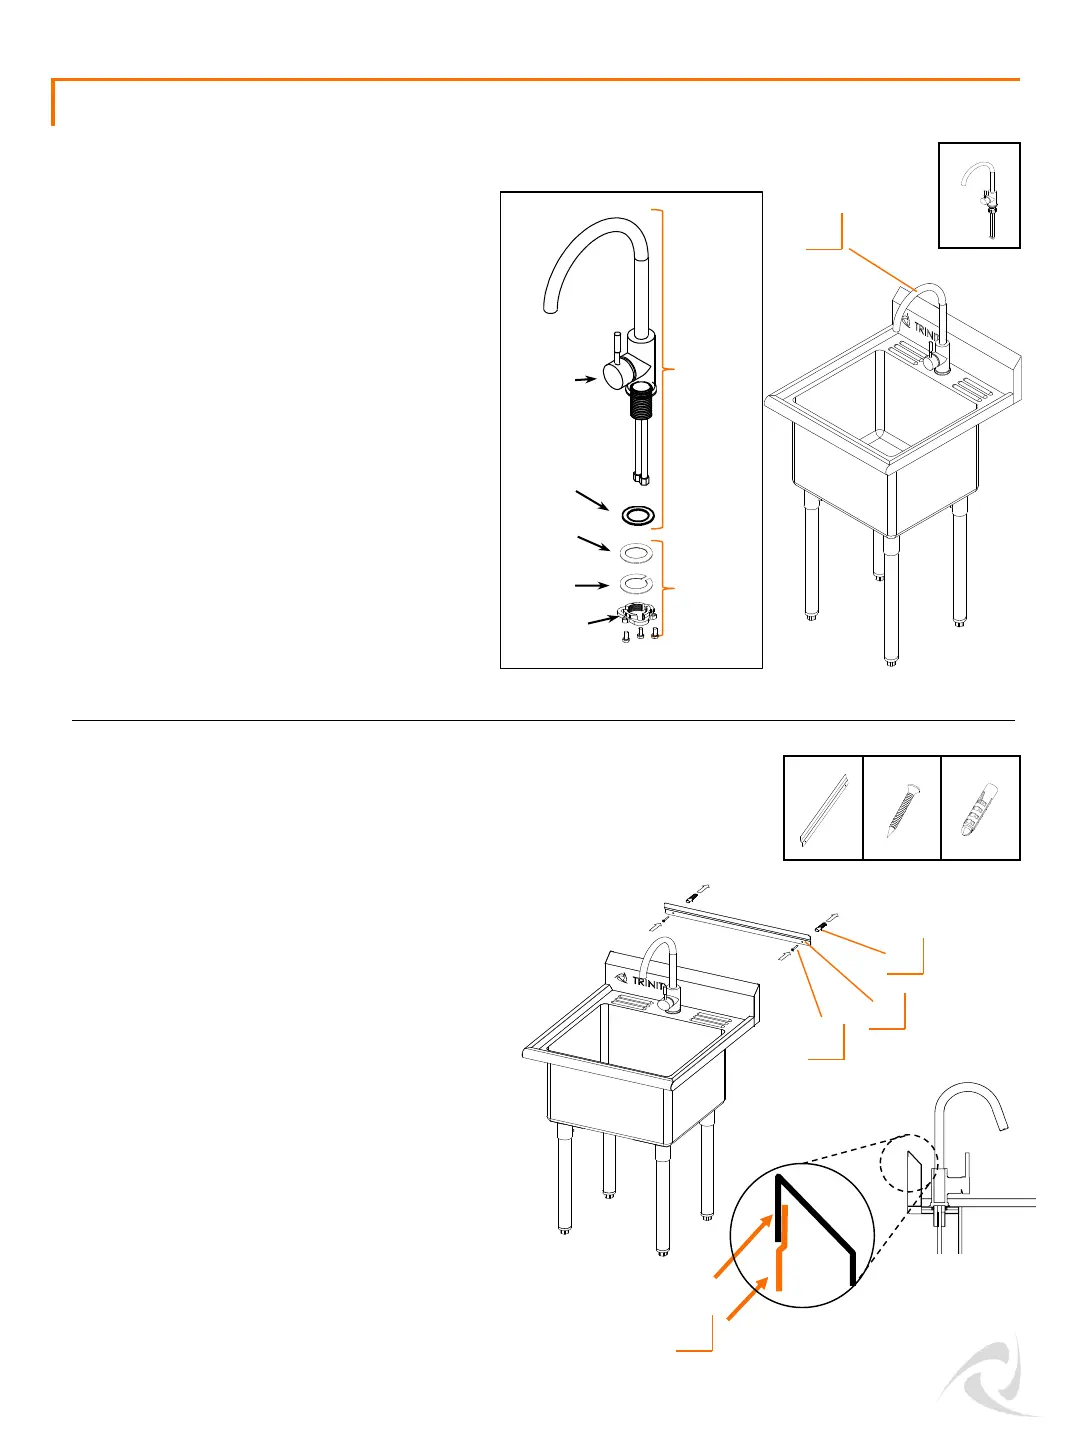
Unscrew each screw securing Lock Nut to
bottom of FAUCET ASSEMBLY (C) and remove
Lock Nut w/Screws, Metal Washer and
Rubber Gasket.
From top side, insert FAUCET ASSEMBLY (C)
through hole. Make sure Metal Base is on top
of SINK (A). Align faucet handle facing
towards front of SINK (A). From under SINK
(A), first slide on Rubber Gasket, then Metal
Washer, and lastly, screw on Lock Nut
w/Screws pointed upward. Tighten Lock Nut
as much as you can by hand and tighten
screws with a screw driver.
STEP 3
C (1)
C
On top of
the sink
Under
the sink
Faucet
Metal
Base
Rubber
Gasket
Lock Nut
w/ Screws
Carefully move sink against wall at your desired
location. If needed, use a pencil to mark off
mounting height of BRACKET (H).
Position BRACKET (H) on wall, marking off
fastening location on wall through holes on
BRACKET (H). Drill holes in marked locations.
Insert ANCHOR (J) completely into each drilled
hole. Fasten MOUNTING SCREWS (I) through
these holes into wall or anchors tightly with
a screwdriver.
Slightly lift sink and hook flange of sink over
BRACKET (H). Adjust Feet Levelers to ensure sink
is stable and level. Connect Hoses and Drain to
plumbing system.
Note: Bracket is to prevent sink tipping, NOT for
mounting sink to a wall. Do NOT mount sink to a
wall without legs.
STEP 4
H (1) I (2) J (2)
H
I
J
flange
H
© 2020 TRINITY - 800.985.5506
3
Faucet Assembly (C)
Metal
Washer