Do you have a question about the Tripp Lite DWM1327SE and is the answer not in the manual?
Product is warranted against defects in material and workmanship for 5 years from purchase.
Register your product online for quicker service and a chance to win a Tripp Lite product.
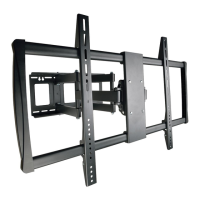
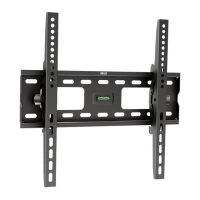
Lists included items for Package M, such as the mount and hex keys.
Lists included items for Package W, such as anchor bolts and concrete anchors.
Find and mark the precise position for wall mount holes on the stud.
Drill pilot holes into the wall studs at the marked locations.
Screw the wall mount firmly onto the wall using appropriate hardware.
Ensure screws anchor into stud centers; use a stud finder for accuracy.
Find and mark the precise position for wall mount holes on the concrete surface.
Drill pilot holes into the concrete wall using the correct anchor size.
Screw the wall mount firmly onto the wall with concrete anchors and bolts.
Verify concrete thickness, avoid mortar joints, and use slow drill settings.
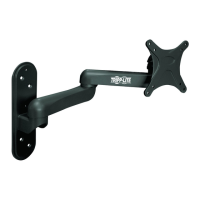
Align and attach the display's rear mounting holes to the VESA plate.
Firmly secure all screws attaching the display, but do not over-tighten.
Tighten the adjustment screw using the provided Hex Key to correct the tilting angle.
Use Hex Key to adjust head/arm bolts for desired motion tension (tight or loose).
| Type | Wall Mount |
|---|---|
| Weight Capacity | 50 lbs |
| Material | Steel |
| Color | Black |
| VESA Compliance | 75 x 75 mm, 100 x 100 mm |
| Maximum Weight Capacity | 50 lbs |
| Number of Monitors Supported | 1 |
| Mounting Style | Wall Mount |
| Load Capacity | 50 lbs |
| Mounting Type | Wall Mount |
| Adjustable Depth | No |
| Finish | Powder Coated |
| Maximum Screen Size Supported | 27 inches |