EasyManua.ls Logo

Tripp Lite PDU3V602D354 User Manual

Tripp Lite PDU3V602D354
68 pages
To Next Page IconTo Next Page
Page #1 background imageLoading...
Page #1 background image
1. Important Safety 2
Instructions
2. Installation 3
2.1 Mounting the ATS 3
2.2 Mounting the Power Strip 4
2.3 Connecting the Power Strip 4
to the ATS
2.4 Connecting the ATS 5
2.5 Networking the ATS 5
3. Features 6
4. Digital Display 8
5. Using the Digital Display 11
5.1 Navigating Display Menus 11
and Submenus
5.2 Navigating Config Menus 18
and Submenus
6. Configuration and Operation 20
6.1 Automatic Transfer Switch 20
7. Service 22
8. Warranty and Product 22
Registration
Español 24
Français 47
1
Owner’s Manual
PDU360AT6G60
(Series Number: AG-013D)
3-Phase 1U Monitored Rack PDU
with Automatic Transfer Switch (ATS)
PDU3V602D354, PDU3V602D354A,
PDU3V602D354B
(Series Number: AG-013E)
3-Phase Vertical Power Strip
1111 W. 35th Street, Chicago, IL 60609 USA • www.tripplite.com/support
Copyright © 2016 Tripp Lite. All rights reserved.
PROTECT YOUR INVESTMENT!
Register your product for quicker service
and ultimate peace of mind.
You could also win an
ISOBAR6ULTRA surge protector—
a $100 value!
www.tripplite.com/warranty
16-01-031-933588.indb 1 3/22/2016 4:14:15 PM
Question and Answer IconNeed help?

Do you have a question about the Tripp Lite PDU3V602D354 and is the answer not in the manual?

Tripp Lite PDU3V602D354 Specifications

General IconGeneral
Network ManagementNo
MeteringNo
Input Frequency50/60 Hz
Form FactorRackmount
Mounting TypeVertical (0U)
Power Cord Length10 ft
InputL6-30P
PhaseSingle
Agency ApprovalsUL, cUL

Summary

Important Safety Instructions

Installation Procedures

Mounting the Automatic Transfer Switch (ATS)

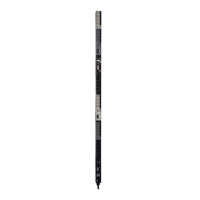
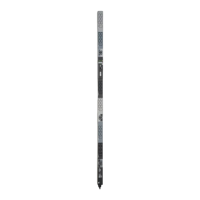
Step-by-step guide for mounting the ATS unit in a rack.

Mounting the Power Strip

Instructions for installing the power strip within the rack enclosure.

Connecting the Power Strip to the ATS

Details on connecting power strip cords and circuit detection cable to the ATS.

Connecting the ATS to Power Sources

Guide for connecting the ATS's 3-phase AC input plugs to power sources.

Product Features Overview

Digital Display Functionality

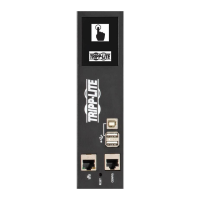
Explains the digital display showing source status and measurements.

Digital Display and Indicators

3-Digit Measurement Display

Shows measured values like Amperage, Kilowatts, Voltage, etc.

Source Status LED Patterns

Detailed explanation of LED patterns for source status.

Using the Digital Display

Navigating Measurement Displays

Guide to cycling through measurement displays like Amps, kW, Volts, Hz, PF.

Accessing Fault Code Menu

Accessing and displaying fault codes when a breaker trips.

Navigating Configuration Menus

Guide to configuring settings like temperature units and preferred source.

Preferred Source Selection

Choosing between Source A or Source B as the primary power source.

Configuration and Operation

ATS Source Selection Logic

Logic for selecting the preferred source based on quality.
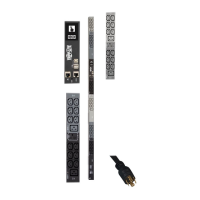
Related product manuals