EasyManua.ls Logo

Triton LocBoard LB1-B - User Manual

Triton LocBoard LB1-B
2 pages
Print Icon
To Next Page IconTo Next Page
Loading...
Installation & Assembly Instructions
Please contact our Customer Service Division with any questions at:
30700 D Carter Street ∙ Solon, OH 44139 ∙ (P) 440.248.5480 ∙ support@tritonproducts.com
For a full line of products visit www.tritonproducts.com 1 INLBD2101
Read all instructions completely before installing. Should you have any questions about your installation,
please call Customer Service at 440-248-5480
These rugged steel tool boards can be easily and quickly positioned to conform to your storage
requirements.
Boards can be positioned side by side or above one another in vertical and horizontal mounting
positions.
Additional boards and hooks can be added to your system as your needs continue to grow.
LocBoards fasten directly to concrete, solid wood and hollow wall structures without the use of
furring strips. (Mounting hardware not included.)
LocBoard™ Installation:
Hardware need for installation: (NOTE DO NOT USE Tapered Head Screws.)
1. For hollow or concrete block wall: Quantity=12 Each #8- 2” long Phillips pan head machine screws and
#8 plastic commercial grade wall anchors. Head diameter size of screws should not exceed .35” in order
to fit through square holes in front of boards.
2. For wood stud or wood headers: Use #8-2” long wood screws with Phillips pan heads
Tools needed for Installation:
Level, Marker, 7/32” standard or masonry drill bit, 7/64 std bit for wood studs, #2 Phillips head screw driver,
power drill.
1. Select wall location for your LocBoards and the desired vertical or horizontal mounting pattern you
wish to mount in. When selecting a location for mounting always make sure that mounting locations
do not fall in line with, are adjacent to, or interfere with any internal or external electrical wiring, wall
mounted or built-in electrical appliances, heaters, gas lines, ductwork or plumbing inside of wall, or
are located on the opposite side of any wall surface from where you are mounting. If you are unsure,
please consult a professional before proceeding with installation.
2. (Using Images on Back) There are four screw holes on the back of your LocBoard that are accessible
through the square holes on the front.
3. Place 1 LocBoard flat against wall surface. While using a level to make sure your board is straight and
squared, looking through the square holes on the front of the board, mark the centers of all 6 screw
holes onto your wall surface. Note: Installation for first board should be completed before marking
mounting holes for the second board.
4. Pre-drill holes for #8 wall anchors marked in Step 3 using 7/32" standard or masonry drill bit
depending on wall surface. If you hit a wood stud stop drilling and using a 7/64” drill bit create a
pilot hole for the wood screw Note: Avoid over drilling holes. (Plastic wall anchors should fit snug.)
5. Insert plastic wall anchors in each hole drilled in Step 4 except where you drilled 7/64” pilot hole for
wood stud.
6. Align mounting holes in wall surface with screw holes in pegboard. Insert wood screws through the
front square opening and into pre-installed plastic wall anchors. Tighten all screws. The head of each
screw should not be visible.
7. Repeat Steps 2-6 for second LocBoard installation.
Hook Installation: Insert the hook back locking tabs into front square openings of tool board.
Slide each hook securely into place and install required number of LocScrews (LocScrews are
supplied with each pack of LocHooks.)
LB1-B, T, W - (2) 24x 24x 9/16 LocBoard® Pegboards
Question and Answer IconNeed help?

Do you have a question about the Triton LocBoard LB1-B and is the answer not in the manual?

Summary

LocBoard Installation

Hardware Requirements

Details required screws, anchors, and their specifications for mounting.

Tools for Installation

Lists essential tools needed to properly install the LocBoard system.

Select Mounting Location

Choose a wall location avoiding electrical wiring, appliances, and utilities.

Identify Mounting Holes

Locate the four accessible screw holes on the back of the LocBoard.

Mark Wall for Mounting

Position the board, ensure it's level, and mark screw hole centers on the wall.

Drill Pilot Holes

Drill pilot holes using appropriate bits for anchors or wood studs.

Insert Wall Anchors

Insert plastic wall anchors into drilled holes, except for wood stud pilot holes.

Secure LocBoard

Align board holes, insert screws, and tighten securely. Screw heads should not be visible.

Hook Installation

Instructions for attaching hooks to the LocBoard system.

Warranty Information

Product Liability

Mounting Diagrams and Details

Overview

This document outlines the installation and assembly instructions for the Triton Products LB1-B, T, W LocBoard® Pegboards, which are steel tool boards designed for organizing tools and other items.

Function Description

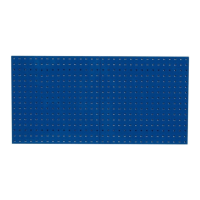
The Triton Products LocBoard® Pegboards are rugged steel tool boards designed for efficient and organized storage. These boards can be easily positioned to meet various storage needs, offering flexibility in both vertical and horizontal mounting configurations. They are designed to be expandable, allowing users to add more boards and hooks as their storage requirements grow. A key feature of these LocBoards is their ability to fasten directly to concrete, solid wood, and hollow wall structures without the need for furring strips, simplifying the installation process. The unique design of the LocBoards ensures that each LocHook can be securely mounted both vertically and horizontally, providing versatile hanging options for a wide range of tools and items. For optimal performance and to support heavy loads, the panels must be securely fastened to sound wall structures.

Usage Features

The LocBoard® Pegboards offer several usage features that enhance their functionality and user experience:

  • Flexible Positioning: The boards can be positioned side by side or one above another, allowing for both vertical and horizontal mounting. This flexibility enables users to customize their storage layout to best fit their available wall space and specific organizational needs.
  • Expandable System: The system is designed to be modular. Users can add additional LocBoards and LocHooks as their storage requirements increase, making it a scalable solution for evolving organizational needs.
  • Direct Wall Fastening: LocBoards are engineered to fasten directly to various wall types, including concrete, solid wood, and hollow wall structures. This eliminates the need for additional furring strips, simplifying installation and providing a clean, flush mount.
  • Secure Hook Mounting: Each LocHook features a unique capability for secure mounting in both vertical and horizontal orientations. This versatility allows for optimal placement of tools and ensures that items remain securely in place. The hooks are designed with back locking tabs that insert into the front square openings of the tool board, and are then slid into place and secured with LocScrews (supplied with each pack of LocHooks).
  • Durable Construction: Made from rugged steel, these tool boards are built to withstand the demands of a workshop or garage environment, ensuring long-lasting performance and reliable storage.
  • Installation Guidance: The manual provides detailed, step-by-step instructions for installation, including specific hardware recommendations and tools needed. This ensures that users can properly install the LocBoards for maximum stability and safety.
  • Safety Precautions: The instructions emphasize critical safety considerations during installation, such as ensuring that mounting locations do not interfere with internal or external electrical wiring, gas lines, or plumbing. This helps prevent potential hazards and ensures a safe installation process.
  • Clear Marking and Drilling Instructions: The manual guides users on how to mark and pre-drill holes accurately, specifying drill bit sizes for different wall types (standard or masonry for #8 wall anchors, and a smaller bit for wood studs). It also advises against over-drilling to ensure a snug fit for plastic wall anchors.
  • Visibility of Fasteners: Once installed, the head of each screw should not be visible, indicating a proper and secure fastening that maintains the aesthetic of the board.

Maintenance Features

While the document primarily focuses on installation, some aspects relate to the long-term maintenance and care of the LocBoard® Pegboards:

  • Durable Material: The use of rugged steel for the tool boards inherently contributes to their low maintenance. Steel is known for its durability and resistance to wear and tear, meaning the boards themselves will require minimal upkeep.
  • Secure Fastening for Longevity: Proper installation, as detailed in the instructions, is crucial for the longevity of the system. Ensuring that panels are securely fastened to sound wall structures helps prevent loosening or damage over time, reducing the need for frequent adjustments or repairs.
  • Warranty Information: Triton Products offers a two-year warranty against defects in material and workmanship from the date of original purchase. This warranty provides a safety net for users, ensuring that any manufacturing defects will be addressed through replacement parts, product replacement, or a refund, provided the product was used as intended under normal household conditions and proof of purchase is supplied. This reduces the burden of unexpected repairs or replacements due due to manufacturing flaws.
  • Customer Support: The availability of customer service for any questions regarding installation or assembly indicates ongoing support for users. This resource can help troubleshoot issues, clarify instructions, and provide guidance, which indirectly contributes to the proper maintenance and long-term functionality of the product.
  • Avoidance of Tapered Head Screws: The explicit instruction "NOTE DO NOT USE Tapered Head Screws" is a maintenance-related feature. Using the correct type of screws (Phillips pan head machine screws or wood screws with Phillips pan heads) ensures proper fit and secure fastening, preventing damage to the board or fasteners that might occur with incompatible screw types. This helps maintain the structural integrity of the installation over time.
  • Proper Anchor Insertion: The instruction to insert plastic wall anchors snugly and avoid over-drilling holes is critical for maintaining the integrity of the wall mounting. A secure anchor prevents the screws from stripping or loosening, which would compromise the board's stability and require re-installation or repair.
  • Regular Inspection (Implied): While not explicitly stated as a maintenance feature, the nature of a tool board suggests that periodic inspection of the hooks and fasteners would be beneficial to ensure everything remains secure, especially if heavy loads are frequently stored. This proactive approach can prevent minor issues from escalating.
  • Cleanability: As steel products, the LocBoards are generally easy to clean with standard cleaning agents, contributing to their low-maintenance profile and ability to maintain a professional appearance in a workshop setting.

Triton LocBoard LB1-B Specifications

General IconGeneral
MaterialSteel
ColorBlack
Hole Diameter0.25 inches
MountingWall
Surface TexturePowder Coated
Dimensions18 x 36 inches
UsageTool Storage and Organization