12
GB
front panel for better clamp locations
• Ifyourbladewillnottthroughtheslotbecauseyou
have a riving knife fitted to the saw: extend the slot
towards the front of the insert by using a hacksaw
blade or a file on edge
• Ifoneoftheclampsfoulsthesawmotor:replaceitwith
one of the Temporary Saw Clamps (18) on a shortened
coach bolt
Saw blade cannot be adjusted fully square to the
table
• First,checkthatthesawdoesnothavealimitscrew
in the baseplate, underneath the angle quadrant, that
is preventing you from reaching 0°. Check that nothing
else is fouling the saw motor or top guard, and thus
preventing full tilt
• Checkthatthemountingsbetweenthesawbaseplate
and the motor housing are reasonably firm. Tighten
them, if possible, or upgrade your saw
• Ifyoucannotndanyothersolution,removeyoursaw
and insert a full length strip of thin packing between
the narrow part of the baseplate and the table, to
slightly tilt the saw. Ideally tape or glue the strip to the
table, then re-tighten the clamp knobs
Very thin saw blades (teeth approx. 1.5mm thick)
Thin slitting blades can be fitted, though we
recommend standard blades approx 2.5mm thick,
because:
• Thinbladesareveryexibleandareeasilybentor
twisted when fitting the saw, making them difficult to
align
• Withathinbladethescaleswillonlybeaccuratewhen
the fence is set on the right hand side of the blade. You
will have to make an allowance when setting the fence
to the left
• Athickerbladewillnotcausetheaboveproblems,
and should also give you smoother cuts, less flexing in
dense wood, and better results when planing
NOTE: 1.5mm thin blades cut 2.0 to 2.2mm wide.
If fitting a thin blade saw, insert a strip of 0.5mm
cardboard between the blade and the fence, as a
temporary spacer, and hold the blade against it whilst
aligning the saw. You will not be able to spin the blade
by hand.
Protractor scale is slightly inaccurate
• Thescalepointercanbeadjustedbyusingasmall
screwdriver to lever out the lens, and then prising the
pointer sideways
• First,maketestcutsandadjusttheprotractorangle
setting until you are cutting exactly square. Then insert
the screwdriver blade into the appropriate slot beside
the pointer, and twist until the tip of the pointer is
exactly opposite 0°
Workpiece binds on overhead guard support when
ripping
• First,checkthatthefencewassetatidenticalreadings
front and rear. If it was, try increasing the rear fence
setting slightly (0.5mm – 1mm) and repeat the cut
• Checkthatthesawbladeiscorrectlylinedupwiththe
overhead guide support
• Checkthattheoverheadguardsupportissquaretothe
table. To square it up: use a straight piece of material,
such as a block of wood, to spread the load as you
carefully bend it square
• Iftheproblempersists:tryre-aligningthe saw
slightly so that the overhead guard support fits into the
kerf of the blade without jamming
High spots, burn marks and re-cut damage on the
workpiece
If the back of the blade re-cuts or burnishes the
workpiece when you cross-cut against the protractor,
or when you rip against the parallel fence, the most
likely reason is that your saw is mounted slightly skew.
Before realigning your saw, check a few other possible
causes:
• Removethebladefromthesaw,checkthatthearbour
and washers are clean and that the blade is well
seated. If an arbour-reducing washer is fitted, make
sure it is a snug fit and not proud of the blade disc.
• Checkforbladeatnesswithametalstraight
edge at various points across the centre hole. If
significantly buckled, replace the blade
• Checkforarbouroatinyoursawbearingsby
disconnecting the power, gripping the blade
nut and pulling in and out in the direction of the
shaft. Any movement is undesirable. If you want
perfectly square cuts, you may have to repair or
replace your saw
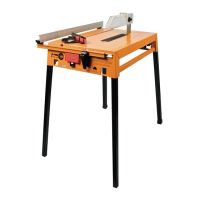
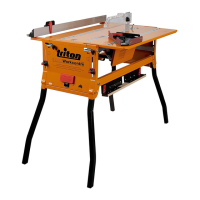
Assembly
 Loading...