Wartungs- und Pflegehinweise:
Reinigen Sie das Gerät nach jeder Benutzung von Feilstaub. Benutzen Sie für die Bedieneinheit ein leicht mit Wasser be-
feuchtetes Tuch, für das Handstück eine weiche Bürste.
Abhängig von der Laufleistung sollte die Schleifkohle im Mikromotor des Handstücks ca. jährlich ausgetauscht werden. Um
die Schleifkohlen (erhältlich über Ihren Fachhändler) zu tauschen, trennen Sie zunächst das Handstück von der Bedienein-
heit.
1. Lösen Sie die beiden Schrauben der Motorenabdeckung (1) und ziehen Sie danach Abdeckung und Anschlusskabel ab.
2. Lösen Sie die Schrauben an den Kontaktblechen (2) und entnehmen Sie die Kohlen (3).
3. Ersetzen Sie die Kohlen und setzen das Handstück in umgekehrter Reihenfolge wieder zusammen.
Lassen Sie das Handstück nun ohne Aufsatz bei ca. 10.000 U/min etwa 30 Minuten laufen, damit die Kohlen eingeschliffen
werden.
HINWEIS: Nach dem Wechsel tritt meist ein verändertes Laufgeräusch auf, welches sich nach dem Anschliff der Kohlen
jedoch wieder normalisiert.
Weitergehende Wartungsmaßnahmen sind nicht vorgesehen. Beachten Sie bitte, dass über diese Bedienungsanleitung hi-
nausgehende Maßnahmen den Verlust der Gewährleistung nach sich ziehen. Darüber hinaus bezieht sich die Gewährleistung
nicht auf normalen Verschleiß von Bauteilen wie Schleifkohlen und Kugellager sowie Zweckentfremdung und fehlerhaften
Gebrauch.
Maintenance and care:
Clean the device after each use. For the control unit, use a cloth slightly moistened with water. For the handpiece, use a soft
brush.
Depending on working hours, the carbon brushes in the micro motor housing will have to be replaced yearly. To replace the
carbon brushes (available from your dealer), disconnect the handpiece of the control unit.
1. Loose the two screws of the engine cover (1) and then pull off cover and connecting cable.
2. Loose the screws on the contact sheet (2) and remove the carbon brushes (3).
3. Replace the brushes and reassemble the handpiece in reverse order.
Let the handpiece run for about 30 minutes with approx. 10,000 rpm so that the brushes are grounded.
NOTE: After the change usually occurs a change in noise level, which returned to normal after the brushes are grounded.
Further maintenance is not provided. Please note that manintenace steps beyond the steps mentioned in this manual will cau-
se a loss of warranty. In addition, the warranty does not refer to normal wear and tear of components such as carbon brushes
and ball bearings as well as misuse and misapplication.
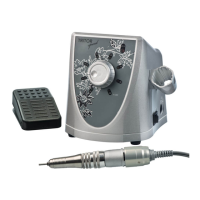
Technische Daten / Technical data: Lieferumfang / Delivery:
Bedieneinheit / Control Unit: - Steuergerät / Control unit
- Micro Motor Handstück / Handpiece
Aufnahme / Input: 220/240V, 50/60Hz - Fusspedal / Foot Pedal
Leistung / Output: 25W - Ersatz-Schleifkohle / Spare Carbon Brushes
Sicherung / Fuse: 250VT1AL
Handstück / Handpiece:
Aufnahme / Input: 25V, 0,5A
max. Drehzahl / max. Speed: 35.000 U/min
Schaftdurchmesser / Shank diameter: 2,35mm (ISO 7785-2)
1 2 3
050820161