BODY
SEALING
RUBBER
SECTION
THR~ ATTACHMENT
POINT.
NOTE
:-
'
7T.H
CLIP
IN
PILLAR
YDIA.
HOLES
SEALING
RUBBER
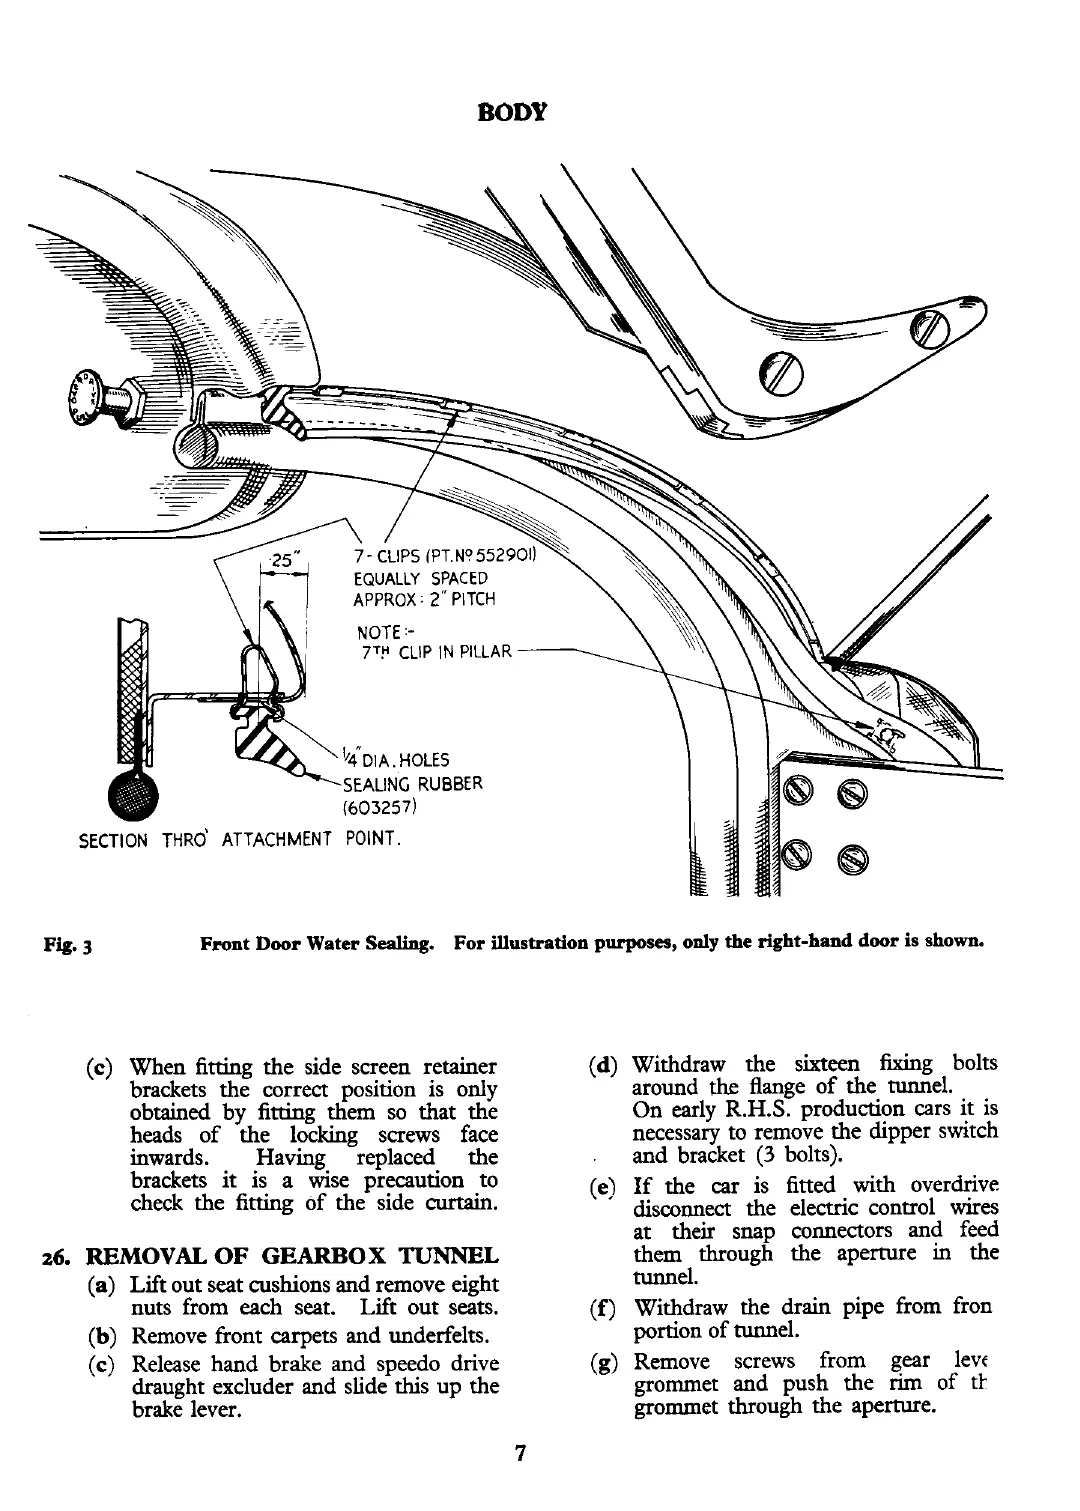
Front Door Water
Sealing.
For illustration
purposes,
only
the
right-hand door is shown.
(c)
When fitting the side screen retainer
brackets the correct position is only
obtained by fitting them so that the
heads of the locking screws face
inwards.
Having
replaced the
brackets it is a wise precaution to
check the fitting of the side
curtain.
26.
REMOVAL
OF
GEARBOX
TUNNEL
(a)
Lift out seat cushions and remove eight
nuts from each seat. Lift out seats.
(b)
Remove front carpets and underfelts.
(c)
Release hand brake and speedo drive
draught excluder and slide this up the
brake lever.
(d)
Withdraw the sixteen fixing bolts
around
the
flange of the tunnel.
On early R.H.S. production cars it is
necessary to remove the dipper switch
and bracket
(3
bolts).
(e)
If
the car is fitted with overdrive.
disconnect the electric control
wires
at their snap connectors and feed
them through the aperture in the
tunnel.
(f)
Withdraw the drain pipe from fron
portion of tunnel.
(g)
Remove screws from gear levr
grommet and push the rim of
tf
grommet through the aperture.