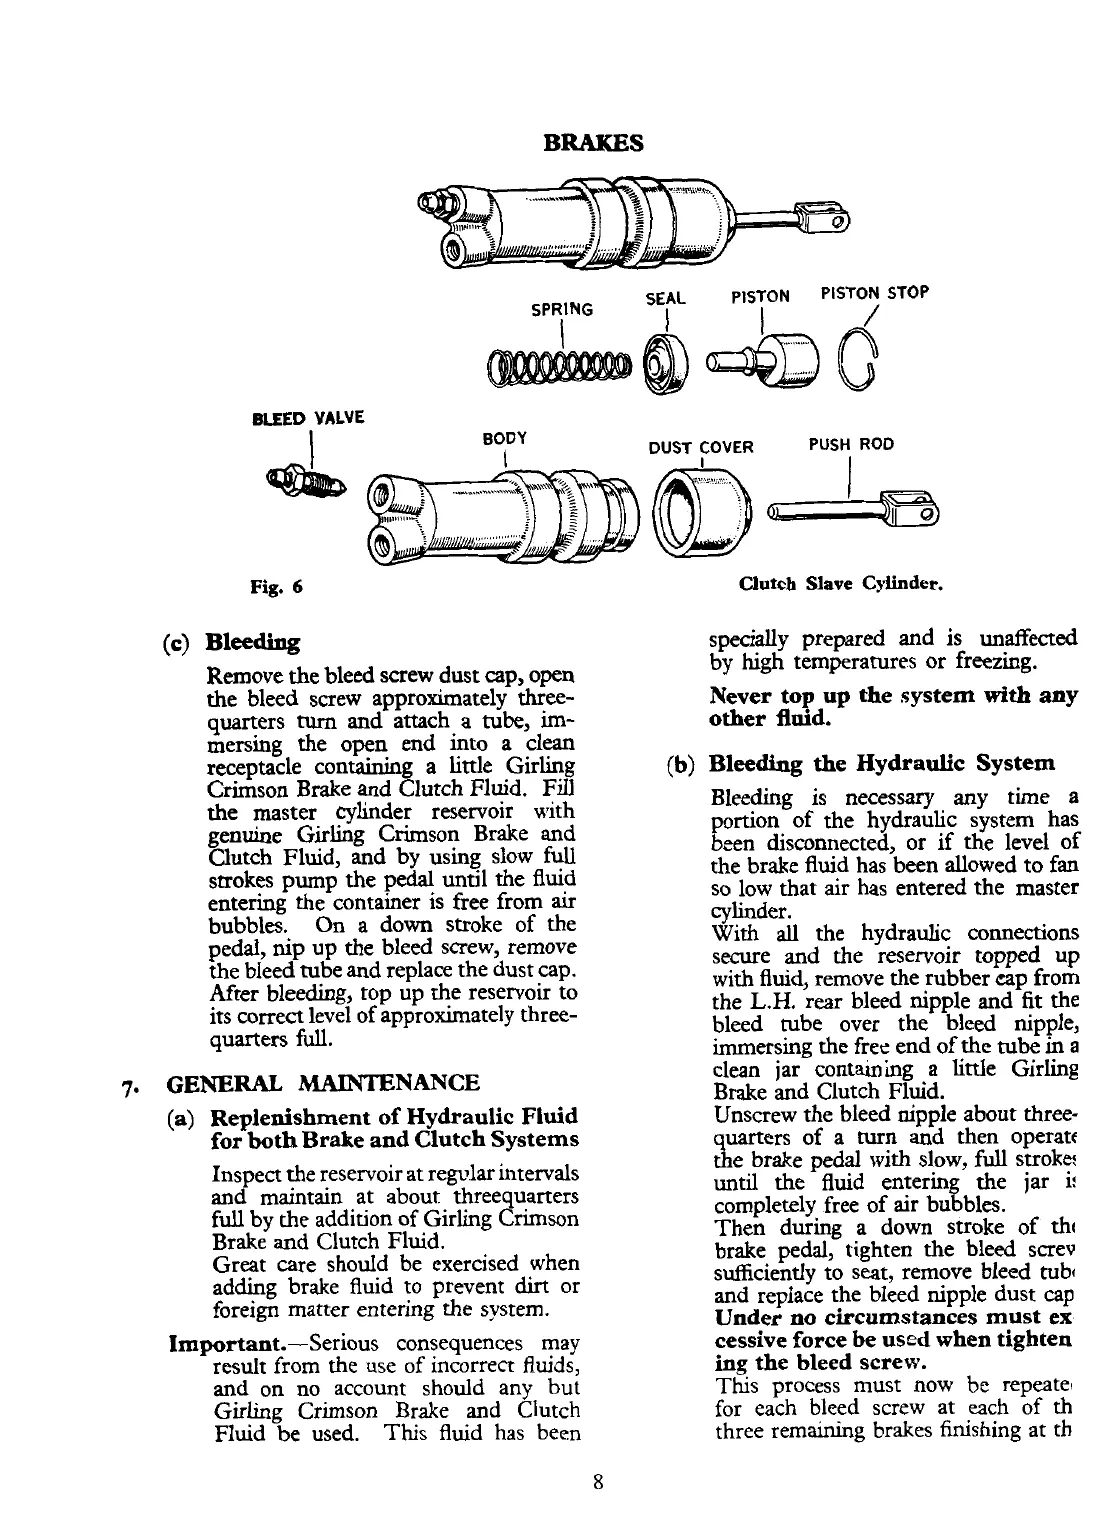
BRAKES
SPRING
SEAL
I
PISTON
I
PISTON
STOP
/
BLEED
VALVE
BODY
DUST
COVER
PUSH
ROD
Fig.
6
Clutch
Slave
Cylinder.
(4
Bleeding
Remove the bleed screw dust cap, open
the bleed screw approximately three-
quarters
turn
and attach a tube,
im-
mersing the open end into a clean
receptacle containing
a
little Girling
Crimson Brake and Clutch Fluid.
Fill
the master cylinder reservoir with
genuine Girling Crimson Brake and
Clutch Fluid, and by using slow fdl
strokes pump the pedal until the fluid
entering the container is free from
air
bubbles. On a down stroke of the
pedal, nip up the bleed screw, remove
the bleed tube and replace the dust cap.
After bleeding, top up the reservoir to
its correct level of approximately three-
quarters
full.
7.
GENERAL
MAINTENANCE
(a) Replenishment of Hydraulic Fluid
for
both
Brake and Clutch Systems
Inspect the reservoir at regdar intervals
and maintain at about threequarters
full by the addition of Girling Crimson
Brake and Clutch Fluid.
Great care should be exercised when
adding brake fluid to prevent
dirt
or
foreign matter entering the system.
Important.-Serious consequences may
result from the use of incorrect flmds,
and on no account should any but
Girling Crimson Brake and Clutch
Fluid be used. This fluid has been
specially prepared and is unaffected
by high temperatures or freezing.
Never top up the system
with
any
other fluid.
Bleeding
the Hydraulic System
Bleeding is necessary any time
a
portion of the hydraulic system has
been disconnected, or
if
the level of
the brake fluid has been allowed to fan
so low that air has entered the master
cylinder.
With
all
the hydraulic connections
secure and the reservoir topped up
with fluid, remove the rubber cap from
the
L.H.
rear bleed nipple and
fit
the
bleed tube over the bleed nipple,
immersing the
free end of the tube in
a
clean jar containing
a
little Girling
Brake and Clutch Fluid.
Unscrew the bleed nipple about three-
quarters of a turn and then operate
the brake pedal with slow, full stroke5
until the fluid entering the jar
i!
completely free of air bubbles.
Then during a down stroke of thc
brake pedal, tighten the bleed screv
sufficiently to seat, remove bleed tub(
and replace the bleed nipple dust cap
Under no circumstances must ex
cessive force be used when tighten
ing
the bleed screw.
This process must now
be
repeate~
for each bleed screw at each of th
three remaining brakes finishing at
th