COOLING
SYSTEM
(f) The thermostat can be removed from
g.
TESTING
THE
lXERMOSTAT
housing by removing the remainder of
Remove the thermostat from its housing as
the front cover nuts (already loosened
described on page
2.
It
should be tested in
in para. c) but after the removal of the
water, at a suitable temperature employing
joint washer.
a thermometer to ascertain that the valve
does commence to open at the correct tem-
6.
TO REPLACE THERMOSTAT
perature 158°F. There is no need to check
HOUSING
the temperature at which the valve is fully
open as this follows automatically.
The replacement is the reversal of the re-
moval but care should be taken concerning
the following points.
(a)
That the contact surfaces of the house-
ing and the cover are perfectly clean
and do not bear traces of the old joint
washer. Failure to
obseme this point
may lead to water leakages.
(b)
The thermostat is fitted to the housing
first and followed next by the joint
washer.
In
no circumstances should
the joint washer be fitted first.
7.
TO REMOVE THE THERMOSTAT
ONLY
(Fig.
5)
(a) Drain the cooling system.
See page
1.
(b) Disconnect the top hose.
(c) Withdraw the thermostat housing front
cover by removing the three nuts and
lock-washers. Remove the petrol pipe
clip on the lower right hand stud.
On cars from Commission No. TS. 1201
onwards there are only two front cover
attachment studs. The lower one
accommodating the petrol pipe clip.
(d)
Remove the joint washer before re-
moving the thermostat.
8.
TO REPLACE THERMOSTAT
The replacement is the reversal of the
removal but care should
be
taken concern-
ing the following the points.
(a) That the contact surfaces ofthe housing
and the cover are erfectly clean and do
not bear traces o
?
the old joint washer.
Failure to observe this point may lead
to water leakages.
(b) The thermostat is fitted to the housing
first and followed next by the joint
washer. In no circumstances should
the joint washer be fitted
first.
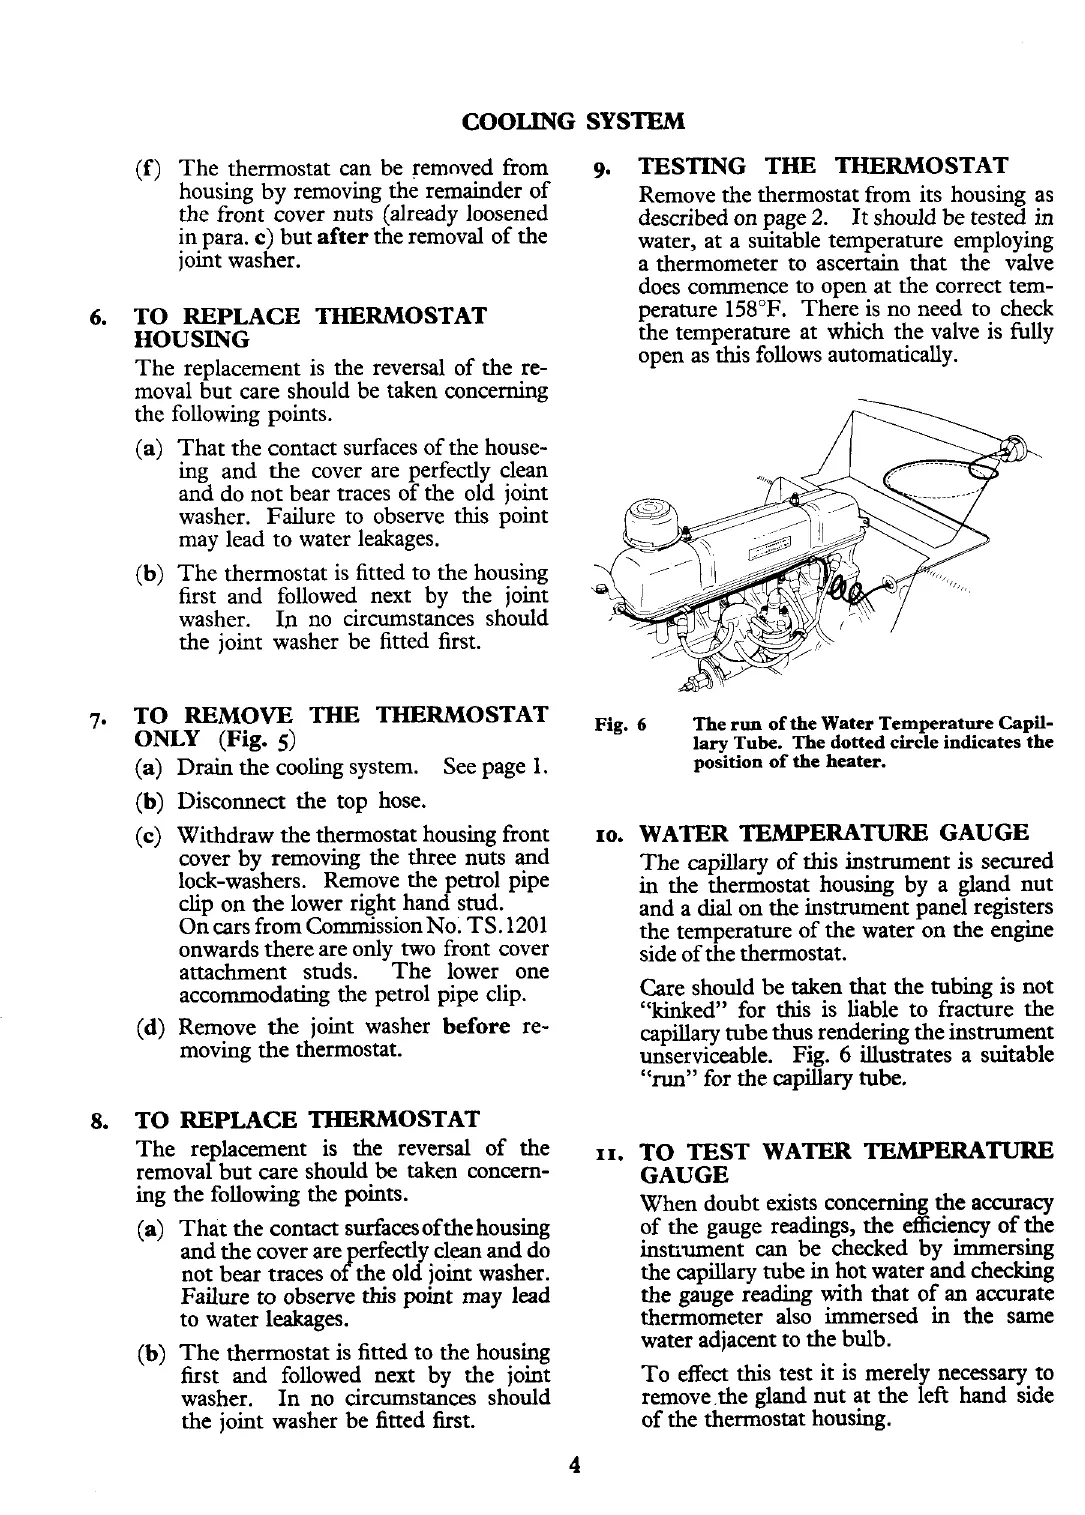
Fig.
6
The run of the Water Temperature
Capil-
lary Tube. The dotted circle indicates the
position of the heater.
10.
WATER TEMPERATURE GAUGE
The capillary of this instrument is secured
in the thermostat housing by a gland nut
and a dial on the instrument panel registers
the temperature of the water on the engine
side of the thermostat.
Care should be taken that the tubing is not
"kinked" for this is liable to fracture the
capillary tube thus rendering the instrument
unserviceable. Fig.
6
illustrates a suitable
"run"
for the
capillary
tube.
XI.
TO TEST WATER TEMPERATURE
GAUGE
When doubt exists concerning the accuracy
of the gauge readings, the efficiency of the
instiument
can
be checked by immersing
the capillary tube in hot water and checking
the gauge reading with that of
an
accurate
thermometer also immersed in the same
water adjacent to the bulb.
To effect this test it is merely necessary to
remove.the gland nut at the left hand side
of the thermostat housing.
 Loading...


