8 Section 3— ASSembly & Set-Up
3. Slide the wheel fully inward on the wheel shaft . Reinstall
the wheel drive pin through the wheel shaft only (not
through the wheel hub). See Fig. 3-5. The wheel should
now spin freely (freewheel) on the wheel shaft. Repeat with
the other wheel.
4. Use the handlebar to roll the tiller to a flat area.
NOTE: Before starting the engine, the wheels must be placed in the
WHEEL DRIVE position (pins through wheel hubs and wheel shaft).
Forward Clutch Cable
1. Carefully unwrap the forward clutch cable from its shipping
position.
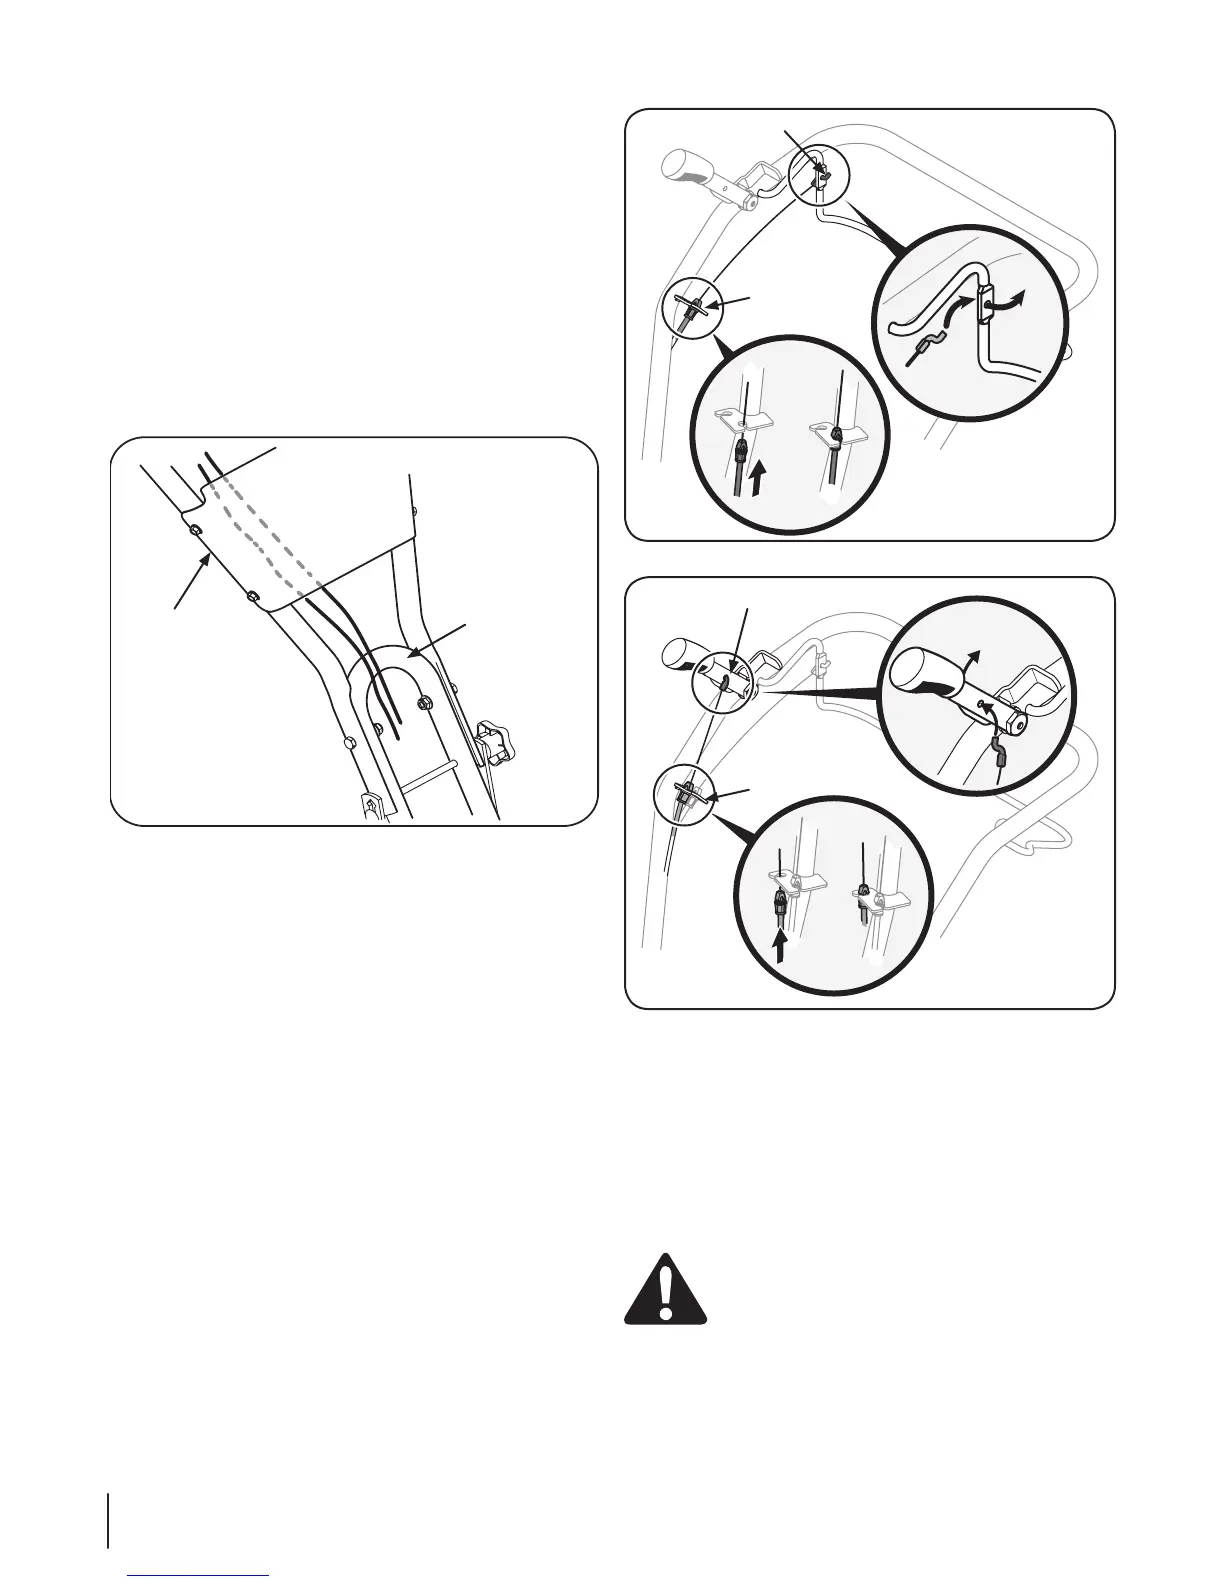
2. Route the clutch cable over the lower handle bar and under
the handle panel. See Fig. 3-6.
3. Pull the cable up through the bottom hole of the cable
bracket and push the cable connector up through the hole
until the groove in the connector snaps into place. See Fig.
3-7.
4. Place the Z-connector into the hole in the forward clutch
bail from the outside of the bail to the inside. See Fig. 3-7.
Reverse Clutch Cable
1. Carefully unwrap the reverse clutch cable (Red end fitting)
from its shipping position.
2. Route the clutch cable over the lower handle bar and under
the handle panel. See Fig. 3-6.
3. Pull the cable up through the top hole of the cable bracket
and push the cable connector up through the hole until the
groove in the connector snaps into place. See Fig. 3-8.
2. Place the Z-connector into the hole in the reverse clutch
handle assembly from the inside of the handle to the
outside. See Fig. 3-8.
Set-Up
Tire Pressure
Check the air pressure with a tire gauge. Deflate or inflate the
tires equally to between 15 and 20 PSI.
NOTE: Be sure that both tires are inflated equally or the tiller will
pull to one side.
Gas & Oil Fill Up
WARNING! Use extreme care when handling
gasoline. Gasoline is extremely flammable and the
vapors are explosive. Never fuel the machine
indoors or while the engine is hot or running.
Extinguish cigarettes, cigars, pipes and any other
sources of ignition.
Service the engine with gasoline and oil as instructed in the
Engine Operator’s Manual packed separately with your tiller.
Read the instructions carefully.
Figure 3-8
Figure 3-7
Figure 3-6
Lower
Handlebar




 To Next Page