Do you have a question about the Tucker Auto-Mation SW10 and is the answer not in the manual?
Crucial section to read before commencing any installation tasks.
Specific recommendations for low energy applications using presence sensors.
Comprehensive data on power, dimensions, weight, environmental ratings, and more.
Mounting the back-plate to the door frame, including application-specific notes.
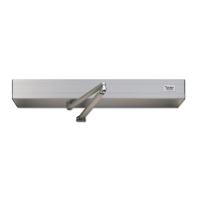
Determining door hand and mounting the operator assembly to the header.
Procedures for push and pull arm assemblies, with measurements.
Guidelines for increased spring tension push arm installation and preparation.
Procedure for increased spring tension pull arm installation and alignment.
Adjusting open/closed stops and configuring the soft stop option.
Configuring I/O board and adjustment board dip switches.
Mapping functions to terminal connections on the I/O board.
Using adjustment potentiometers, LEDs, and key notes.
Safely connecting the 120 VAC main power supply.
Powering up, interpreting LEDs, and performing initial setup.
Resolving common problems with door movement and control board errors.
Required documentation and actions upon completing installation.
List of available accessories such as motion sensors and spindle adaptors.
Contact details for Tucker Auto-Mation, including address and phone.
Procedure for adjusting and signs of a loose chain tensioner.
Diagrams covering door status, low energy, pairs, locks, and specific systems.
Scenarios for lock relay operation based on switch and dip settings.
Specific installation guidelines for fire-rated doors, including hardware.
Instructions for correctly placing the Tucker logo on doors.
| Brand | Tucker Auto-Mation |
|---|---|
| Model | SW10 |
| Category | Door Opening System |
| Language | English |