Chapter 4 Installation instructions
● Turn off the main power in the electricity box and confirm the live wire is
not alive with a test pencil.
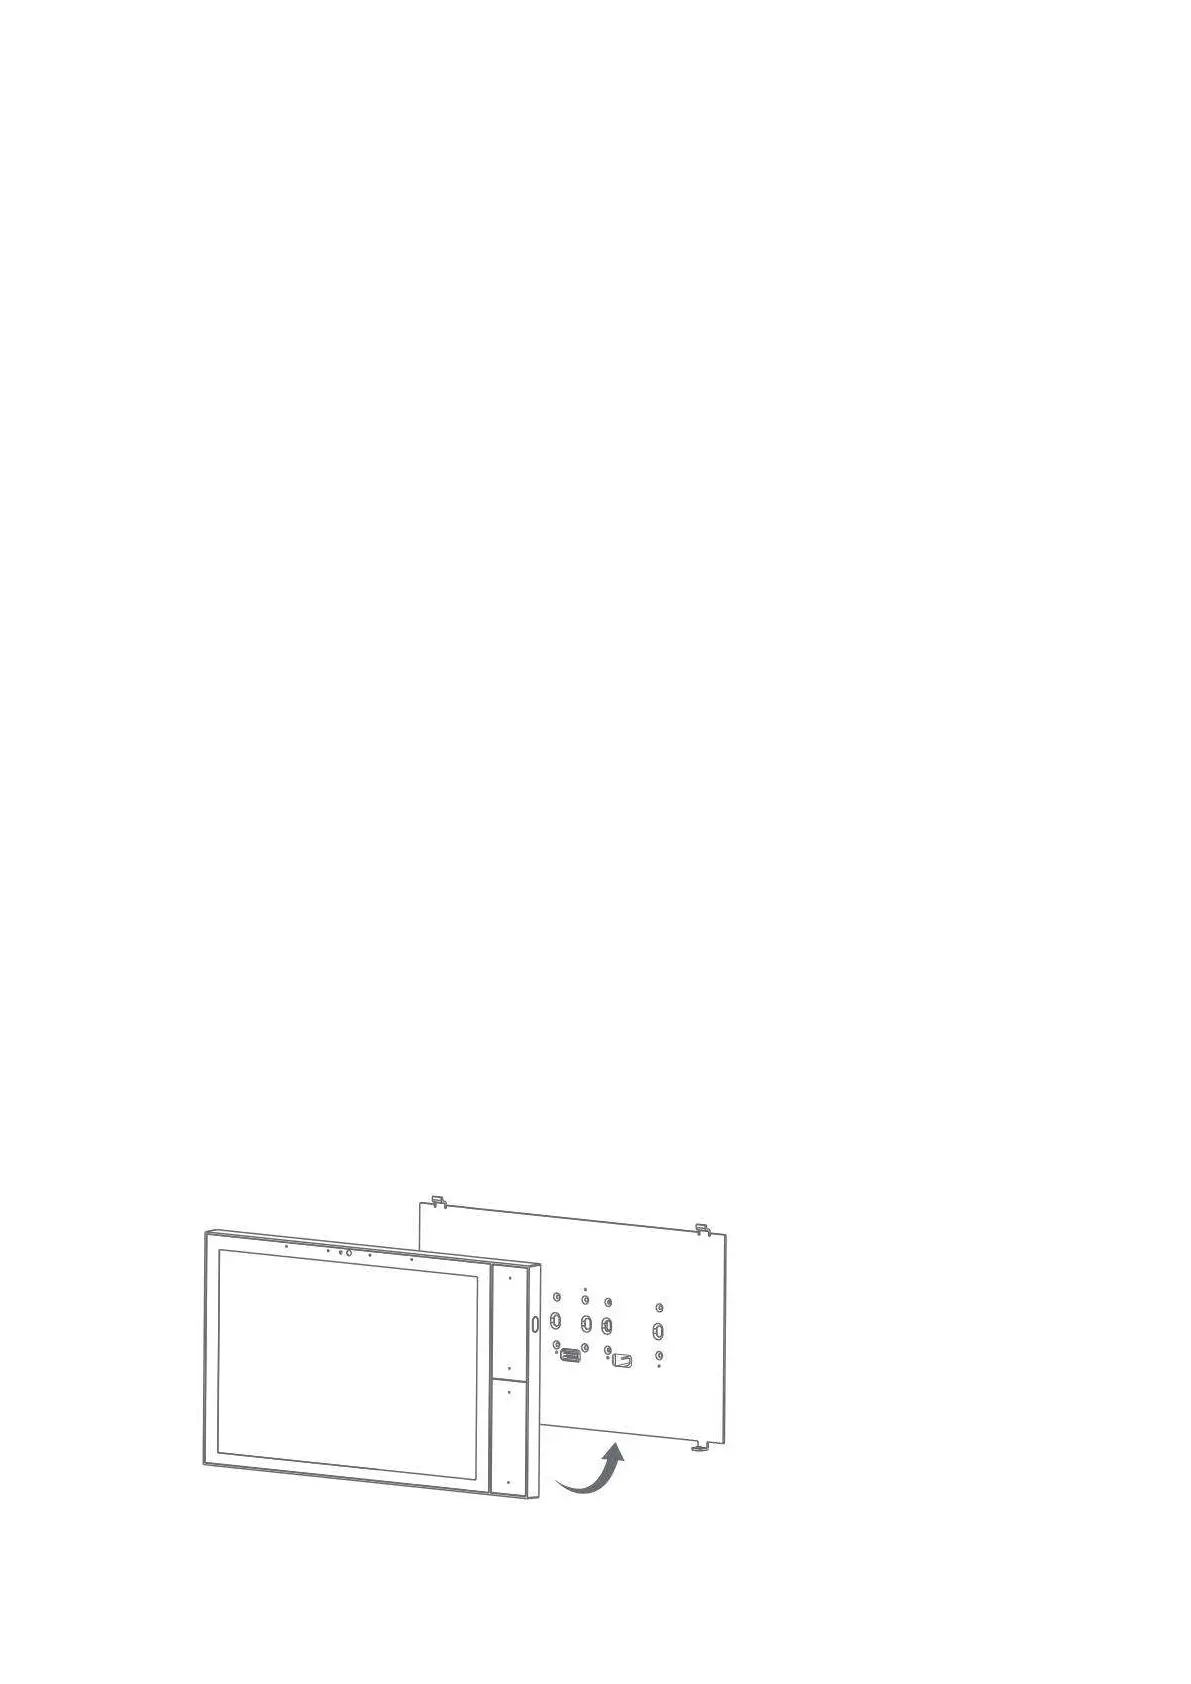
● Remove the base of the smart panel and install it in the wall box (as
shown in the pictures following).
● Check the wires and make sure the wires are in good contact with the
terminals and no exposed cooper wires.
● Fasten the base to the wall box with mounting screws and fix the smart
panel back to the base.
● Note that the screws should not be fixed too tight during installation in
case any deformation or damage to the screen and hardware.
● If your smart panel is not flat after installation, do not press the screen
violently, please check the wall box and the base installation at first.
4.1 Installation drawings