17
13. Ensure grub screws are 90 degrees to the clamp plate.
14. Place a straight edge (metal ruler) across the bottom of the sink bush to check that the bottom face
is parallel to the suspension plate.
15. Repeat at 90 degrees and adjust the grub screws as required.
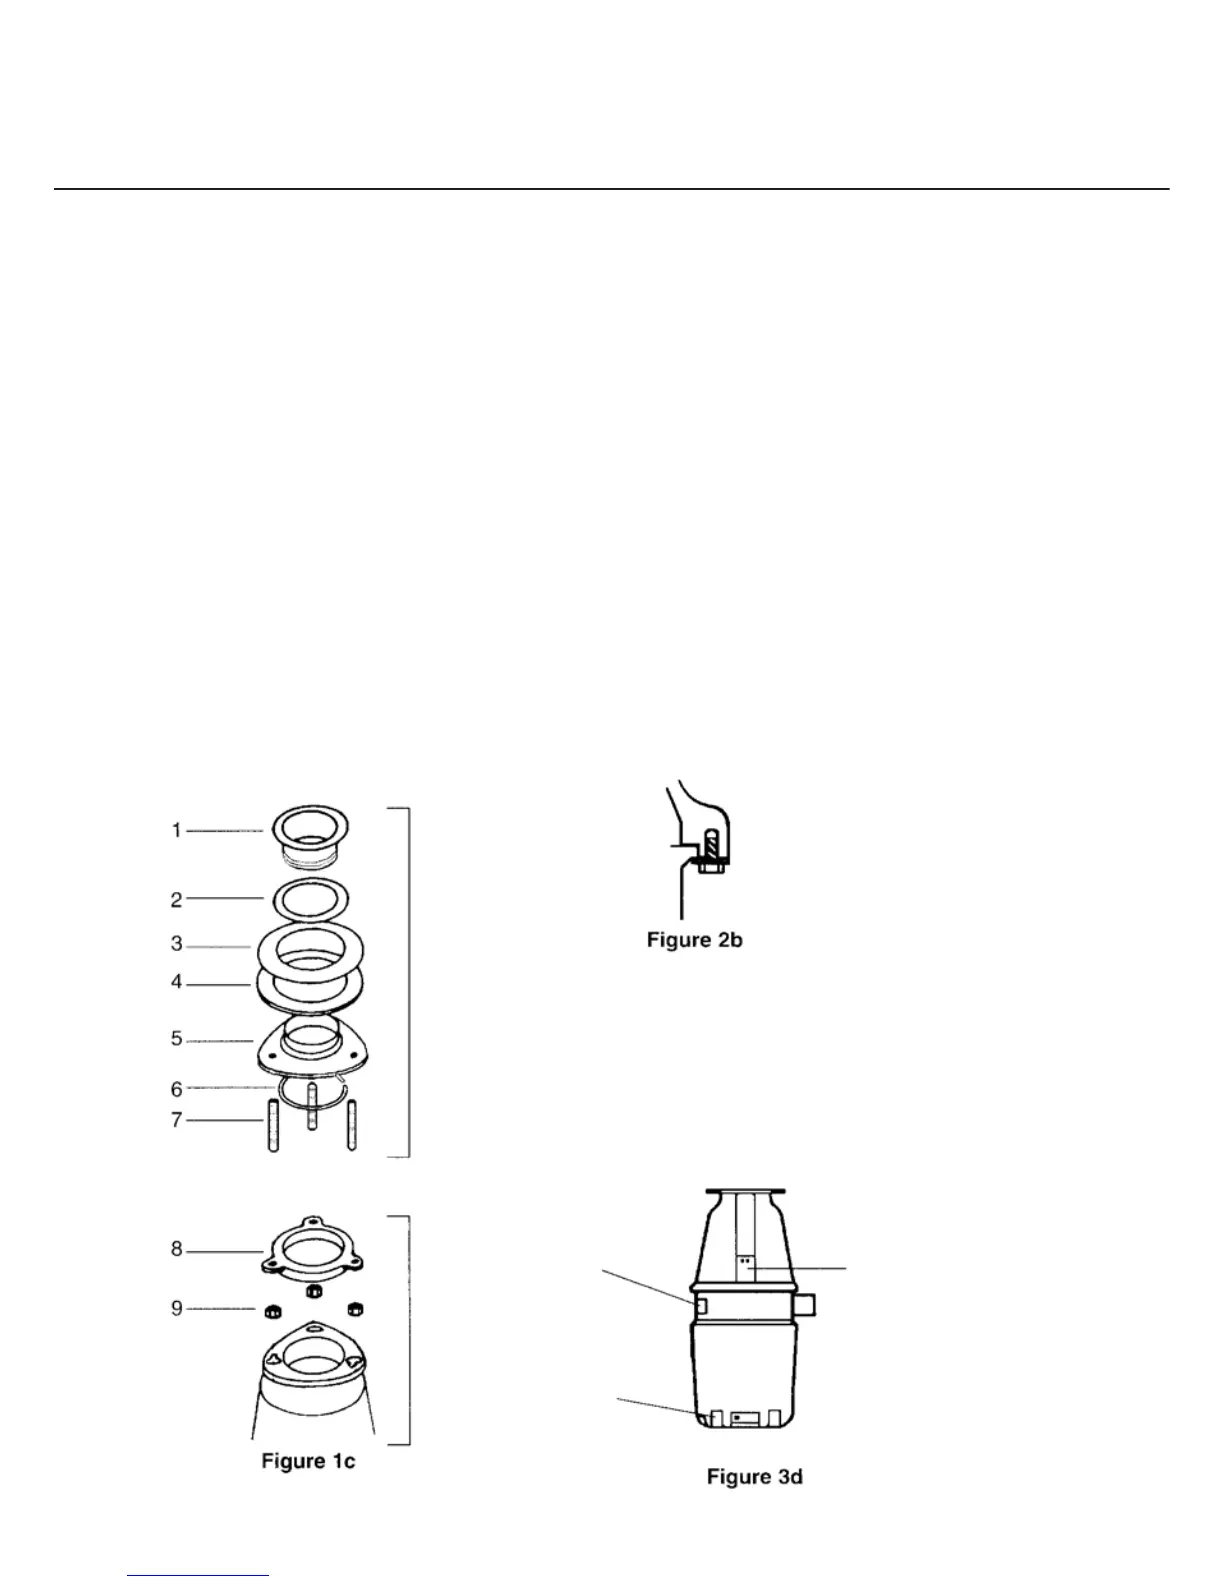
Step 2 - Fitting the unit to the sink bush assembly (Fig. lc - Stage 2).
1. Apply a thin layer (2mm) of silicon sealer to both sides of the hopper seal (8) and locate it on
the ends of the three grub screws, with the central recess area uppermost, and push it up
hard against the bottom edge of the sink bush, which will locate in that recess.
2. Screw the three nuts, supporting their washers, up onto the grub screws only just suffi cient .
number of turns so that they will not fall off.
3. Offer up the disposer with the control box facing towards you ensuring that the nuts and
washers fi t through the large holes of the keyholes, and turn the disposer clockwise, so that
the grub screws move into the keyhole slots.
4. Rest the disposer on the nuts.
5. Tighten up the three nuts evenly ensuring that the hopper seal is correctly seated.
DO NOT tighten nuts too much, as this will cause the hopper seal edge to bulge out into the waste
inlet and restrict movement of the Magnitop Plug. It is only extreme pressure that will cause this,
so it can easily be avoided.
Loosen the six screws to
enable the lower section of
the appliance to rotate.
When the position has been
set evenly retighten screws.
N.B. If the lower section of the appliance is
rotated as in fi gure 2b, the position of the reset
button (fi gure 3b) will be moved accordingly.
Reverse switch
Machine Serial no.
Reset button
 Loading...