This document is the installation, operation, and maintenance manual for the Twin Eagles Outdoor Refrigerated Drawers, model TERD242-F.
Function Description
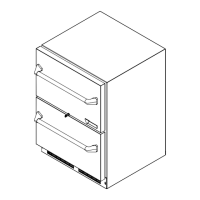
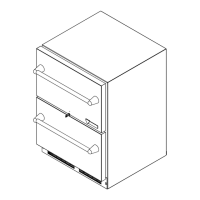
The Twin Eagles Outdoor Refrigerated Drawers are designed for outdoor use, providing refrigerated storage for various items. The unit features multiple drawers for organized storage and is equipped with an electronic control system for temperature management. It is intended for freestanding installations.
Important Technical Specifications
- Model: TERD242-F
- Electrical Requirements: 115V/60Hz/15A
- Product Weight: 130 lbs (59 kg)
- Rough-in Opening Dimensions:
- Width ("A"): 24" (61 cm)
- Height ("B"): 34" to 35" (86.4 cm to 88.9 cm)
- Depth ("C"): 23¾" (60.7 cm)
- Cabinet Dimensions:
- Width ("D"): 23¾" (60.2 cm)
- Height ("E"): 33½" to 34¾" (85.7 cm to 88.3 cm)
- Depth ("F"): 26¼" (66.8 cm)
- Overall Depth with Handle ("G"): 39¼" (99.5 cm)
- Depth with Door Open 90° ("H"): 54.6 cm (21½")
- Temperature Range: The available temperature range of the refrigerator is 34° to 42°F (1° to 6°C).
- Refrigerant: R134a
- Power Supply: 115 volt, 15 amp dedicated circuit is required. The product is factory-equipped with a power supply cord that has a three-pronged, grounded receptacle.
- Anti-Tip Device: Includes an anti-tip bracket for secure installation.
Usage Features
Installation:
The appliance requires a proper location with adequate air circulation and away from direct sunlight and heat sources. It must be installed on a level surface, and the leveling legs can be adjusted to ensure stability and proper door alignment. The anti-tip device is crucial for safety and must be installed according to the instructions, either as a counter-top or floor-mounted bracket. Proper electrical connection to a dedicated 15-amp grounded circuit is essential. The front grille should not be obstructed to allow proper airflow for the condenser.
Electronic Control:
The unit features an electronic control panel for managing temperature.
- Starting the Refrigerator: Plug the power cord into a wall outlet. The refrigerator will begin cooling after power is applied. If the refrigerator does not start, check that the refrigerator is turned on and the set temperature is cold enough.
- Turning ON or OFF: Press and hold the "ON/OFF" button for three (3) seconds. "OFF" will appear on the display. If the refrigerator is not on, "OFF" will be shown on the display. To turn the refrigerator on, press and hold the "ON/OFF" button for three (3) seconds. The refrigerator temperature will be shown on the display.
- Setting Temperature: Press and hold the "SET" button. When the "SET" button is pressed, the display will show the set temperature. While holding the "SET" button, press the "WARMER" or "COLDER" buttons to adjust set temperature.
- Refrigerator Operation: The available temperature range is 34° to 42°F (1° to 6°C). It may take up to 24 hours for the refrigerator to reach desired temperature.
- Alarms:
- Door Ajar Alarm: If the door has been left open for over five (5) minutes, the alarm will sound in one (1) second intervals. The display panel will flash "OP" and the Alarm LED located at the top left of the display below the word "Alarm" will be illuminated. This will stop as soon as the door is closed.
- Temperature Sensor Fault: If the controller detects that the temperature sensor is not properly functioning, a temperature sensor alarm will sound in one (1) second intervals. "E1" will flash on the display panel and the Alarm LED located at the top left of the display below the word "Alarm" will be illuminated.
- High and Low Temperature Alarm: If the storage compartment temperature deviates excessively from the set-point temperature, the alarm will sound in one (1) second intervals. The display panel will flash either "HI" or "LO" depending upon the condition and the Alarm LED light at the top left of the display below the word "Alarm" will be illuminated. The alarm will remain active until the condition is corrected.
- Energy Saving Tips:
- Do not install near heat sources or in direct sunlight.
- Ensure front grille vents are not obstructed.
- Plug into a dedicated power circuit.
- When loading new product, organize items to minimize drawer openings.
- Maintain a relatively full storage compartment.
- Ensure drawer closing is not obstructed.
- Allow hot items to reach room temperature before placing in product.
- Minimize drawer openings and duration of drawer openings.
- Use the warmest temperature control setting that meets personal preference.
- When on vacation or away from home for extended periods, set the appliance to warmest acceptable temperature.
- Set the control to the "off" position if cleaning the appliance.
Maintenance Features
Care and Cleaning:
- Cabinet: The stainless steel cabinet can be washed with a mild soap and water and thoroughly rinsed with clear water.
- Interior: Wash interior compartment with mild soap and water. Do NOT use abrasive cleaner, solvent, polish cleaner or undiluted detergent.
- Drawers: Leave drawers open and allow to completely dry out before closing.
- Door Gaskets: Clean with mild soap and water to remove any residual chemicals.
- Exterior: Clean with a cleaner approved for stainless steel. Do not use abrasive cleaners or scouring pads.
- Hinges/Fasteners: Check for signs of corrosion and clean as needed.
- Condenser: If the plastic defrost drain pan located under the compressor contains water, use a sponge to remove as much water as possible.
- Rear Access Cover: Remove screws around the perimeter of the access cover and clean out debris.
- Long-Term Storage: If stored outside, inspect for dirt or debris from weather and/or animals/insects. Connect to electrical power, turn on, and confirm desired control settings. Allow 24 hours for the unit to stabilize before loading contents.
Stainless Steel Maintenance:
- Stainless steel does not stain, corrode, or rust as easily as ordinary steel, but it is not stain or corrosion proof.
- Clean with mild soap and water or a stainless steel cleaner.
- Avoid abrasive cleaners, chlorine bleach, or products containing chlorine.
- A good quality car wax may be applied to help maintain the finish.
- For cleaning, choose a product that is ultimately that of the consumer, and there are many products from which to choose. Depending upon the type of cleaning and the degree of contamination, some products are better than others.
- The most effective and efficient means for routine cleaning of most stainless steel products is to give the surfaces a brisk rubbing with a soft cloth soaked in warm water and a mild detergent, or mild mixture of ammonia. Rubbing should, to the extent possible, follow the polish lines of the steel, and always insure thorough rinsing after cleaning.
Troubleshooting:
The manual provides a detailed troubleshooting guide with possible causes and remedies for common issues such as:
- Appliance not cold enough (e.g., control set too warm, content temperature not stabilized, excessive usage, airflow to front grille blocked).
- Appliance too cold (e.g., control set too cold).
- No interior light (e.g., drawer gasket not sealing properly, failed LED light assembly or light switch).
- Light will not go out when drawer is closed (e.g., drawer not activating light switch, failed light switch).
- Noise or Vibration (e.g., appliance not level, fan hitting tube obstruction).
- Appliance will not run (e.g., appliance turned off, power cord not plugged in, no power at outlet).
Warranty:
The product comes with a Limited One Year Parts and Labor Warranty and an Additional Second Through Fifth Year Limited Parts Only Warranty. The warranty covers defects in material or workmanship. It does not cover shipping costs, customer education, appliance loss due to product failure, or removal/installation costs. It also excludes damage from transportation, commercial use, improper installation, misuse, abuse, accident, alteration, or use not conforming to electrical codes.