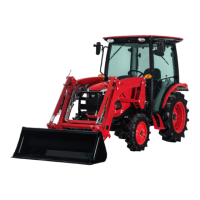
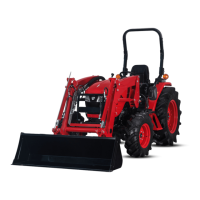
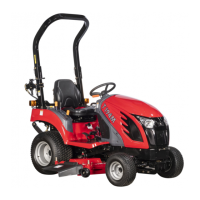
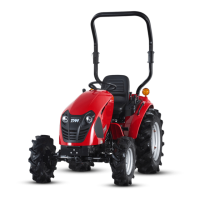
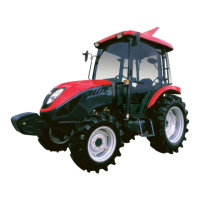
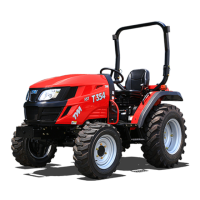
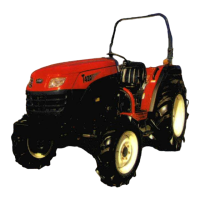
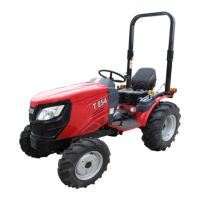
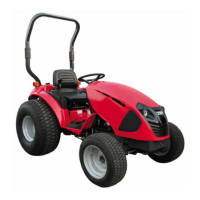
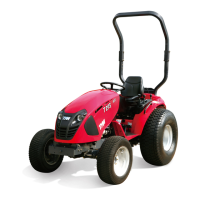
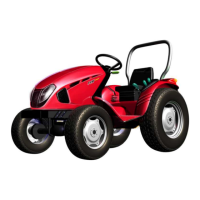
This document is an operator's manual for the TYM 3515C(Ch), 4215C(Ch), and 4815C(Ch) tractor models. It provides essential information for safe operation, maintenance, and troubleshooting.
Preface
The manual emphasizes the importance of reading it carefully before operating the tractor to ensure correct operation and maintain optimum condition. It advises keeping the manual close to the tractor for immediate reference and lending it along with the tractor if loaned to someone else. In case of loss or damage, users are instructed to contact their local authorized dealer for a copy. The manual also notes that some parts may have been changed for quality or safety reasons, so photographs or drawings might not perfectly match the actual installed parts. Users are warned not to modify the machine or use it for purposes beyond its intended design, as this could void the warranty.
Table of Contents
The manual is organized into nine main sections:
- For Safe Operation
- Regarding Warranty Support
- Specifications
- Operation Description
- Operation
- Maintenance
- Troubleshooting
- Storage and Disposal
- Emissions Control Warranty
Safety and Vehicle Damage Warning
The manual uses specific symbols to highlight safety information:
- DANGER: Indicates a condition that may result in harm, fatal injury, or death if ignored.
- WARNING: Indicates a condition that may result in harm, serious injury, or death if ignored.
- CAUTION: Indicates a condition that may result in damage to the vehicle or its equipment, or alerts to unstable operation if ignored.
- IMPORTANT: Emphasizes notable characteristics of working procedures and information about technology for easier operation.
- NOTE: Provides additional description to the operator for more effective machine operation.
Symbol Marks of Controller
The manual includes a legend for symbol marks used on the controller to simplify operations and maintenance:
- PTO
- Preheat
- Parking Brake
- DPF
- Left side indicator
- Engine oil pressure
- High beam
- Right side indicator
- Battery
- Low beam
"Use and Disposal" Policy Concerned with Environment Preservation
TYM is committed to environmental preservation throughout the product lifecycle, from planning and development to production, distribution, use, and disposal. They comply with international, national, and local environmental regulations and promote environmental awareness. Key policies include:
- Reading the operator's manual for global environment protection. Overloading shortens product life and increases harmful exhaust gases.
- Proper disposal of used fluids (engine, transmission, hydraulics) through local dealers to prevent ground and water pollution.
- Proper storage and disposal of waste products to prevent rust, oil, and other leaks from polluting the environment. Contact approved waste collection and recycling facilities for legal disposal.
For Safe Operation
This section details safety precautions to prevent accidents, injuries, or death.
- Before Using the Machine:
- Inspect and repair the tractor in a wide, flat area.
- Perform engine running, repairing, or grinding in a well-ventilated area to avoid intoxication from exhaust gas or dust.
- Keep the work area clean and arranged, free from dust, mud, oil, or parts.
- Carry out maintenance in a well-lit place, using safety work lights with protective covering.
- Keep a first aid kit and fire extinguisher handy.
- Do not drive if fatigued, under medication, under the influence of alcohol, pregnant, or under 18 years old.
- Wear appropriate work attire (tight clothes, work hat, rough-bottomed shoes) to avoid entanglement, slipping, or falling.
- Use only manufacturer-recommended implements.
- Start the machine slowly after warning bystanders.
- Pay attention to road shoulders when driving on unpaved roads with ditches or slanted sides to avoid falling over.
- Interlock brake pedals (left and right) when driving on a road to prevent abrupt turning or overturning due to one-sided braking.
- Do not modify the machine; use a truck for public road transport.
- While Working:
- Avoid rapid starting, braking, turning, and excessive speed. Reduce engine speed on hilly or curved roads.
- Observe traffic regulations and drive safely. Wear a hard hat and seat belt.
- If the machine breaks down on the road, move it to a safe place.
- Put a machine shut-down sign (emergency triangle reflex reflector) 100-200 yards before the failed machine on the road.
- Only the driver should be aboard the tractor during operation; never allow others, especially children.
- Do not allow anyone near the tractor or implement during operation.
- Read the manual before driving.
- Properly train anyone operating the tractor, explaining handling tips and ensuring they read the manual.
- Use pesticides safely, observing all regulations and wearing protective clothing. Clean equipment and tractor after spraying.
- Observe all relevant regulations for disposal of engine oil, transmission oil, fuel, coolant, filters, and battery. Never dispose of used oil directly into rivers or drainage.
- No smoking or open flame when fueling to prevent fire or explosion.
- Inspect for fuel leaks in lines and hoses.
- Consider the strength, length, and width of loading ramps. Load/unload on a flat, safe place with the engine off and parking brake engaged. Ramps must be non-slip and strong enough.
- Move the tractor backward when loading and forward when unloading.
- Do not shift gears on slopes or loading ramps. Select the proper gear before approaching.
- Be careful when driving on loading ramps; do not disengage the clutch or shift gears.
- Stop the engine before maintenance, checking, repairing, or cleaning.
- Stop and cool down the engine before fueling or lubricating. Do not fill fuel while the engine is running or hot.
- No fire or spark near the battery during checking or charging.
- Remove dirt and debris from the muffler and engine daily before operating.
- Check electrical components and wire harnesses for burns, damage, or loose connections.
- Do not over-inflate tires; refer to the manual for maximum pressure.
- Use correct tools for maintenance.
- Secure hood and side covers before operating.
- Observe correct battery installation/removal procedures: connect (+) first, disconnect (-) first.
- Inspect brakes and steering wheel for proper function and tightness.
- Avoid contact with battery solution; wash immediately with water if contact occurs.
- Check the machine before and after use, especially clutch, brake, and levers.
- Lock tilt lever and telescopic knob when adjusting the steering wheel.
- Use loading ramps when crossing ditches or dikes, or passing through soft land. Ramps must be suitable for the tractor.
- Properly ventilate when working in a greenhouse to let out exhaust gas.
- Pay attention and keep hands on the steering wheel while driving.
- After Using the Machine:
- Do not allow anyone near the tractor or implement during operation.
- Stop the engine when removing grass from cultivator blades and lock the flow control valve.
- Perform maintenance on a level, safe location, placing blocks at tires to prevent movement.
- Cover the PTO shaft when not in use, applying grease.
- Carry out maintenance after parts have cooled down.
- Stop and cool down the engine before fueling or lubricating.
- Be careful of high oil pressure when separating hydraulic couplings or hoses.
- Ensure you are seated with the seat belt fastened before starting the engine.
- Put the tractor rain cover on only after the tractor has cooled down.
- Do not open the radiator cap when the radiator is hot.
- Remove dirt and debris from the muffler and engine daily before operating.
- Precaution for Prolonged Storage:
- Be careful of hot muffler during operation and right after engine is turned off.
- Immediately repair or replace faulty parts after working.
- Disengage the clutch when storing the tractor for a long time to prevent the clutch disc from sticking.
- Other:
- Do not adjust or repair injection capacity/timing or hydraulic system components; consult a TYM dealer.
- Do not modify the tractor; use only genuine or approved parts.
- Pay attention when turning with implements, as overall length may be long.
- Move wheels to the widest setting when working on slopes or towing.
- Use caution signs when towing a trailer; link the trailer brake with the tractor brake. Do not shift gears on a hill.
- Properly secure the tractor during transport using ropes or belts.
- Interlock brake pedals for both sides when loading or unloading.
- Release the differential gear lock when making a turn.
- Use the drawbar when towing; never tow with the top link or lower links.
- Be careful when driving on a hill; do not disengage the clutch or shift to neutral.
- Turn off the engine in a level area when leaving the tractor, apply the parking brake, and lower the implement.
- Remove spilled excess fuel after closing the fuel cap.
- Be aware of PTO RPM requirements for implements.
- Engage the parking brake during engine warm-up.
- Check and perform maintenance on the loader after lifting it, and fix the joystick safety lever when dismantling.
- Maintain lights and indication plates for visibility.
- Entanglement in rotating drive-line can cause serious injury or death. Keep shields in place.
- Do not lubricate, service, or adjust the machine while it is moving.
- Keep all parts in good condition and properly installed.
- Disconnect battery ground cable (-) before electrical adjustments or welding.
- Disconnect wiring harnesses from the tractor before servicing towed implements.
- Contact an authorized dealer for injection pump, hydraulic pressure, or durability/performance-related adjustments.
- Use agricultural chemicals safely, wearing protective clothing and cleaning equipment after use.
Regarding Warranty Support
- Warranty Certificate: Do not modify the machine; unapproved modifications and misuse against the manual's description will void the warranty.
- After-Sales Service: Refer to "Troubleshooting" (Chapter 7) or contact an authorized TYM dealer for problems.
- Prepare for the Following Questions Before Calling: Model and product serial number, engine serial number (if engine failure), working conditions (type of job, speed), run hour, and detailed problem description.
- Supplying Service Parts: TYM supplies service parts according to quality assurance regulations. Consult a local dealer for availability and pricing.
- Genuine Parts and Fluid: Use TYM genuine parts and fluid, which have passed durability and performance tests, for safety.
Specifications
This section provides detailed technical specifications for the TYM 3515C(Ch), 4215C(Ch), and 4815C(Ch) models, including both MEC (Mechanical) and HST (Hydrostatic) variants.
-
Engine (MEC. MODEL):
- Maker: TYM A1700N2 IDI (3515C), TYM A2000N2 IDI (4215C), TYM A2300N2 IDI (4815C)
- Aspiration: Natural for all models
- Emissions Standards: Tier 4 for all models
- Gross Power hp (kW): 35.0 (26.0) for 3515C, 42.0 (31.0) for 4215C, 48.0 (36.0) for 4815C
- PTO hp (kW): 30.0 (22.5) for 3515C, 36.0 (26.8) for 4215C, 40.0 (30.7) for 4815C
- No. of Cylinders: 3 for 3515C, 4 for 4215C/4815C
- Displacement cu.in (cc): 104.5 (1,714) for 3515C, 127.2 (2,084) for 4215C, 139.5 (2,287) for 4815C
- Rated Revolution RPM: 2,600 for all models
- Max Torque lb-ft (Nm): 67.5 (91.5) for 3515C, 92.0 (125.6) for 4215C, 110.0 (150.0) for 4815C
- Fuel Tank Capacity gal (ℓ): 7.1 (27.0) for all models
- Fuel Consumption gal.hr (ℓ/hr): 2.3 (8.8) for 3515C, 2.8 (10.6) for 4215C, 3.0 (11.5) for 4815C
- Air Cleaner: Dry Element for all models
- Alternator 12volt amp: 70 for all models
-
Drivetrain (MEC. MODEL):
- Transmission: Synchro mesh for all models
- Forward/Reverse Method: Synchro shuttle for all models
- 4 Wheel Drive: 2WD/4WD for all models
- No. of Traveling Speeds: 12F / 12R for all models
- Forward Traveling Speed mph (km/h): 13.79 (22.2) for all models
- Reverse Traveling Speed mph (km/h): 13.66 (22.0) for all models
- Clutch: Dry Single Type for all models
- Brake: Wet, Multi-disc for all models
- Differential Lock: STD for all models
- Creeper: No for all models
- Cruise Control: No for all models
-
Hydraulics (MEC. MODEL):
- Power Steering: Hydrostatic Power Steering for all models
- Total Hydraulic Flow (POWER STEERING+Implement) gpm/lpm: 12.6 (4.4+8.2) / 6.8 (16.4+30.4) for 3515C, 14.6 (4.5+10.1) / 54.2 (16.8+37.4) for 4215C/4815C
- Lift Control Type: Position for all models
- Joystick Valve: STD for all models
- Rear Remote (Port): Optional (Up to 4) for all models
-
3 Point Hitch (MEC. MODEL):
- 3 Point Hitch: CAT I for all models
- Lift capacity at lift link ends lbs (kg): 3,306 (1,500) for all models
- 3Point Hitch Lift Capacity @24" behind lift point lbs (kg): 2,425 (1,100) for all models
-
PTO (MEC. MODEL):
- Rear(Mid) PTO Speed RPM: 560 for all models
- Rear PTO Type: Independent for all models
- Clutch: Wet, Multi-disc for all models
-
Tires (MEC. MODEL):
- Front: 7-16 for all models
- Rear: 11.2-24 for all models
-
Dimensions (MEC. MODEL):
- Wheelbase in.(mm): 65.7 (1,670) for all models
- Overall Length(W/ 3PT) in.(mm): 120.9 (3,071) for all models
- Min.Overall Width in.(mm): 55.6 (1,413) for all models
- Overall Height(W/ ROPS) in.(mm): 88.0 (2,253) for all models
- Ground Clearance(4WD) in.(mm): 12.9 (327) for all models
- Min.Turning Radius(W/ Brake) feet(m): 7.51 (2.29) for all models
- Turning Degree: 45 for all models
- Weight(W/O Front Weights) lbs(kg): 3,547 (1,609) for 3515C, 3,664 (1,662) for 4215C, 3,606 (1,636) for 4815C
-
Engine (HST. MODEL):
- Maker: TYM A1700N2 IDI (3515CH), TYM A2000N2 IDI (4215CH), TYM A2300N2 IDI (4815CH)
- Aspiration: Natural for all models
- Emissions Standards: Tier 4 for all models
- Gross Power hp (kW): 35.0 (26.0) for 3515CH, 42.0 (31.0) for 4215CH, 48.0 (36.0) for 4815CH
- PTO hp (kW): 30.0 (22.5) for 3515CH, 36.0 (26.8) for 4215CH, 40.0 (30.7) for 4815CH
- No. of Cylinders: 3 for 3515CH, 4 for 4215CH/4815CH
- Displacement cu.in (cc): 104.5 (1,714) for 3515CH, 127.2 (2,084) for 4215CH, 139.5 (2,287) for 4815CH
- Rated Revolution RPM: 2,500 for 3515CH, 2,600 for 4215CH/4815CH
- Max Torque lb-ft (Nm): 67.5 (91.5) for 3515CH, 92.0 (125.6) for 4215CH, 110.0 (150) for 4815CH
- Fuel Tank Capacity gal (ℓ): 7.1 (27.0) for all models
- Fuel Consumption gal.hr (ℓ/hr): 2.3 (8.8) for 3515CH, 2.8 (10.6) for 4215CH, 3.0 (11.5) for 4815CH
- Air Cleaner: Dry Element for all models
- Alternator 12volt amp: 70 for all models
-
Drivetrain (HST. MODEL):
- Transmission: Hydrostatic for all models
- Forward/Reverse Method: HST for all models
- 4 Wheel Drive: 2WD/4WD for all models
- No. of Traveling Speeds: 3 range for all models
- Forward Traveling Speed mph (km/h): 17.95 (28.9) for all models
- Reverse Traveling Speed mph (km/h): 17.95 (28.9) for all models
- Clutch: No for all models
- Brake: Wet, Multi-disc for all models
- Differential Lock: STD for all models
- Creeper: No for all models
- Cruise Control: Standard for all models
-
Hydraulics (HST. MODEL):
- Power Steering: Hydrostatic Power Steering for all models
- Total Hydraulic Flow (POWER STEERING+Implement) gpm/lpm: 12.6 (4.4+8.2) / 6.8 (16.4+30.4) for 3515CH, 14.6 (4.5+10.1) / 54.2 (16.8+37.4) for 4215CH/4815CH
- Lift Control Type: Position for all models
- Joystick Valve: STD for all models
- Rear Remote (Port): Optional (Up to 4) for all models
-
3 Point Hitch (HST. MODEL):
- 3 Point Hitch: CAT I for all models
- Lift capacity at lift link ends lbs (kg): 3,306 (1,500) for all models
- 3Point Hitch Lift Capacity @24" behind lift point lbs (kg): 2,425 (1,100) for all models
-
PTO (HST. MODEL):
- Rear(Mid) PTO Speed RPM: 560 for all models
- Rear PTO Type: Independent for all models
- Clutch: Wet, Multi-disc for all models
-
Tires (HST. MODEL):
- Front: 7-16 for all models
- Rear: 11.2-24 for all models
-
Dimensions (HST. MODEL):
- Wheelbase in.(mm): 65.7 (1,670) for all models
- Overall Length(W/ 3PT) in.(mm): 120.9 (3,071) for all models
- Min.Overall Width in.(mm): 55.6 (1,413) for all models
- Overall Height(W/ ROPS) in.(mm): 88.0 (2,253) for all models
- Ground Clearance(4WD) in.(mm): 12.9 (327) for all models
- Min.Turning Radius(W/ Brake) feet(m): 7.51 (2.29) for all models
- Turning Degree: 45 for all models
- Weight(W/O Front Weights) lbs(kg): 3,552 (1,611) for 3515CH, 3,644 (1,653) for 4215CH, 3,587 (1,627) for 4815CH
-
Driving Speed: Tables are provided for both MEC and HST models, showing forward and reverse speeds in km/h and mph across different ranges (A, B, C) and gears (1-4). Engine speed is 2,600 rpm, and tire rolling radius is 508 mm (Rear 11.2-24). The manual notes that speed changes based on tire condition and road surface, and advises driving at a proper speed for safety.
Operation Description
This section details the various controls and components of the tractor.
- Exterior View: Provides a diagram identifying key external components: Work Lamp (F), Roof, Side Mirror, Hood, Rear Tire, Front Tire, Step, Combination Lamp, Center Link, Lift Link, Work Lamp, Lower Link.
- Switches and Levers:
- MEC. MODEL: Steering Wheel (Handle), Shuttle Lever, Hazard Switch, Turn Signal Lamp Switch, Instrument Cluster, PTO ON/OFF Switch, Main Key Switch, PTO Operation Switch, Hand Throttle Lever, Link Bracket, Steering Wheel Tilt Lever, Clutch Pedal, Brake Pedal(L), Brake Pedal(R), Accelerator Pedal, Parking Brake Lever, DPF Regeneration Switch.
- HST MODEL: Steering Wheel (Handle), Cruise Control Switch, Hazard Switch, Turn Signal Lamp Switch, Instrument Cluster, PTO ON/OFF Switch, Main Key Switch, PTO Operation Switch, Hand Throttle Lever, Parking Brake Lever, Steering Wheel Tilt Lever, Brake Pedal, HST Pedal Forward, HST Pedal Reverse, DPF Regeneration Switch.
- Main Key Switch: Used to start (START), run (ON), or stop (OFF) the engine. Requires the shuttle shift lever to be in "Neutral" to start. Key should be removed when not in use.
- Hazard Switch: Activates all turn signal lamps to warn other vehicles in emergencies.
- Turn Signal/Lamp Switch: Turns on tail lamps, instrument cluster, high/low beam, and left/right turn signals. Includes a horn button. Prolonged use can discharge the battery.
- Shuttle Lever: Shifts the tractor forward or backward. Requires clutch and brake pedals to be fully depressed.
- Cruise Control Switch [HST MODEL]: Engages cruise control at a desired speed. Deactivated by applying full pressure to brake pedals. Light pressure reduces speed temporarily.
- DPF Regeneration Switch: Initiates DPF regeneration by holding the button for 3+ seconds. Lamp turns off after 30 minutes when complete. DPF collects soot, which is burned off periodically.
- Hand Throttle: Adjusts engine RPM (faster/slower) and maintains constant speed. Foot throttle is recommended for travel.
- Steering Column Tilt Lever: Adjusts steering wheel position. Must be firmly fixed and not adjusted while driving.
- Parking Brake Lever: Locks the brake after pressing the brake pedal.
- Instrument Panel:
- Indicator - LED: Displays various status icons: TURN(L), PARKING BRAKE, PTO, TURN(R), BATTERY, ENGINE OIL PRESSURE, HIGH BEAM, BRAKE RELEASE, ENG FAILURE, LOW BEAM, WARM UP, TEMP WARNING, NEUTRAL.
- PTO Indicator: Illuminates when the PTO shaft is rotating.
- Left/Right Turn Signal Indicator: Shows the active turn signal direction.
- High Beam Indicator: Illuminates when high beams are on.
- Parking Brake & Brake Indicator: Illuminates when the parking brake is applied or brake pedal is depressed.
- Engine Oil Pressure Warning Lamp: Illuminates if engine oil pressure is low. Stop engine immediately.
- Battery Charge Warning Lamp: Illuminates if the charging system malfunctions. Check fan belt or consult dealer.
- Preheat Indicator: Illuminates based on engine coolant temperature during start-up. Wait for it to turn off before starting the engine in cold weather.
- Fuel Gauge: Shows remaining fuel level. Refill if needle is in the red area.
- Tachometer: Indicates engine RPM.
- Hour Meter: Displays tractor's running hours.
- DPF Indicator: Illuminates when soot accumulation is high, indicating regeneration is needed. Blinking patterns indicate sensor malfunction or overdue cleaning. Driving with the DPF indicator illuminated can cause severe damage.
- Sensor Error Indication: Table detailing various sensor errors (RPM, water temperature, differential pressure, exhaust temperature, electric exhaust valve learning error) with their lamp indications and actions.
- Controls 1 (Pedals):
- Clutch Pedal: Disengages power. Allows shifting main/range shift lever. Release slowly for smooth start.
- Brake Pedals (Left/Right): Activated independently for sharp turns. Must be interlocked with the link bracket for road driving to prevent one-sided braking and overturning.
- Accelerator Pedal: Controls engine speed (faster/slower). Used for road driving with manual transmission.
- F-R HST Pedal (HST): Shifts between "forward" and "reverse" drive. Pedals should be at neutral to stop the machine. Do not shift quickly between forward/reverse.
- Controls 2:
- Lever Operation: Joy-Stick Lever, Range Shift Lever, PTO ON/OFF Switch, PTO Operation Switch, Parking Brake, Main Shift Lever, MFWD Lever, PTO Shift Lever, Differential Lock Pedal, Position Control Lever, Flow Control Valve.
- Lever (RH/LH): MFWD Lever, Range Shift Lever, PTO Shift Lever, Differential Lock Pedal, Main Shift Lever, Position Control Lever.
- Lever (RH/LH) [HST]: MFWD Lever, Range Shift Lever, PTO Shift Lever, Position Control Lever.
- Main Shift Lever: Selects four speeds in an "H" shaped path. Synchromesh gears allow shifting while moving with clutch disengaged.
- Range Shift Lever: Selects three ranges (A-B-C), providing 12 stages of gear shifting (3 stages for HST). Stop tractor and depress clutch fully when shifting.
- Position Control Lever: Maintains implement position. Used to lower/lift implements.
- PTO Shift Lever: Shifts PTO shaft revolution in two levels. Put PTO switch to 'OFF' when shifting.
- PTO Operation Switch / PTO ON/OFF Switch: Controls PTO shaft rotation (OFF, Auto, Manual). 'Auto' stops PTO when implement is lifted. 'Manual' allows manual control. 'ON' rotates PTO, 'OFF' stops it.
- Differential Lock Pedal: Locks wheel rotation on both sides for traction. Release before turning. Do not press when one wheel is spinning fast.
- Flow Control Valve: Regulates implement lowering speed. Winding fully right stops hydraulic pressure to the raising device.
- MFWD Lever: Shifts between 2-wheel drive and 4-wheel drive. Depress clutch pedal when shifting.
- Others:
- Work Lamp Switch: Turns on front and rear work lights. Indicator lamp illuminates on the instrument cluster. Turn off while driving at night.
- Wiper Switch: Operates windscreen wiper and washer pump.
- Stereo: For listening to MP3 or radio.
- Climate Control: Controls cooling function (A/C compressor), air flow rate, air circulation direction, and temperature (red for increase, blue for decrease).
- Seat Belt: Adjust seat and fasten seat belt. Do not wear when safety frame is folded down. Keep safety frame upright during operation.
- Seat Adjustment: Adjusts fore/aft position, back cushion angle, and weight. Do not adjust while the tractor is moving.
- Brake Lamp: Illuminates when the brake pedal is depressed.
Operation
This section covers daily inspection, starting, stopping, tractor operation, and implement attachment.
- Daily Inspection Before Starting:
- Check engine oil level.
- Grease points (front axle pin, steering shaft, tie rod ends, front axle supporter, bonnet latch, seat sliding rail) every 10 hours in damp/muddy conditions.
- After cleaning with pressurized water, lubricate points if necessary.
- Pre-Operation Check:
- Engine is tuned for normal use. Inspect and check within the first 100 hours for new tractors.
- Warm up the engine. Check battery charge warning lamp, oil pressure warning lamp, and engine coolant temperature gauge.
- Avoid unnecessary engine idling.
- Frequently check engine oil, coolant, transmission fluid, and front axle oil levels for leaks.
- Add corresponding grade oil for the season; use genuine TYM oil.
- Avoid running the engine in an enclosed area due to harmful exhaust gas.
- Running-In Period:
- Within first 10 hours: Inspect daily, tighten wheel bolts.
- After first 50 hours: Tighten wheel, disc, and hub bolts. Check alternator and fan belt tension, air inlet. Tighten cooling system hose and clamp. Perform scheduled 50-hour maintenance. Change transmission/hydraulic oil and filter element. Change engine oil and filter. Change front axle fluid.
- Starting Engine:
- Check fuel gauge.
- Set shuttle lever to neutral.
- Set PTO Operation Switch to OFF.
- Lower implements to the ground.
- Put main shift lever to neutral.
- Place hand throttle lever to minimum position.
- Turn main key switch to "START". Do not operate starter for more than 20 seconds at a time.
- Cold Start:
- Turn ignition switch to "ON" and wait for preheat indicator to turn off.
- Turn ignition switch to "START" with clutch pedal depressed.
- Repeat until engine runs smoothly.
- Idle engine at 1,200 rpm to warm up. Do not use starting fluid if equipped with cold start system.
- Stopping Engine:
- Reduce engine RPM with hand throttle to low speed.
- Depress clutch pedal, put all shift levers to neutral.
- Turn main switch to "OFF".
- Tractor Operation:
- When Attaching Weight: Reduce speed on bumpy ground. Attach additional weight for stability. Ensure front wheels are not lifted when transporting implements or towing heavy loads. Do not drive heavily loaded on roads.
- Reduce Speed When Towing Load: Observe towing speed and capacity guidelines. Stopping distance increases on downhill. Reduce speed if towed weight is heavier than tractor and trailer lacks braking.
- How to Drive: Adjust seat and fasten seat belt. Interlock brake pedals. Use foot throttle. Reduce speed on slippery/gravel roads. Attach proper weight. Use brake gently. Don't rest foot on clutch pedal.
- Stopping: Stop with brake and clutch pedals. Put main shift and shuttle levers to neutral. Put all SCV levers to neutral. Set PTO switch to OFF. Lower all implements. Push hand throttle lever back to decelerate engine and idle for 1-2 minutes. Apply parking brake. Turn main switch to OFF. Remove ignition key.
- Parking: Interlock brake pedals, depress, and pull up parking brake lever. Place prop under rear wheels. Release by depressing brake pedal firmly.
- Differential Lock: Depress pedal when one wheel loses traction. Disengages automatically when traction is even. Do not drive at high speed or turn with differential lock engaged. Do not press pedal when one wheel is spinning fast.
- Position Control Lever: Used to lower/lift implements.
- DPF Regeneration: Details the process, including conditions for regeneration (engine max RPM, parking, gear neutral, shuttle neutral, pedal neutral, cooling water temp 60-100°C). Press regeneration button for 3+ seconds. Regeneration completes after 30 minutes.
- DPF Regeneration Indication: Table showing lamp indications (light on, blinking) and descriptions for DPF regeneration time reached, starts, proceeding, and complete. Includes buzzer sounds.
- Error Display During DPF Regeneration: Table showing lamp indications (blinking, light on) and descriptions for engine overheating, regeneration fail, 3 times consecutive regeneration failures, regeneration off, engine stop during regeneration, and DPF error.
- Attachment of Implement:
- Attachment Position: Select implement matching tractor horsepower.
- Top Link Adjustment: Install top link to 3 selective positions (high traction, mid traction, low traction) based on working condition.
- Attaching Implement: Drive tractor backward, apply parking brake, stop engine. Insert hitch pins into lower links and secure.
- Preventing Rocker Shaft Movement: Turn "OFF" traction (draft) control before attaching implement.
- Interference Check: Always check for interference with implement, quick-coupler, and other attachments.
- Adjustment of Stabilizer: Adjust length for sideways movement (plow/disc harrow) or no sway (rotary tiller/mower).
- Adjustment of Vertical Height: Turn rectangular steel plate to vertical for implement float, or horizontal to secure. Do not extend top link excessively.
- Positioning of Draw Bar: Use drawbar for towing. Retract to shortest position for 3-point hitch PTO drive.
- Installation of PTO Driven Implement: Attach implement, lift off ground, stop engine, put PTO shift lever to neutral. Connect universal joint shaft, check security, close PTO cover. Adjust PTO shift lever. Check safety shields. Do not operate PTO without master safety shield.
Maintenance
This section outlines the maintenance schedule and procedures.
- Maintenance Schedule Chart: Detailed tables for inspection parts, hours (50, 100, ..., 700), and years (1YR, 2YR) for checking, adding, adjusting, replacing, and cleaning. Includes engine oil, filters, fuel hose, air cleaner, coolant, radiator, fan belt, battery, transmission oil, front axle oil, fuel pipe, steering wheel hose, hydraulic oil hose, electric cables, greasing, tightening handles/bolts/nuts, clutch, brake, engine breed pipe, engine crankcase, intake/exhaust gas valves, fuel injection valve, generator motor, and hydraulic system.
- Fluids and Capacity: Table listing items (Fuel, Engine oil, Grease, Coolant, Transmission oil, Front axle) with their capacities, specifications, and remarks.
- Routine Maintenance:
- Opening Hood: Unlock lever, lift with gas spring, press down to close.
- Checking and Replacing Engine Oil: Check dipstick, add oil if low. Drain from plug, refill. Change first 50HR engine oil.
- Checking and Changing Transmission Fluid: Check dipstick, add oil if low. Drain from plug, refill. Change first 50HR transmission fluid. Turn off ignition switch before checking. Drain warm oil carefully.
- Checking and Changing Front Axle Oil: Check dipstick, add oil if low. Drain from plugs, refill. Change first 50HR front axle oil.
- Replacing Engine Oil Filter: Remove cartridge, apply oil to rubber ring of new filter, install. Run engine until hydraulic pilot lamp turns off.
- Replacing Transmission Oil Filter: Remove cartridge, apply oil to rubber ring of new filter, install. Run engine, stop, check oil level. Change first 50HR transmission fluid filter.
- Checking and Changing Coolant: Check reservoir tank level, add if low. Drain from radiator cap and plug. Flush radiator. Add coolant to filler neck. Run engine with heater on for 5 minutes, check level.
- Checking and Adding Fuel: Check fuel gauge, refill if in red area. Never smoke or use lighter while refueling. Close cap securely and wipe spilled fuel.
- Checking Battery: Check electrolyte level, add distilled water. Do not expose to flames/sparks. Connect (+) first, disconnect (-) first. Avoid excessive electrolyte during charging. Avoid boost charging. Charge/replace battery after removing from tractor. Use genuine TYM battery.
- Checking Hoses and Pipes: Check fuel, hydraulic steering, radiator hoses for damage/leakage. Replace every 2 years. Ensure fuel does not leak from damaged hose.
- Checking Electric Wiring: Check for contact with other parts, peeled insulation, loose connections. Repair damaged cables. Perform periodic maintenance. Remove straw/dust from battery/cables.
- Greasing: Apply grease every 50 hours to axle bracket (front & rear), axle tie rod end (LH/RH), brake and clutch pedals, lift rod (upper/lower). Apply after working in wet conditions.
- Checking and Adjusting Steering Wheel: Check free play (0.8 - 2.0 in. / 20 - 50 mm). Adjust if outside range. Check for severe vibrations or no free play.
- Checking and Adjusting Brake: Check free play (5 - 10 mm). Adjust both pedals at the same time.
- Cleaning Fuel Filter Separator: Drain water from drain plug.
- Checking Exhaust Gas: Normally colorless. Black indicates incomplete combustion. White indicates burning engine oil or water vapor. Inspect if color is abnormal.
- Checking Fuse and Fusible Link: Replace with specified capacity. If blown again, consult dealer.
- Checking and Adjusting Toe-In: Measure distances A and B of front wheels. Adjust if front is narrower than rear by 0.2 - 0.3 in. (4 - 8 mm).
- Checking and Adjusting Fan Belt: Loosen generator mounting bolts, move generator to adjust tension. Replace if still slips after maximum adjustment. Inspect new belts after 50 hours.
- General Maintenance Caution: Carry out inspection/maintenance after engine is fully cooled down to avoid burns.
Troubleshooting
This section provides a guide to diagnose and resolve common issues.
- Troubleshooting - Engine:
- Starter motor does not start: Check clutch, battery, battery terminals, main fuse, ignition switch, starter motor.
- Starter motor runs, but engine does not start: Check fuel tank, fuel/air mixture.
- Engine revolution is irregular: Check air/water in fuel, injection nozzle, fuel filter.
- Engine is overheated: Check coolant level, fan belt, radiator fin, engine oil level, engine overload.
- Engine power is too weak: Check air cleaner, nozzle, compression force, valve clearance, injection timing.
- Coolant warning lamp is "ON": Check coolant level.
- Engine oil pressure lamp is "ON": Check engine oil level, viscosity, pressure switch, oil pump.
- Battery charge warning lamp is "ON": Check alternator, fan belt.
- Troubleshooting - Clutch and Brake:
- Clutch slips or does not disengage: Check free play of clutch pedal.
- Brake does not work or works only on one side: Check free play of brake pedals.
- Brake pedal does not return to original position or makes noise: Check brake pedal return spring, sliding parts.
- Troubleshooting - Hydraulic System:
- Implement does not lift: Check hydraulic flow control dial, transmission oil level, air in fluid suction system, oil filter, selective control valve lever, hydraulic pump, cylinder.
- Implement does not lower: Check hydraulic flow control dial, position control lever.
- Troubleshooting - Electrical System:
- Headlamp does not turn "ON": Check bulb, fuse, cable connector, contact.
- Turn signal lamp does not come "ON": Check bulb, fuse, cable connector, contact.
- Other lamp does not turn "ON": Check bulb, fuse, cable contact, switch.
Storage and Disposal
This section provides instructions for daily and long-term storage, as well as operating the tractor after storage and disposal.
- Daily Storage:
- Clean and dry the tractor, grease nipples.
- Avoid water on electrical parts.
- Lower the implement.
- Store indoors or cover if outside.
- Caution: Disconnect negative battery cable to prevent wiring gnawing by rodents. Ensure engine/muffler are cooled before covering to prevent fire. Turn off engine for checking/maintenance.
- Long-Term Storage:
- Perform annual maintenance during off-season.
- Replace electrical cables and rubber hoses (fuel, steering, radiator) every two years.
- Put ignition switch to "OFF".
- Store in a dry, well-drained place. Remove/detach weights and implements or lower them to the ground.
- Fill fuel tank to prevent rust from condensation. Lock fuel cock to "C" (Closed).
- Disconnect battery and store in a well-ventilated, dry, dark place. Connect (+) terminal first when reattaching.
- Change engine oil and run engine for 5 minutes to circulate oil.
- Drain coolant from radiator. Attach "No coolant, do not start" tag. If anti-freeze is present, no draining is needed.
- Check and tighten loose bolts and nuts.
- Add oil, fluid, and fuel according to maintenance chart.
- Apply a slight coat of grease or oil to parts prone to rust.
- Inflate tires slightly higher than usual.
- Place chocks behind and in front of rear wheels.
- Store indoors, covered.
- Keep clutch pedal depressed to avoid rust.
- Put all controls into neutral position.
- Important: Stop engine and allow cooling before washing. Cover only after cooling.
- Warning: Carry out maintenance on a flat, safe place. Block front tires.
- Caution: Never clean tractor body while engine is running. Do not run engine in enclosed area. Remove key and store separately when storing.
- Operating Tractor After Long-Term Storage:
- Perform inspection procedures.
- Check tire air pressure.
- Install fully charged battery.
- Check fan belt tension.
- Check all fluid levels.
- Remove grease from exposed cylinder rod.
- Apply grease to lubrication points.
- Remove cover from exhaust pipe.
- Start engine and idle for 30 minutes to prolong life and enhance performance.
- Start engine, release parking brake, check brake condition, adjust free play.
- Check instrument panel and all parts.
- Drive tractor outside, check operation, idle for 5 minutes, stop, inspect for leaks.
- Warning: Ventilate enclosed areas when operating to release exhaust gas.
- Usage and Disposal:
- Overloading shortens product life and increases harmful exhaust gas.
- Dispose of used fluids (engine oil, transmission/hydraulic oil, coolant) properly according to regulations to prevent pollution.
Emissions Control Warranty
This section details the U.S. EPA Emissions Control Warranty Statement.
- Your Warranty Rights and Obligations: TYM warrants the emission control system to conform to 40 CFR Part 1039 standards. TYM will repair warrantable conditions at no cost.
- Manufacturer’s Warranty Coverage: TYM warrants new diesel engines to the original and subsequent owners for the emission control system.
- Warranty Period:
- Engines under 19 kW (25 HP): two (2) years or 1,500 hours, whichever occurs first.
- Engines under 37 kW (50 HP) with peak power rated at less than 3,000 RPM: five (5) years or 3,000 hours, whichever occurs first.
- Engines at or above 19 kW (25 HP): five (5) years or 3,000 hours, whichever occurs first.
- The warranty period begins when the engine is placed into service.
- Owner’s Warranty Responsibilities: Engine designed for diesel fuel only. Purchaser is responsible for initiating warranty process and presenting engine to TYM dealer.
- Emissions Warranty Exclusions:
- Use of non-exempted add-on or modified parts.
- Failure to perform scheduled maintenance.
- Malfunctions caused by misuse, abuse, improper adjustments, modifications, alteration, tampering, disconnection, improper/inadequate maintenance, or use of non-recommended fuels.
- Damage from accident, acts of nature, or events beyond TYM's control.
- Loss of time, inconvenience, loss of use of equipment, engine, or commercial loss.
- Emission Parts Covered Under Warranty:
- Fuel Injection Pump, Fuel Injectors, Ignition system, Intake Manifold, Electronic control units (if equipped), Sensors (if equipped), Exhaust Manifold, Positive Crankcase Ventilation system parts (including PCV Valve and Oil Filler Cap).
- Turbocharger (if equipped), Charge air cooling system (if equipped), Smoke puff limiter (if equipped), EGR (if equipped), Air-induction system (e.g., intake and exhaust manifolds).
- Aftertreatment devices (if equipped), e.g., Diesel Particulate Filter [DPF], Diesel Oxidation Catalyst [DOC].
- Miscellaneous hoses, clamps, connectors, sealing gaskets, or devices used in the above systems.
- Any other part whose only purpose is to reduce emissions or whose failure will increase emissions without significantly degrading engine/equipment performance.