4 Model 334 Operations Manual
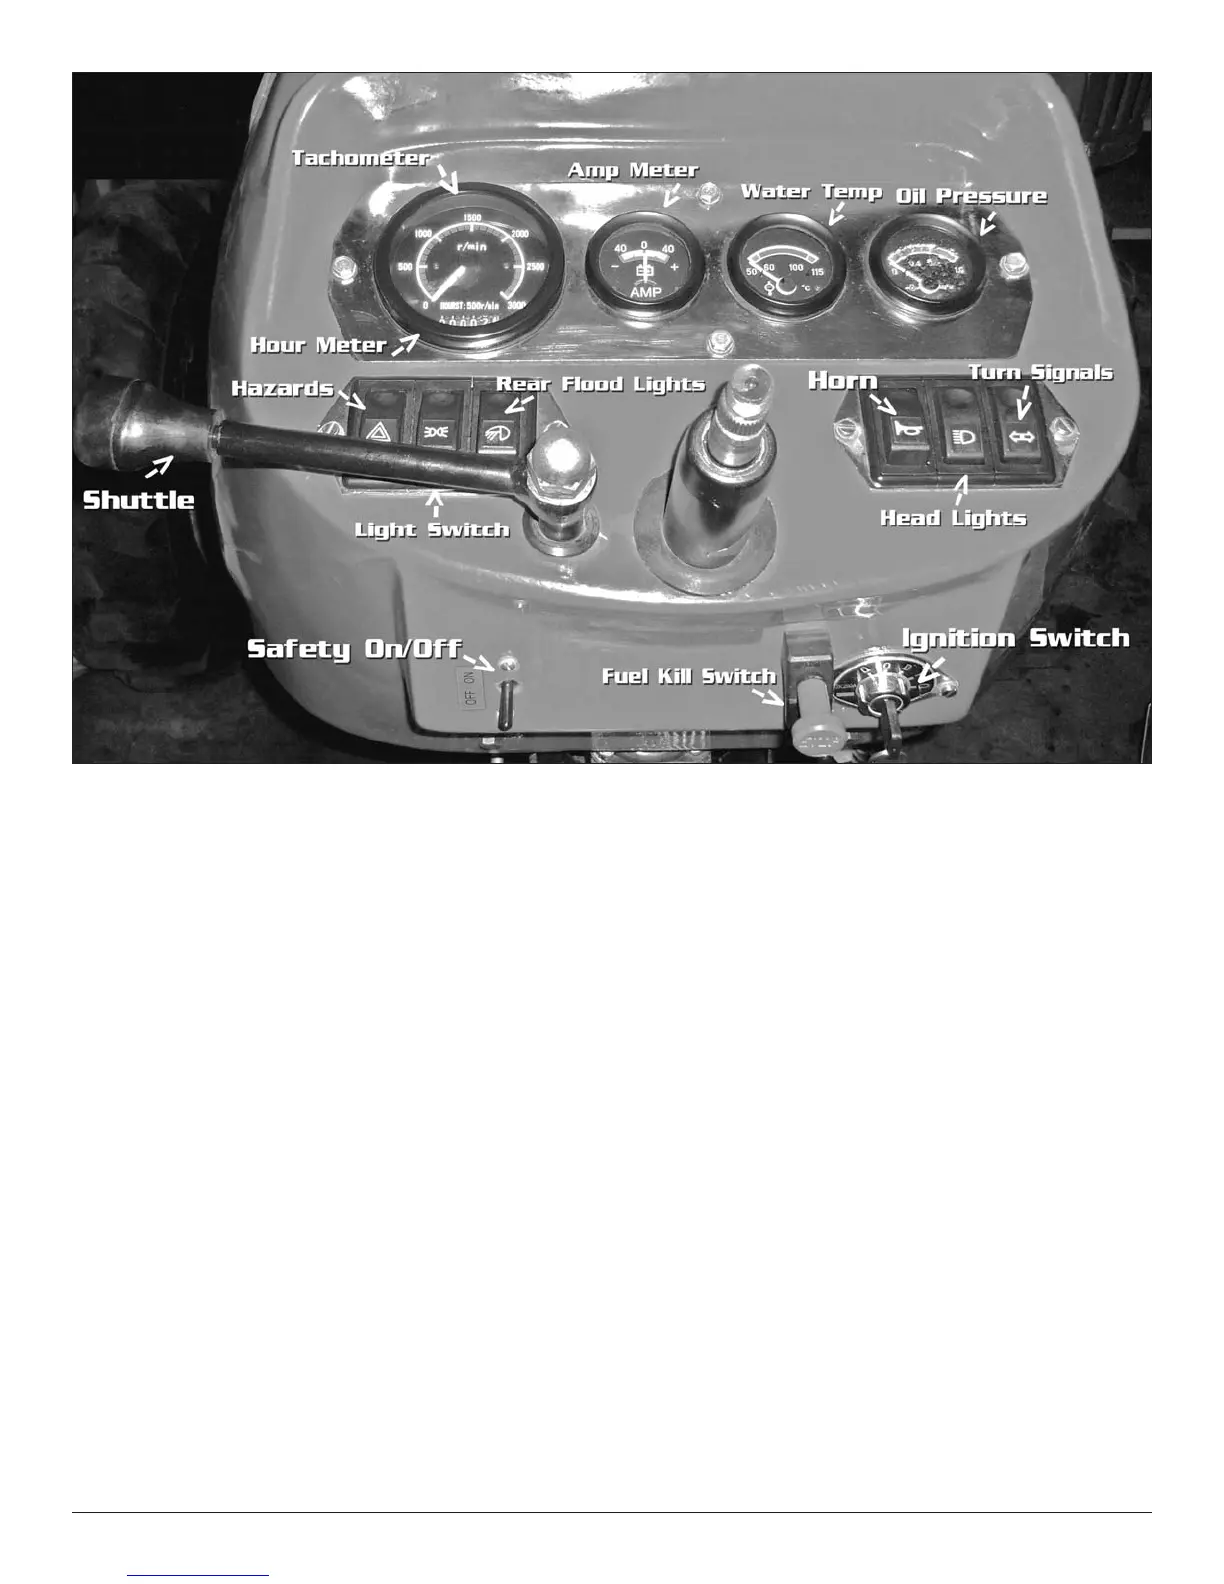
FIGURE 1: The basic layout of the main control panel.
released after starting it will spring back to the “run” position
while the tractor is running.
Shut off—Below the safety switch (see Fig. 1) and also below
the fiberglass lies the red knob that is a ‘pull type’ kill switch.
It is to be pulled out to kill the motor. Make sure it moves
freely back in when you release it.
Figure 2—
Shuttle Lever—Once you have selected the working gear range
that you prefer from the (on floor) gear shift lever and H/L
lever, you then can move the shuttle lever (on the left side of
the steering column) to forward, neutral or back positions for
tractor movement. This is a steering column type shuttle
shifter. Remember, that you cannot move the gears when
shuttle is engaged. Shuttle should be in neutral when select-
ing gears. This is a mechanical shuttle and requires using the
clutch to operate.
Two Stage clutch—this means when you depress the clutch to
the half way mark that will stop the ground speed of your
tractor. Pressing it further to the floor will stop the PTO. You
must depress the clutch pedal all the way to the floor in order
to have smooth engagement of the PTO lever. If there is any
noise or roughness in that engagement with the clutch all the
way to the floor, then that means there may need to be a
clutch adjustment made.
Brakes—there are twin brake pedals that have a flip-over pin
connecting them. They can be depressed individually for
steering but it isn’t recommended. To the left of the brake
pedals is a flip-up locking lever to use when parking the trac-
tor. Tractor brakes are not designed for heavy road use and
especially not for going down long hills. They will wear fast
if used in this manner.
Foot and Hand throttles—The foot throttle is handy to use at
various times however, in the field, using the hand throttle
gives you a constant RPM while in motion. The hand throttle
has an adjustment nut that can be tightened or loosened as
needed.
Gear shift lever—the gear pattern is seen just to the left of the
shifting lever. The key here is to fully engage into your gears
and to fully disengage. Otherwise if those gears are not
moved to the proper positions, it is possible to jam them. The
gears start out rather stiff when new but get much smoother
after 75 hours.
2WD-4WD lever—This lever is one you don’t want to move
accidentally when in operation. It is best to push the lever out
towards the fender just slightly before attempting to slide it
into position. Forward is 2WD and this is where you should
keep your tractor when you are off the farm land acreage. Pull
the lever back for 4WD.
Hydraulic and transmission oil fill—This has a dip stick and
that level should be ½" below the housing that the top plate
attaches to. We use Mobil #424, JD 303 or AW-46 oil for
this function. Sometimes it is labeled ‘tractor hydraulic oil’.
High & Low lever—this lever has low gear in the ‘down’ posi-
tion, neutral in the center and high in the ‘up’ position. The
normal user has no need to use high gear. The first gear low
is great for tilling and fourth low is great for bush hogging a
field of grass.
Locking Differential—this is an optional lever sold only as part
of a package purchase. This operates similar to positraction.
 Loading...