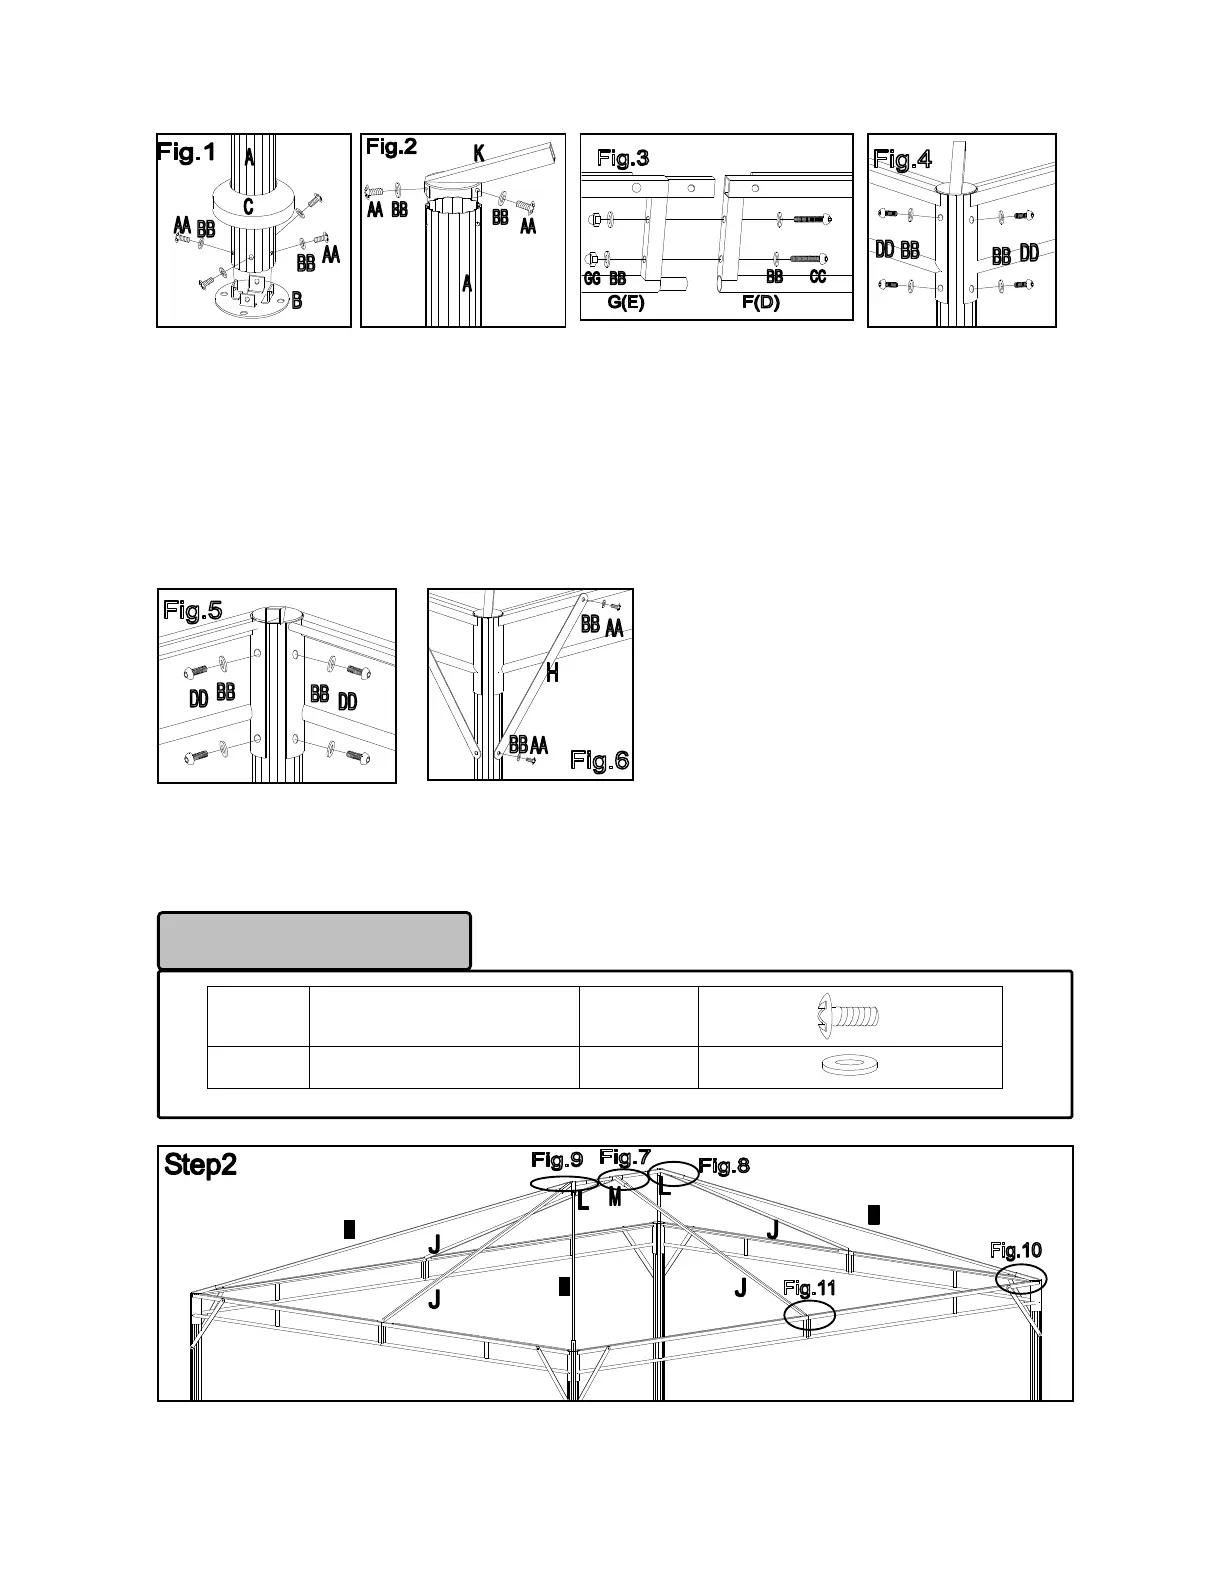
Fig.1: Attach stake cover (C) to post (A), then fix stake plate (B) to post (A) with bolt (AA) and flat washer
(BB). Repeat for all posts.
Fig.2: Attach lower slanting beam connector (I) by inserting it into Post (A) with bolt (AA) and flat washer
(BB). Repeat for all slanted beams.
Fig.3: Insert Valance 2 (E) into Valance 1 (D); attach with bolt (CC), flat washer (BB) and nut (GG), then
cover bolt (CC) with plastic cover (HH). Repeat for each assembly.
Fig.4: Attach assembled valance to post (A) with bolt (DD) and flat washer (BB), then cover bolt (DD) with
plastic cover (HH). Repeat on all sides.
Fig.5: Attach inside of valance with bolt (DD) and flat washer (BB), then cover bolt (DD) with plastic cover (HH).
Repeat for each corner.
Fig.6: Install supporting bar (F) to valance and post with bolt (AA) and flat washer (BB). Repeat for each corner.
AA
M6 x15 bolt
4 PCS
BB
M6 flat washer
4 PCS
Hardware Pack 2






 To Next Page