This document provides a user manual for a wireless controller, likely designed for the Nintendo Switch, given the "SWITCH™" branding. The manual is presented in both French and English, covering various aspects of the device from its basic layout to advanced features like Turbo speed adjustment and gyroscope calibration.
Function Description
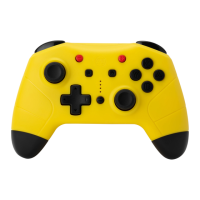
The device is a wireless controller, specifically a "MANETTE SANS FIL SWITCH™" (Wireless Switch Controller). It features a standard gamepad layout, including:
- Left Joystick and Right Joystick for directional control.
- A Direction Pad (D-Pad) for precise directional input.
- Action Buttons: Y, X, A, B.
- Shoulder Buttons: L, R, ZL, ZR.
- System Buttons:
- Home Button: Used for waking up the controller, exiting sleep mode, and accessing the console's main menu.
- Capture Button: For taking screenshots.
- + Button and - Button: Standard console menu navigation buttons.
- Turbo Button: A dedicated button for activating and adjusting turbo functions.
- LED Indicators: These lights provide visual feedback on the controller's status, such as pairing, charging, and battery level.
The controller's primary function is to provide wireless input for gaming on a compatible console (implied to be the Nintendo Switch). It supports Bluetooth connectivity for wireless communication.
Important Technical Specifications
- Connectivity: Bluetooth wireless.
- Charging Cable: Type C USB cable (1 meter length included).
- Battery Life:
- Charging Time: Approximately 2-3 hours.
- Play Time: Approximately 8-10 hours on a full charge.
Usage Features
1. Initial Setup and Connection:
- First Use: It is crucial to charge the battery before the first use.
- Pairing:
- Ensure the console's system is updated to the latest version.
- Simultaneously press and hold the "Home" and "Y" buttons for 1 second to enter Bluetooth searching mode.
- The four LED indicators will flash during searching and remain lit once connected.
- Reconnect Mode:
- To wake up the controller and reconnect, press the "Home" button for 1 second.
- If reconnection fails within 10 seconds, the controller will enter sleep mode.
2. Console Pairing Interface (Nintendo Switch specific):
- To access the pairing interface on the console:
- From the main menu, select "System Settings" (or "Paramètres de la console" in French).
- Navigate to "Controllers & Sensors" (or "Manettes & Capteurs").
- Choose "Change Grip/Order" (or "Changer l'ordre des manettes").
3. Joystick Calibration (3D Joystick Adjustment):
- Accessing Calibration:
- Press the "Home" button to go to the main interface.
- Select "System Settings".
- Navigate to "Controllers & Sensors".
- Choose "Calibrate Control Sticks" (or "Calibrage des sticks").
- Calibration Process:
- Select the stick you wish to calibrate.
- Press the "X" button to initiate calibration.
- Press the "A" button to validate.
- Follow the on-screen instructions.
4. Gyroscope Calibration (6-Axis Adjustment):
- Recommendation: It is recommended to perform gyroscope calibration before first use for optimal performance.
- Accessing Calibration:
- In "System Settings", go to "Controllers & Sensors".
- Choose "Calibrate Motion Controls" (or "Calibrage des gyroscopes").
- Calibration Process:
- Turn off the controller.
- Simultaneously hold the "-", "B", and "Home" buttons for 3-5 seconds to enter axis adjustment mode. LEDs 1+2 and 3+4 will blink alternately.
- Place the gamepad on a flat, stable surface.
- Hold the "+" button; the console will automatically adjust.
- After adjustment, the gamepad should connect to the console, and the LEDs will remain lit.
- Enter the adjustment system again to verify successful calibration.
- A confirmation window will appear on the console if the adjustment is successful, indicating the controller is ready for normal use.
5. Turbo Speed Adjustment:
- Compatible Buttons: A, B, X, Y, L, ZL, R, ZR.
- Activating/Deactivating Turbo:
- Step 1 (Manual Turbo): Press the "Turbo" button and one of the function buttons simultaneously.
- Step 2 (Automatic Turbo): Repeat Step 1.
- Step 3 (Disable Turbo): Repeat Step 1 again to disable both manual and automatic turbo functions.
- Turbo Speed Levels (3 levels):
- Minimum: 5 shots per second (corresponding channel light flashes slowly).
- Moderate: 12 shots per second (corresponding channel light flashes at a moderate rate).
- Maximum: 20 shots per second (corresponding channel light flashes quickly).
- Adjusting Turbo Speed:
- Increase Speed: While manual turbo is active, push the right joystick upward and simultaneously press the "Turbo" button for 5 seconds.
- Decrease Speed: While manual turbo is active, push the right joystick downward and simultaneously press the "Turbo" button for 5 seconds.
Maintenance Features
1. Sleep Mode:
- Automatic Sleep:
- The controller enters sleep mode when the console screen powers off.
- The controller enters sleep mode after 5 minutes of inactivity.
- Exiting Sleep Mode: Press the "Home" button for 1 second. If reconnection fails within 10 seconds, it will return to sleep mode. No other function buttons can wake it up.
2. Charging Indicators:
- Power Off Charging: LEDs 1-4 flash slowly. All LEDs turn off when fully charged.
- Connected and Charging: The currently connected LED indicator flashes slowly. The LED indicator remains lit when fully charged.
- Low Battery: LED indicators flash quickly to remind the user.