★사용하기 전 바늘 설치 시 반드시 전원을 O FF 시켜 주십시오.
그렇지 않으면 폐달 오작동으로 인한 상해의 원인이 죕니다.
★Turn off the power switch before installing the n ee dle, otherwise the machin e
may operate if treadle is pressed by mistake, which could result in injury.
- 13 -
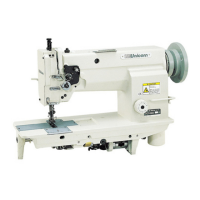
올바른 사용법 / HOW TO USE THE MAC HINE
1. 바늘 끼우는 법 / HOW TO ATTACH THE NEEDLE
2. 밑실 감는 법 / HOW TO WIND THE LOWER THREAD
☞
실토리①를 사권기 축②에 끼워 주십시오.
☞
실토리 누름쇠③를 눌러 주십시오.
☞
실토리에 실을 화살표 방향으로 몇 번 감아서
미싱을 운전시켜 주십시오.
☞
평행으로 감기지 않을 때는 실안내 죔나사④를
풀고 실안내⑤를 좌우로 움직여 조절하여
주십시오.
☞
실토리의 실을 보다 많이 감으려고 할 때는
나사⑥를 조여 조절하십시오.
∙공 운전시 반드시 노루발을 올려 주십시오.
☞
Insert the bo bbi n① o nto the bo bbin wind er s haft②.
☞
Push the bobbin winder stop latch③ all the way
do wnwa rd.
☞
Wind th e thread ar ound th e bob bin① a few times(in the d ir ectio n of the arrow), and then operate
the machine.
☞
If the thread cannot be wound evenly, loosen the thread guide screw④, and move the thread guide⑤
to the right or left.
☞
To win d more the t hread on to the bobbin , make adju s tmen t b y t ightening the sc rew⑥.
∙ In case of rotating the machine without sewing, keep the presser foot raised.
☞
나사①를 풀고 바늘②를 잡고 바늘이 맞닿는데
까지 꽂으며, 긴 홈을 서로 안쪽으로 마주 보게 하여
나사를 조여 주십시오.
☞
L o osen the scr ew s①, and ho lding the
needles② with their long groove facing inward,
in ser t them all th e wa y into the need le b ars,
and re-tighten the screws.
①
②
 Loading...