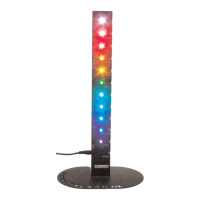
6. Alternative method - measuring the
striking voltages for the LED array
Instead of the plugtop power supply,
connect a 0 to 5V d.c. variable, regulated
power supply to the LED array.
First, increase the voltage slowly from 0 to
5 volts. Observe that each LED “strikes”
in sequence, from red to violet.
Next, with the voltmeter connected to each
contact in turn, check the reading when
each LED just lights. This is the striking
voltage.
Add a column to the table, and record the
striking voltage for each LED. The values
are slightly different from the previous set
of forward voltages, and in sequence.
Plot a graph of striking voltage against
frequency.
Find the gradient and calculate the value
of Planck’s constant, h, as before.
A complete set of results is given below.
7. Assumptions underlying the
measurement of Planck's constant
Apart from errors introduced by the
observers, these methods for determining
Planck’s constant:
- ignore any potential drop across the
semiconductor materials of the LED
- assume that the threshold of photon
release is accurately determined (when
using the variable d.c. supply)
- assume that, at recombination, 100% of
the energy input, eV, is released as
photon energy, hf.
When the fixed power supply is used, you
will notice that there is a large gap in the
forward voltage between the green and the
bright green LEDs. This is due to different
properties of the semiconductor materials
used to make the LEDs above and below
this point.
The plotted values appear to lie in two
groups.
Two best fit lines may be drawn, one using
the top 5 LEDs, the other using the bottom
5 LEDs. These gradients should provide a
better value of Planck's constant.
Online Support
Further information on experiments can be
found at www.fifex.co.uk/flaonline.htm
and you are invited to submit suggestions
for new experiments, to the same site.
Troubleshooting
If one or more LEDs fail:
1.Switch off the LED array immediately.
2.Disconnect the power lead from the
socket in the side of the LED array.
3.Check the output voltage of the d.c.
supply. It should be 5V d.c.
4.Reconnect the power lead to the LED
array and switch it on.
If the LEDs do not all light disconnect the
supply and contact your supplier for
advice.
If the plugtop power supply is lost or
suspected damaged in any way, contact
your supplier immediately.
 Loading...