Creative Solutions, 05-2014
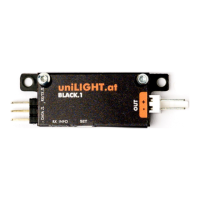
uniLIGHT Module BLACK.1
The BLACK.1 controller is a nice the solution for simplest applications. It’s made for single functional jobs like
navigation-, blink-, strobe/ACL or spotlights in easy models. Usually without the need of a receiver channel -
but this is optional possible.
The BLACK.1 controller is directly connected to a 2S/3S Lipo. In programming mode it’s possible to select a free
light schema, which is selected automatically in future. If plugged to a receiver, the light schema can be
selected by the transmitter.
Simplest solution for position flashlights on gliders and sport models, navigation lights on multicopters,
spotlights for horizon detection on jets, ... The B.1 controller can also be used in combination with existing
uniLIGHT controllers. For more information see www.unilight.at
New in BLACK Series
Dynamic nicer, faster and sharper defined light effects
Dimensions reduced size and weight, optimized for 2-channel applications
Safety basic short cut protection, cut off and automatic restore
Battery deep discharge protection for connected Lipos
Connection and Programming (Normal)
1. Keep the button pressed and connect to the battery.
2. Release button, blue LED will blink and show that
programming mode is active.
3. Press button short to select light schema.
4. If no action is done, the controller will leave programming
mode after 10 seconds.
Connection and Programming (Receiver)
Connect the controller over a male-to-male cable with the receiver, make sure on right polarity.
Usually, the lighting system is controlled via a 3-position switch on the remote. The simplest approach is to start
with position -1- (center position). Modify the servo position (Sub-Trim) to get your desired light signal.
The position -0- with negative deflection (-100%) is the normal condition for "all off". If the center has been
displaced, or if you want to display another signal in the ground state, for example a simple flash, you can
adjust the servo throw on the transmitter until the desired light signal appears.
Finally switch to the last position -2- and change the servo position to get the second operating mode.
Normally, you will power up the landing or navigation lights.
Hint Depending on the manufacturer, the percentage values and corresponding results may vary. Simply adjust the servo until the desired
signal is displayed live.
Hint On some systems, you can also use two switches and pair them to attain more positions. You can also achieve this through phases
of flight or switchable mixers and curve mixers.