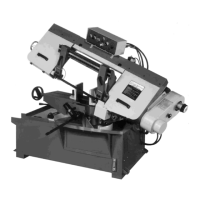
Do you have a question about the Unimac UE-250S and is the answer not in the manual?
Comprehensive list of safety rules to prevent injury during operation.
Guidelines for lighting, floor flatness, and noise level considerations.
Advice on machine weight, lifting tools, balance, and forklift operation.
Details on connecting a 3-phase power supply, including protection and grounding.
Instructions for connecting a single-phase power supply and safety precautions.
Essential steps for grounding the machine before power connection.
Diagram illustrating control wiring for 1-phase operation.
Diagram illustrating control wiring for 3-phase operation.
Wiring diagram for the power circuits of a 1-phase setup.
Wiring diagram for the power circuits of a 3-phase setup.
Schematic for control circuit connections in 1-phase mode.
Schematic for control circuit connections in 3-phase mode.
Diagram showing the power supply and circuit layout for 1-phase.
Diagram showing the power supply and circuit layout for 3-phase.
Instructions for component wiring and an overview of control panel functions.
Detailed explanation of each button and switch on the control panel.
Checks for blade seating, guides, vise squareness, speed, feed, and coolant.
Procedures for adjusting variable speed, auto shut-off, and feed rate.
Steps for safely removing the old blade, including guard and brush adjustments.
Procedures for installing a new blade, ensuring correct direction and seating.
Post-installation checks for blade tension and wire brush settings.
How to adjust blade tracking for proper alignment on the wheels.
Adjusting thrust roller clearance for optimal blade support.
Procedure for adjusting guide roller snugness against the blade.
How to set the bow weight to approximately 15 lbs for optimal performance.
Steps to swivel the saw arm up to a 45-degree angle and lock it.
How to set the 90-degree stop for accurate vertical cuts.
How to set the 45-degree stop for accurate angled cuts.
How to position the moveable jaw and adjust the vise for angle cuts.
Instructions for cleaning, lubricating gear box, and applying light oil.
Procedures for filter cleaning, valve replacement, and oil refills.
Setting the saw arm's initial position to allow for workpiece loading.
 Loading...