Do you have a question about the UNIRAC NXT UMOUNT and is the answer not in the manual?
Supports PV modules with built-in wire management.
Joins, aligns, and electrically bonds rail sections into a single length.
Secures rails through roofing material to the building structure.
Secures rails to L-feet or other mounting methods.
Secures rails through roofing material using a butyl pad.
Secures rails to roof attachment, usable with other methods.
Secures rail through roofing material with L-foot, flashing, and lag bolt.
Secures and electrically bonds modules to rails as a mid or end clamp.
Secures modules to rails as an end clamp.
Secures MLPE devices or ground wires to rails.
Pre-assembled clamp to secure wires between rails.
Tool-less snap-in clip to retain wires in rail or between rails.
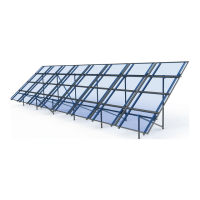
Guides the layout of rails and modules for installation.
Instructions for locating and marking roof attachment points.
Prevents buckling of rails or system connection failure due to thermal expansion.
Clean roof surface and mark array location and attachment points.
Position attachment on a flat surface before peeling release paper.
Attaching the base to the roof rafter using screws.
Attaching the base directly to the roof decking using screws.
Leveling the surface for attachment over shingle overlaps or gaps.
Mark array location and determine roof attachment points.
Drill pilot holes at each attachment point and fill with sealant.
Place base assembly over pilot hole and secure with lag bolt.
Insert UNIRAC sealant into port and inject until sealant exits vent.
Drop rail clamp assembly into the open slot of L-Foot.
Add sealant to flashing and slide under shingles over pilot hole.
Fasten L-foot and flashing with lag bolt into the rafter.
Place bolt through L-foot slot and rail clamp.
Four possible orientations for Stronghold Attachment and Rail Clamp.
Two possible orientations for Stronghold Attachment with Butyl and Rail Clamp.
Two possible orientations for Flashkit Pro L-foot and Rail Clamp.
Insert rail flange into clamp groove and click into place.
Adjust rail height and tighten bolt to specified torque.
Align rail ends to installation area edge and mount modules promptly.
Attach rails using splice, centering and tightening bolts.
Bonding rails to electrical ground using specified components.
Grounding rails using MLPE & Lug Clamp.
Grounding using Ilsco Lay-In Lug.
Grounding between module rows using N/S Bonding Clamp.
Bonding across N/S module gap using N/S Bonding Clip.
Install MLPE & Lug Clamp onto the rail.
Install microinverter onto the rail.
Mount MLPE onto module frame flange and tighten bolt.
Insert wire clamp assembly into rail and seat rail nut.
Retain wire in rail channel by pressing clip onto rail flanges.
Install Combo Clamps at the aligned end of rails.
Insert clamp from one side of the rail nut into the rail.
Position first module and engage frame with end clamps.
Position clamp assemblies in rail near point of use.
Ensure modules are tight against clamps with no gaps.
Proceed with module installation, engaging each clamp.
Install the end clamp with pre-assembled end cap onto rails.
Slide end clamp assembly onto rail by engaging grooves.
Slide clamp onto rail until module return flange is cleared.
Position module and engage clamp with module return flange.
Hold module and tighten end clamp bolt while clamp contacts flange.
Tuck twist tie into rail and press end cap onto rail edge.
Place optional end cap on rail edge and press.
Place optional combo clamp cap on rail edge and press.
Apply certification label to rail at array edge.
Bonds module to module using combo clamp and bonding pins.
Creates bond between splice bar and rail sections for rail-to-rail connection.
Connects lugs at thermal break ends with solid copper wire.
Bonds rail to ground wire using washer tabs and copper wire.
Bonds MLPE flange to rail using tooth lock washer.
Connects modules row-to-row using bonding clamp or clips.
Installs temporary connection when modules are removed.
Classifies system fire rating for steep and low sloped roofs.
Lists modules tested for mechanical load performance.
Details certification marking embossed on components and labels.
Lists manufacturers and models evaluated for electrical compatibility.
Notes frame profile features that might interfere with bonding devices.
Specifies maximum over current protection device (OCPD) of 30A.
Lists conditions for achieving Class A fire system rating.
| Brand | UNIRAC |
|---|---|
| Model | NXT UMOUNT |
| Category | Racks & Stands |
| Language | English |